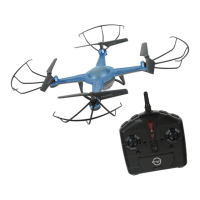
Propeller Blade
Camera
Li-Poly Battery Compartment
ORBIT™ HD QUADROCOPTER DIAGRAM
ORBIT™ HD REMOTE DIAGRAM
D
3 4
FLIGHT PREPARATION
• Verify that there are 6 “AA” batteries inside the remote control unit and the ORBIT™ HD has been
fully charged.
• Make sure your ORBIT™ HD and controller are both turned on.
• Make sure to be in a large space with an open radius of at least 200 feet.
• Make sure the empty space has no obstacles. Set your ORBIT™ HD on a clean flat surface before take-off.
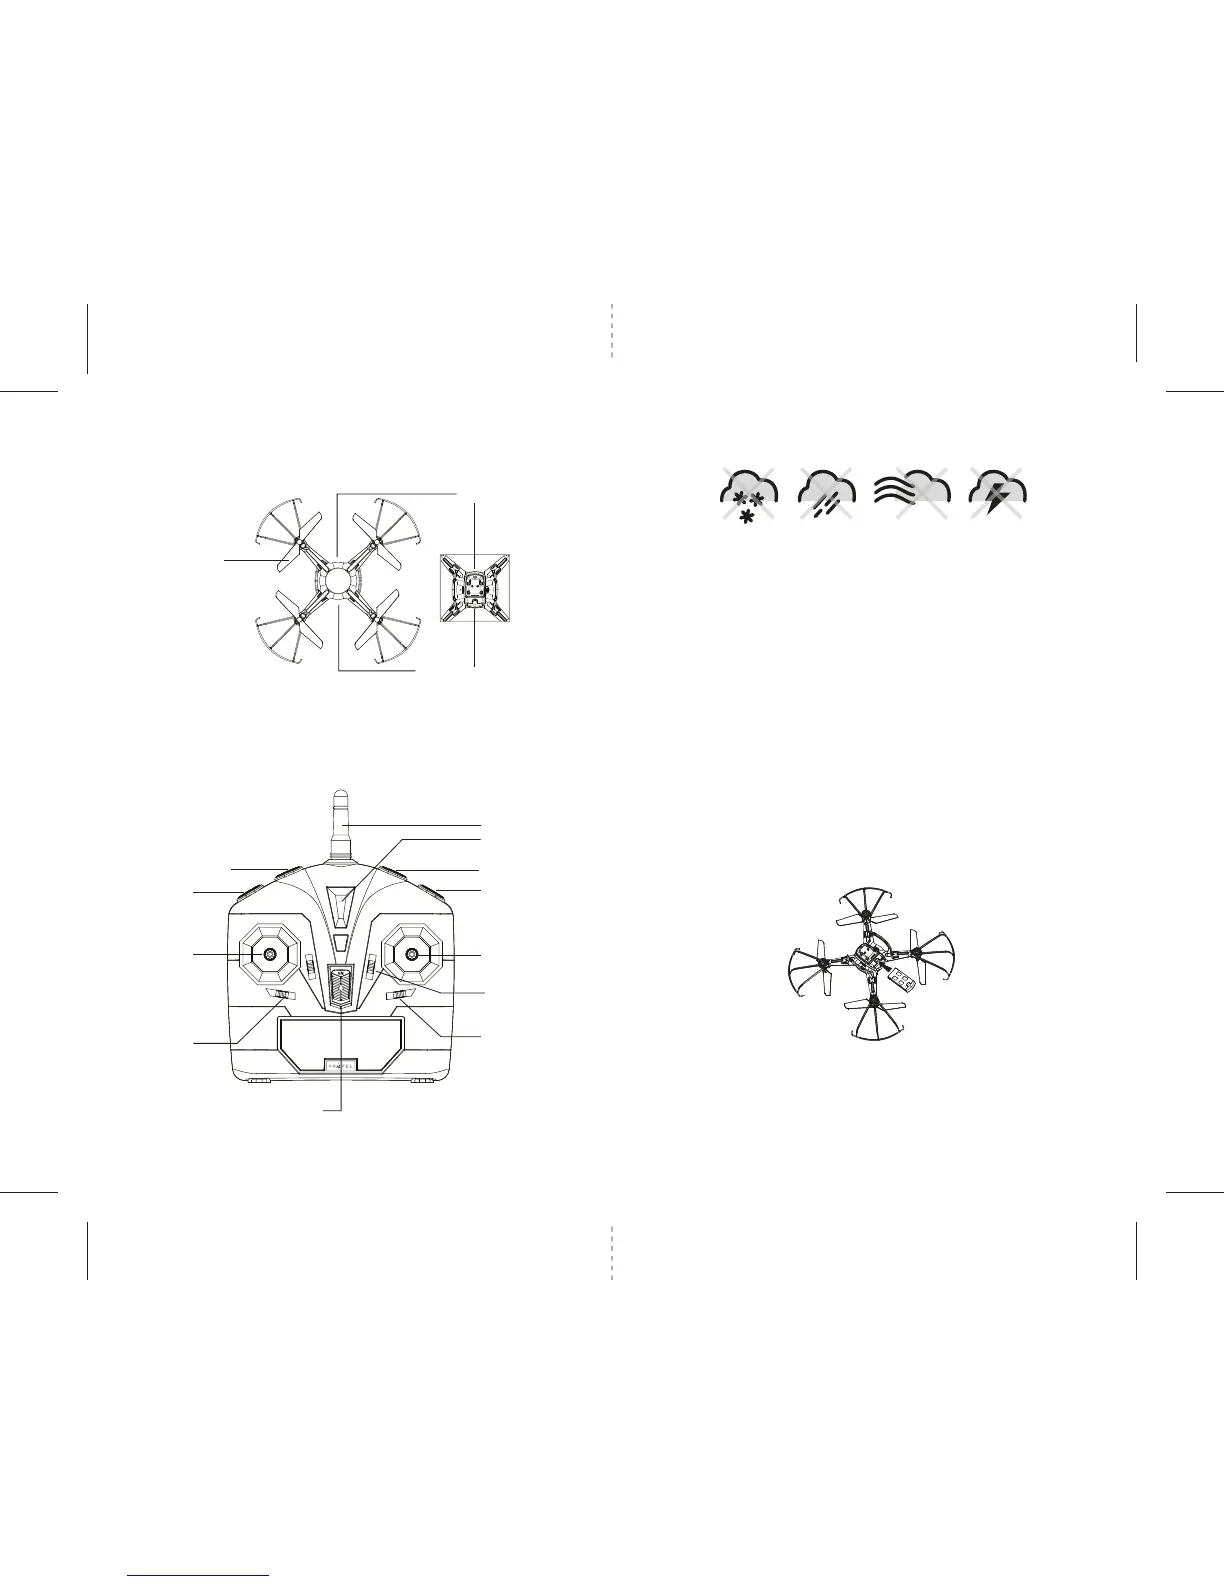
DO NOT ATTEMPT TO FLY YOUR ORBIT™ HD IF THERE IS RAIN, SNOW, HEAVY WINDS, THUNDER OR LIGHTNING
OUTDOORS. IT COULD DAMAGE YOUR PRODUCT AND POSSIBLY EVEN CAUSE BODILY HARM.
SYNCING YOUR ORBIT™ HD
Important! When syncing your ORBIT™ HD quadrocopter with the controller always make sure that
the quadrocopter is on a flat level surface and that your digital trim settings are in the center
position. This insures that the 6 Axis gyro is properly programmed to mimic your trim settings.
Your ORBIT™ HD utilizes an automatic 2.4G channel selection system that allows up to 8 people to fly side
by side in the same wireless range with no interference.
Syncing your aircraft:
1. Before starting, make sure that the power on your controller is in the OFF position and the ORBIT™ HD
battery is not connected. Make sure that there are no other 2.4Ghz devices in the area as well .
2. Insert the battery into the compartment in the right direction and set it down on a flat surface. The LED
indicator lights of the ORBIT™ HD should begin to flash (see diagram D).
3. Next turn ON the remote controller. After hearing a series of beeps, the ORBIT HD's
TM
flashing LED
lights will start flashing at a slower rate. Pull the throttle (left control stick) all the way up and then all
the way down.The LED lights will flash rapidly for a few seconds and then stay soild. You are now ready
to fly the ORBIT™ HD. If this does not happen, repeat all steps above.
FLYING TIPS
• It is recommended that you operate the ORBIT™ HD outdoors in a wide space. The ideal space should
have a 200 foot radius.
• Parental guidance or adult supervision is suggested at all times.
• If you are flying the ORBIT™ HD with others, make sure all spectators are behind you.
• For best performance, it is recommended that you operate the ORBIT™ HD in zero wind conditions.
Wind can greatly affect the performance of the aircraft or cause injury.
DO NOT FLY YOUR ORBIT™ HD IN FOUL WEATHER!
WARNING
Speed Setting
Throttle & Spin
Left/Right
Right/Left Spin
Trim Adjustment
Power Switch
Power Indicator
Antenna
360º Flip Button
Camera/ Video
Forward/Backward
Bank Left/Right
Forward/Backward
Trim Adjustment
Bank Right/Left Trim
Adjustment
FRONT
REAR
Auto Sart/ Land Buttom