对折 基 准线
对折 基 准线
22
Troubleshooting
*Note: In many respects, a stereo acts much like a computer and occasionally requires a
reboot. In the unlikely event of product malfunction, a reset can usually fix the issue.
For software reset operation, please refer to page 8.
Issue
No power
No Sound
No Reception
USB stick not
reading
Cause
1. Incorrect wiring
2. Fuse is blown
3. Low battery voltage
1. Speaker connection
came loose
2. Bad speaker
3. Output blown
4. Volume too low on
media device
1. Antenna not firmly
seated in socket
1. File must be a mp3
or wma file
Solution
1. Double check wiring
2. Replace fuse
3. Check voltage of vehicle battery
with multimeter. Voltage must
be at least 11V.
1. Double check connections.
2. Replace bad speaker with known
good speaker and connect.
3. Send unit in for repair.
4. Increase volume of media device
1. Insert firmly
1. Convert format to mp3 or mwa.
While in Bluetooth mode:
No Connection
1. You are not connect
to the “PRV”
address on your
portable media
device.
2. Out of range
3. The connection is
already in use.
1. Choose “PRV”
2. Bring portable media device closer
to the receiver. Device needs to be
within 30’.
3. Ask the person who first paired to
drop out.
3
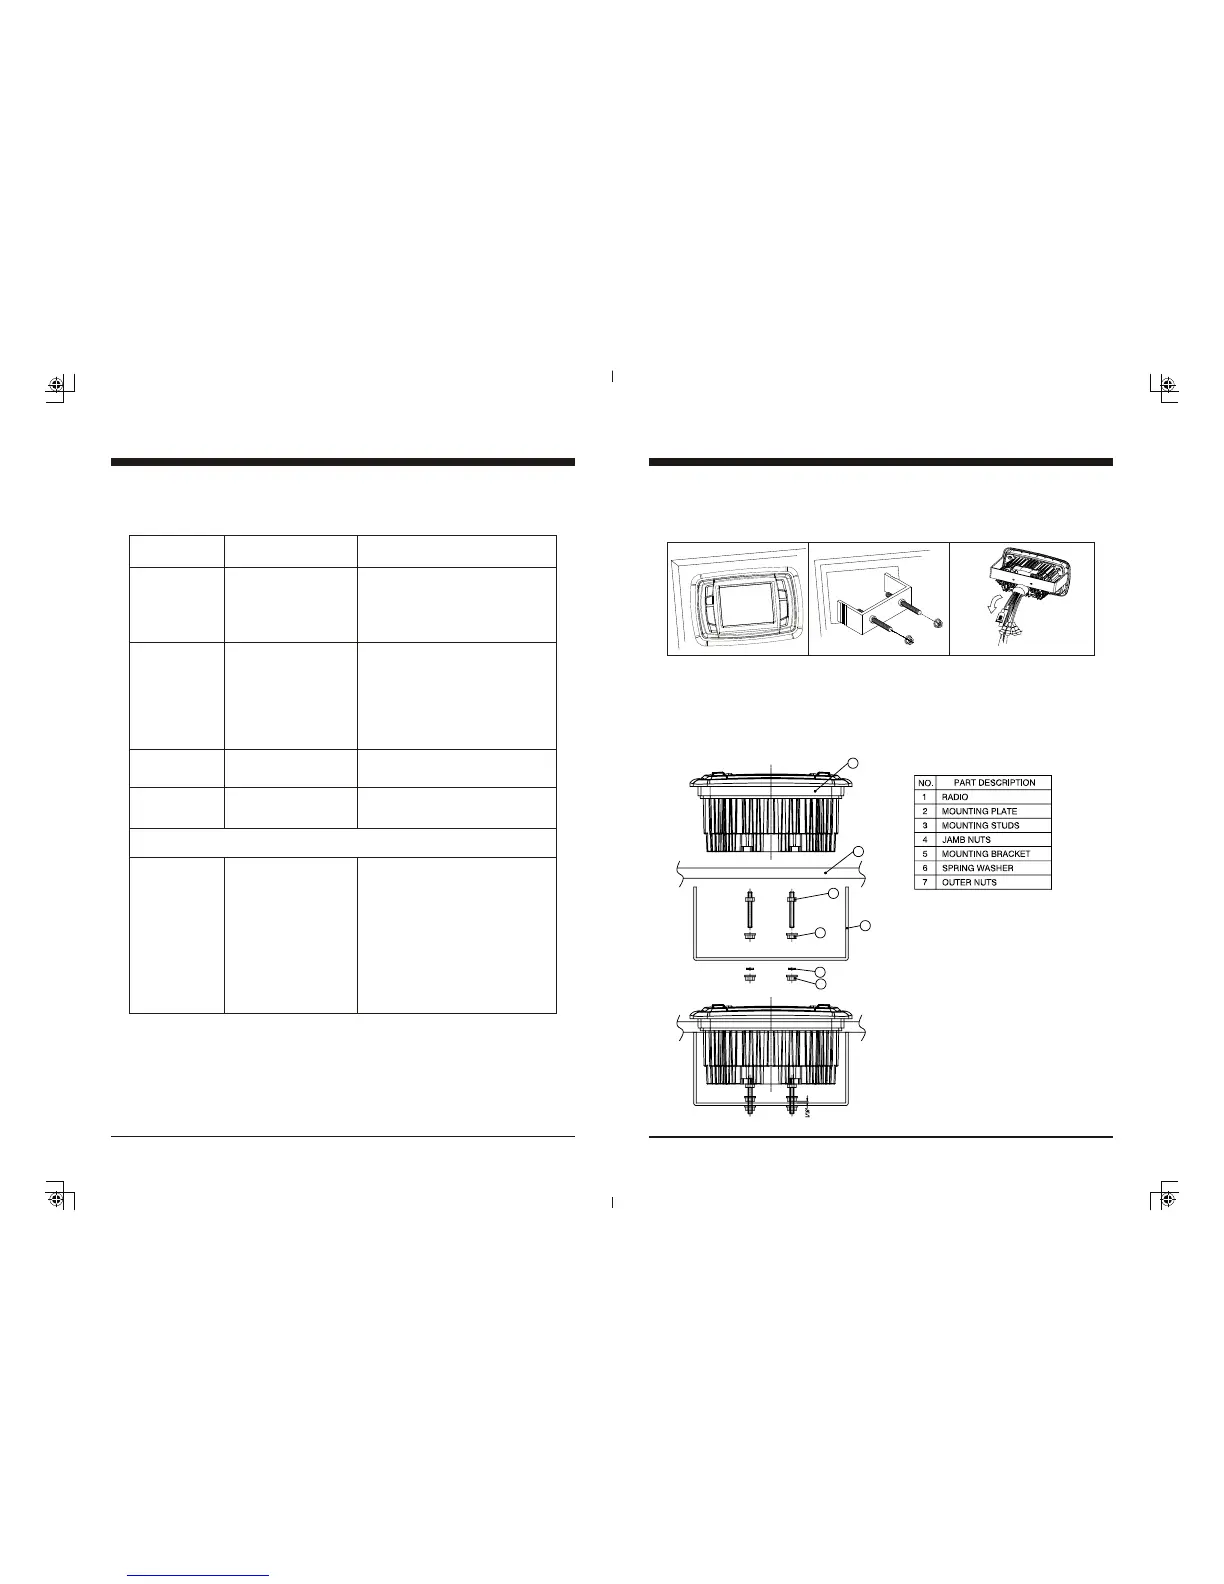
Installation
A mounting gasket has been added inside the package for convenience. Trace along
the outside edge of the gasket thus revealing your cutout.
Mounting Illustration
1. Avoid installing stereo
below cupholders!
Make sure mounting
substrate is flat to avoid
flexing of the plastic.
2. Use the back bracket and
studs to affix the unit. Install
the U bracket behind the unit,
using two nuts per bolt for
ultra hold.
3. To avoid possible water
ingress into wire harness
area, route the harness in
the downward direction
as shown above.
Instructions:
1. Install jamb nuts (4) loosely on mounting
studs (3), so they will not touch mounting
brackets (5) when installed.
2. Slip mounting bracket (5) on and make
flush with mounting surface (2).
DO NOT RIGHTEN
3. Snug spring washer (6) and outer nuts (7)
against mounting plate (2).
DO NOT TIGHTEN
4. Position jamb nuts approximately 1/16”
from mounting bracket.
5. Tighten outer nuts completely.
6
7
5
4
3
2
1
 Loading...