GATOR - 13
Painting instructions body & side guards / Verf instructies voor carrosserie & zijbeschermers
Lackieranleitung für Karosserie und Seitenschalen / Instruction ... pour le body et le ...
S
P
E
CI
AL
P
AI
N
TF
O
R
P
O
L
YCARBO
N
A
T
E
PAINTING INSTRUCTIONS:
Required materials:
Adhesive foil and tapes to cover bigger areas, paint spraying cans for polycarbonate,
scissors, hobbyknife.
We recommend to paint the inside of the transparant polycarbonate body &
sideguards. The paint is protected and the body gets a brilliancy.
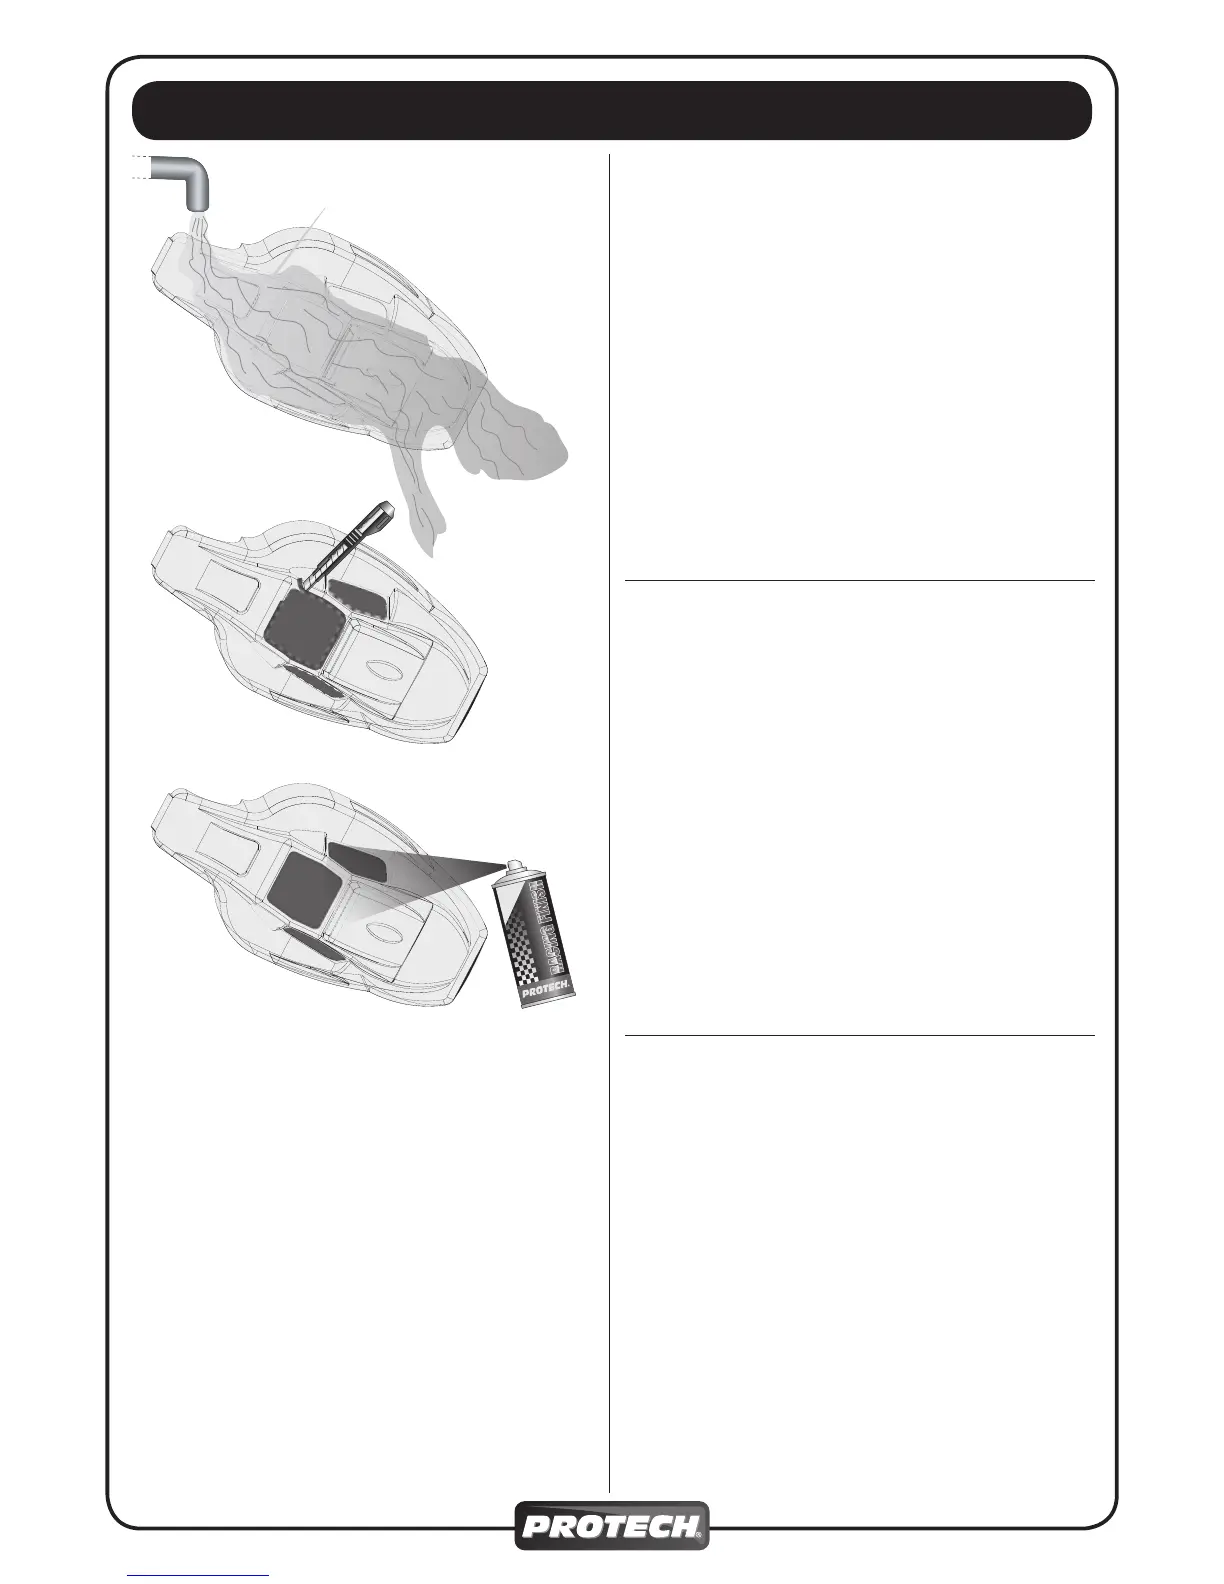
1. Clean the body with clear water and soap solution (see drawing1), especially the inside
which you are going to paint. Then dry it witha clean cloth.
2. Now cover the body parts, which you don’t want to paint, with adhesive foil, f.e. windows.
Cut the overlapping foil along the contour and pull it off (see drawing2). Press the foil well
to the edges in order to avoid an underfl owing of the paint.
3. Apply the paint in multiple thin layers. Let the single coats dry well before you spray again.
TIP: if you use more colours you should start with the darkest one.
Finally spray the complete inside of the body with a little bit white, this prevents a
grinning-through and gives the main paint more brilliancy.
4. Pull the adhesive foil off, if necessary remove the adhesive remainders with spirit. For a
better appearance you can spray the windows with a transparant colour so they look like
tinted windows.
5. Before you stick the decortive strip foils and decals on, rub te outside of the body with
some spirit in order to remove drizzle from painting. Now stick the decorative strip foils
on to the windows, ... Cut out the decals and stick them to the body. To fi x a bigger decal,
spray the spot with soap water, then fi x the decal. Now you are able to move the decal to
the right place. Possibly existing bubbles underneath the decals you should press to the
outside with a smooth cloth.
VERF INSTRUCTIES:
Benodigdheden:
Afdekfolie en kleefband om grote delen van de carrosserie af te dekken, spuitbussen voor
polycarbonaat carrosserieën, schaar, hobbymes.
Wij adviseren u om de binnenzijde van de polycarbonaat carrosserie en
zijbeschermers te verven. De verf wordt beschermd door de carrosserie en glanst.
1. Reinig de carrosserie met proper water en zeep (zie tekening 1), reinig de binnenzijde
zeer goed daar u hier de verf gaat spuiten. Goed uitdrogen met een propere doek.
2. Bedek de carrosserie, waar u niet wilt verven, met afdekfolie (bv. de vensters). Snij de
overtollige folie weg op de contouren en verwijder deze (zie tekening 2). Druk de folie
goed aan op randen zodat de verf er niet kan ondervloeien.
3. Breng de verf aan in verschillende dunne lagen. Goed laten drogen alvorens een nieuwe
laag aan te brengen.
TIP: als u meerdere kleuren gebruikt moet je eerst de donkerste kleur aanbrengen.
Uiteindelijk kan je in de volledige binnenzijde van de carrosserie een dun laagje wit
spuiten om doorkijken te voorkomen en het geeft ook een betere glans van de kleuren.
4. Trek de afdekfolie uit de carrosserie en verwijder indien nodig lijmresten. Voor een mooier
uitzicht kan je de vensters nog met een transparante kleur donkerder maken, zo krijg je
het uitzicht van getinte vensters.
5. Voor u de afwerkingsstrips aanbrengt kan je best de buitenzijde van de carrosserie
reinigen om eventuele verfsluier te verwijderen. Nu kleef je de strips op de vensters,...
Snij de decals uit en kleef deze op de carrosserie. Om een grotere decal aan te brengen
kan je de carrosserie op die plaats eerst met water en zeep besproeien. Daarna de decal
aanbrengen en in positie schuiven. Eventueel onstanen belletjes naar de buitenzijde van
de decal duwen met een zachte doek.
PAINTING INSTRUCTIONS:
Required materials:
Adhesive foil and tapes to cover bigger areas, paint spraying cans for polycarbonate,
scissors, hobbyknife.
We recommend to paint the inside of the transparant polycarbonate body &
sideguards. The paint is protected and the body gets a brilliancy.
1. Clean the body with clear water and soap solution (see drawing1), especially the inside
which you are going to paint. Then dry it witha clean cloth.
2. Now cover the body parts, which you don’t want to paint, with adhesive foil, f.e. windows.
Cut the overlapping foil along the contour and pull it off (see drawing2). Press the foil well
to the edges in order to avoid an underfl owing of the paint.
3. Apply the paint in multiple thin layers. Let the single coats dry well before you spray again.
TIP: if you use more colours you should start with the darkest one.
Finally spray the complete inside of the body with a little bit white, this prevents a
grinning-through and gives the main paint more brilliancy.
4. Pull the adhesive foil off, if necessary remove the adhesive remainders with spirit. For a
better appearance you can spray the windows with a transparant colour so they look like
tinted windows.
5. Before you stick the decortive strip foils and decals on, rub te outside of the body with
some spirit in order to remove drizzle from painting. Now stick the decorative strip foils
on to the windows, ... Cut out the decals and stick them to the body. To fi x a bigger decal,
spray the spot with soap water, then fi x the decal. Now you are able to move the decal to
the right place. Possibly existing bubbles underneath the decals you should press to the
outside with a smooth cloth.
LAKIERANLEITUNG:
Benötigtes Material:
Klebefolie und Klebebänder zum Abkleben größere Flächen, Sprühdosen für Polycarbonat,
Zierleisten-Klebebänder in verschiedene Breiten, Schere, Hobbymesser.
Bei durchsichtigen Polycarbonat-Karosserien empfi ehlt es sich, die Innerseite der
Karosserie und Seitenschalen zu lackieren. Die Farbe wird dadurch geschützt und
bekommt durch die Karosserie von außen einen Glanz.
1. Karosserie mit Wasser und etwas Seifenlösung reinigen (Abbildung 1), vor allem die zu
lackieren Innenseite. Danach mit einem sauberen Tuch abtrocknen.
2. Jetzt die nicht zu lackieren Flächen der Karosserie mit Klebefolie abdecken, z.B. Fenster
(Abbildung 2). Überstehende Klebefolie der Kontur entlang schneiden und von den
Karosserie abziehen. Folie an der Rändern gut andrücken, um ein Unterlaufen des
Lackes zu vermeiden.
3. Beim Aufsprühen der einzelnen Lackschichten ist darauf zu achten, daß diese sehr dünn
aufgetragen werden. Die einzelnen Lackschichten gut abtrocknen lassen, bevor neu
aufgesprüht wird.
TIP: Bei einer Mehrfarbenlackierung mit der dunkelsten Farbe beginnen. Zum Schluß die
kompletten Innenseiten der Karosserie mit etwaß Weiß aussprühen, dies verhindert das
Durchscheinen und gibt dem Hauptlack meht Brillanz.
4. Klebfolie abziehen, evtl. Kleberückstände mit Spiritus entfernen. Für die schöne Optik
können die Scheiben noch mit einer transparenten Scheibentönfarbe besprüht werden.
5. Vor dem Anbringen der Klebebänder und Aufkleber die Außenseite der Karosserie mit
etwas Spiritus abreiben, um evtl. Sprühnebel vom Lackieren zu entfernen. Jetzt auf
die Scheibenumrandungen u.s.w. die Zierlinien-Klebebänder aufbringen. Aufkleber
ausschneiden und an gegebener Stelle auf die Karosserie anbringen. Bei größeren
Aufklebern die Stelle für den Aufkleber etwas mit Seigenwasser besprühen, danach den
Aufkleber anbringen. Durch das Seifenwasser läßt sich der Aufkleber verschieben ohne
festzukleben. Eventuell vorhandenen Blasen unter den Aufklebern mit einem weichen
Tuch nach außen drücken.
 Loading...