Tech Nitro - 20
20
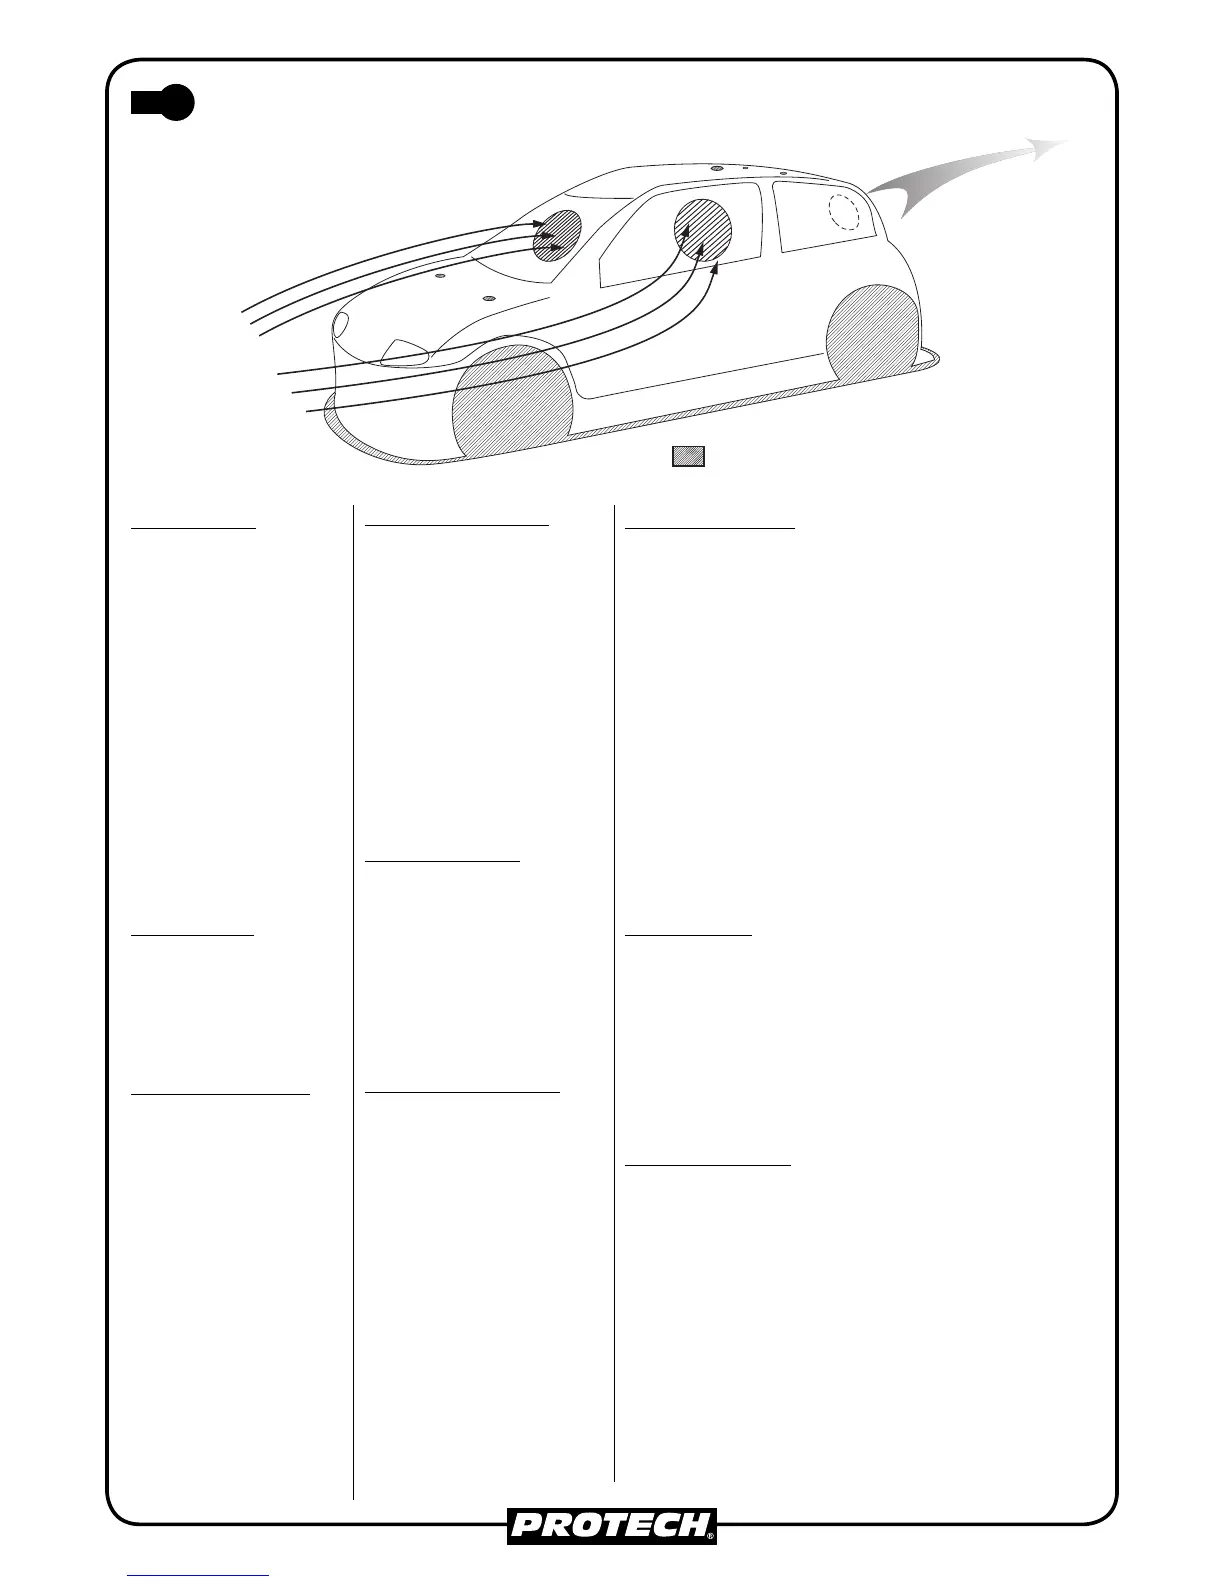
Mounting the body
Cut out the polycarbonate body
using a pair of curved lexan
scis sors. These spe cial lexan
scis sors are avail a ble from all
good model shops (AK100).
When cut ting , fol low the bot-
tom line on the body. Then cut
out the front wheel open ings. Do
not cut the rear wheels out yet.
When the body is cut out place
it onto the chas sis and center it
over the chassis. Once the body
is centered on the chas sis, mark
the po si tion of the body mount-
ing posts with a marker pen. Drill
holes the same di am e ter as the
bodyposts. Once all the holes
have been drilled, place the
body onto the chas sis and mark
the position of the rear wheels,
and cut out.
Mounting the wing
Cut out the wing along the
marked line. Centre the wing
over the body and mark the po-
si tion of the holes. Drill holes with
a 3 mm drill. Fix the wing with
the plastic 3mm screws and the
plastic spacers sup plied.
Painting the body and wing
The body is painted or sprayed
on the inside. For this use only
spe cial paint that is suitable for
polycarbonate. (We rec om mend
PROTECH RACING FIN ISH)
Be fore starting to paint or spray,
the body must be thor ough ly
degreased. This can be done by
wash ing the inside of the body
with water and washing up liq-
uid. Use a normal towel to dry
the body, do not use pa per tow-
els to do this as they cause stat ic
elec tric i ty to build up inside the
body and this will at tract dust.
When the body is dry, try not to
touch the in side of the body. The
fol low ing step is to mask of the
win dows with mask ing tape/fi lm
or mask ing liquid. When spray ing
the body, use very light coats and
al low to dry between coats.
Montage van de carrosserie
Knip de polycarbonaat carrosserie
uit d.m.v. een speciale lexanschaar.
Deze lexanschaar is te verkrijgen bij
uw modelbouwvakhandelaar. (Best
nr AK100). Volg voor het uitknippen
de onderste lijn die in de carrosserie
afgetekend staat. Knip vervolgens de
voorste wielrondingen uit. Plaats de
uitgesneden carrosserie op het chas-
sis en centreer de carrosserie op het
chas sis. Als de carrosserie mooi
uitgelijnd is, teken vervolgens de
plaats van de bodysteunen af d.m.v.
een stift of pen. Boor gaten op de
afgetekende plaatsen. De di am e ter
van de gaten is afhankelijk van de
diameter van de carrosseriesteun.
Montage van de spoiler
Knip de spoiler uit op de contourlijn.
Centreer de spoiler op de carrosserie
en teken de plaatsen af waar de
gaten voor de plastiekvijzen moeten
komen. De diameter van de plastiek
vijzen is 3mm. Boor de gaten met
een di am e ter van 3mm. Monteer de
spoil er op de carrosserie, vergeet
niet de plastiek afstandsbussen te
plaatsen en schroef het geheel aan
elkaar vast.
Schilderen van de carrosserie
De carrosserie wordt aan de bin-
nenkant geschilderd met penseel
of gespoten. Gebruik hiervoor enkel
speciale verf geschikt voor poly-
carbonaat (b.v. Lexanit). Alvorens
met het schilderen of spuiten te
beginnen moet de carrosserie goed
ontvet worden. De carrosserie kan
eenvoudig ontvet worden met wa ter
en detergent voor de afwas. Daarna
goed afdrogen. Gebruik hiervoor
geen papieren doekjes, zij maken
de carrosserie statisch. Een gewone
keukenhanddoek is per fect.
Montage de la carrosserie
Découpez la carrosserie en polycar-
bonate au moyen de ciseaux spé-
ciaux pour Lexan. Ces ciseaux sont
disponibles dans votre magasin de
modélisme sous la référence PRO-
TECH AK100. Découpez en suivant
la ligne inférieure qui est marquée
dans la carrosserie. Découpez en-
suite les pas sag es des roues AV et
les orifi ces de refroidissement pour
le moteur. Placez la carrosserie dé-
coupée sur le châssis et centrez-la.
Lorsque la carrosserie est parfaite-
ment alignée, tracez l’emplacement
des supports de carrosserie et pas-
sages de roues AR au moyen d’un
crayon ou d’un stylo à bille. Forez
et découpez les trous aux emplace-
ments que vous avez marqués. Le
diamètre des trous = diamètre des
supports de la carrosserie.
Montage du spoiler
Découpez le spoiler sur la ligne de
contour. Centrez le spoiler sur la car-
rosserie et marquez l’emplacement
des trous de vis (plastique) de fi xa-
tion. Le diamètre des vis en plastique
est de 3 mm. Forez les trous à un
ø3 mm. Montez le spoiler sur la car-
rosserie, n’oubliez pas de placer les
entretoises (en fonction du type de
carrosserie) et vissez le tout ferme-
ment ensemble.
Peinture de la carrosserie
La carrosserie est peinte au pinceau
ou à l'aérographe du côté intérieur.
Utilisez pour cela uniquement de
la peinture spéciale convenant au
polycarbonate (PROTECH Racing
Finish). Avant de commencer à
peindre, la carrosserie doit être bien
dégraissée avec de l’eau et du déter-
gent vaisselle. Ensuite, séchez soi-
gneusement, n’utilisez pas de papier
absorbant de cuisine qui charge la
carrosserie en électricité statique.
Un essuie de cuisine en tissu ordi-
naire convient parfaitement.
Cut out
Uitsnijding
A découper
Ausschnit
Cut a hole in the rear window
Faîtes une découpe dans la vitre arrière
Cut out for the engine cooling
Découpe des orifices de refroidissement du moteur
 Loading...