Do you have a question about the PROTEX SAFE PWS-1814E and is the answer not in the manual?
Details the personal (4-digit) and master (6-digit) code system for safe operation and recovery.
Instructions for opening the safe using the factory code and handling incorrect entries.
Guide on how to properly close and lock the safe door, including time limits and error codes.
Step-by-step instructions to change the 4-digit personal access code for the safe.
Optional procedure to update the 6-digit master code, used for overriding the personal code.
Instructions for using the emergency override key when codes are unavailable or keypad fails.
Guide on using an external battery box to power the safe if internal batteries are depleted.
Information on low battery warnings, lockout mode duration, and code memory retention.
How to use the star key for code entry privacy and as a backspace function.
Recommendations and steps for installing the wall safe securely within a wall.
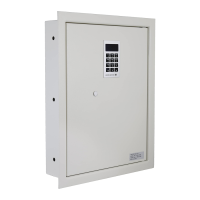
The Protex PWS-1814E Wall Safe is a secure storage solution designed to be discreetly installed within a wall, offering both personal and master code access for enhanced security. This device is equipped with a double code system, allowing for flexible and secure operation.
The primary function of the Protex PWS-1814E Wall Safe is to provide a secure location for valuables, integrated seamlessly into a wall. It operates using an electronic keypad for code entry, controlling a locking mechanism that secures the door. The safe features two distinct codes: a 4-digit personal code for everyday use and a 6-digit master code that can override the personal code, particularly useful if the personal code is forgotten or lost. This dual-code system ensures multiple layers of access control. In addition to electronic access, the safe includes an emergency override key for situations where both codes are unavailable or the keypad malfunctions, and a power override battery box to supply external power if the internal batteries die. The safe also incorporates security features such as a lockout mode to prevent unauthorized access attempts and a hidden code display function for discreet code entry.
To open the safe, ensure it is in an upright position. The initial factory personal code is 1-2-3-4. Upon entering this code, the LED display will show "OPENED," the locking bolts will retract, and the door will slowly spring open. If an incorrect code is entered, the display will show "E-CODE," prompting the user to re-enter the correct code.
To close the safe, shut the door and hold it closed with one hand. While holding the door shut, press the '#' key. The door will automatically lock, and the display will show "CLOSED" followed by your personal code. It's important to note that there is a 10-minute window to press '#' and close the safe after it has been opened. If this period passes, pressing '#' will result in an "E-CODE" display. In such a case, you must re-enter your personal code followed by '#' to lock the door.
To change the personal code, first open the safe using your current personal code or the factory code (1-2-3-4) if it hasn't been changed before. It is recommended to write down or memorize your new 4-digit code. Shut the door, hold it closed, and then enter your new 4-digit personal code. The safe will automatically lock, retaining the new code. The display will show "CLOSE," then "CLOSED," followed by your new personal code. You can then test the new code by entering it to open the safe.
To change the master code, open the safe using your personal code and leave the door in the open position. Enter the existing 6-digit master code (the factory master code is 8-8-8-8-8-8) followed by '#'. The LED display will show "NEU." Next, enter your new 6-digit master code followed by '#'. The LED display will show "AGAIN." Re-enter the new 6-digit master code a second time, followed by '#'. If successful, the display will show "DONED," indicating the new master code has been accepted. If "E-CODE" is displayed, repeat the steps. The master code is crucial as it can override the personal code if it is lost or forgotten.
For discreet code entry, the safe offers a hidden code display function. This is useful if someone might be observing your code entry. To activate this, press the '' key twice, then press '#'. You can then enter your code, and the display will show squares instead of numbers, concealing your input. The '' key can also be used as a backspace to delete the last digit entered.
As a security measure, if an incorrect code is entered three or more consecutive times, the safe will enter a lockout mode for 15 minutes. During this period, the keypad will be unresponsive, and the display will show "HOLD" along with a countdown timer. After 15 minutes, if no further keypad interruptions occur, the lock will return to its normal operational state.
The safe provides a low battery warning. When the internal batteries are running low, the LED display will show "LO-BAT." It is recommended to replace the batteries with high-quality Alkaline batteries (such as Duracell or Energizer). The battery compartment is located at the back of the door; simply slide the black cover to access and replace the batteries. The safe is designed to retain your codes in memory for up to 6 months even without power.
The emergency override key should only be used if both the personal and master codes are unavailable, or if the keypad is malfunctioning. It is not intended for regular use. To use the key, gently unscrew the chrome keyhole cap located below and to the left of the keypad. Insert the key with the notch pointing upwards and turn it counter-clockwise to open the safe. It is crucial to never lock the keys inside the safe; always keep them in a hidden location outside the safe.
If the internal batteries of the safe die completely, an external power source can be provided using the included battery override box. To do this, slide open the battery box cover and install four AA batteries. Plug the jack from the battery box into the power override hole on the keypad. You can then open the safe using your personal or master code as usual. Similar to the emergency keys, never lock the power override box inside the safe.
The manufacturer recommends hiring a contractor or handyman for the installation of the safe. The installation process involves locating an interior wall free of pipes, using a stud finder to identify a suitable location between two wall studs at eye level. A rectangular opening of 18 inches high by 14 inches wide should be drawn and cut into the drywall using a hand-held drywall saw (avoiding electric saws). After removing the drywall cutout and ensuring no obstructions inside the wall, the safe is inserted into the wall and secured to the wall studs from the inside using the provided lag bolts. Drilling pilot holes for the bolts is recommended.
| Model | PWS-1814E |
|---|---|
| Category | Safes |
| Lock Type | Electronic Keypad |
| Material | Steel |
| Bolt Down Holes | Yes |
| Warranty | 1 Year Limited Warranty |