Tsunami
®
800 and 8000 Series - Hardware Installation Guide 64
Step 4: Unpack the Product Package
Unpack the device and its accessories from the shipping box.
Please make a note of the Ethernet addresses, the MAC addresses and the serial number. These addresses may be
used when configuring the device. Note that the serial number helps you to seek support from the Proxim’s Customer
support team.
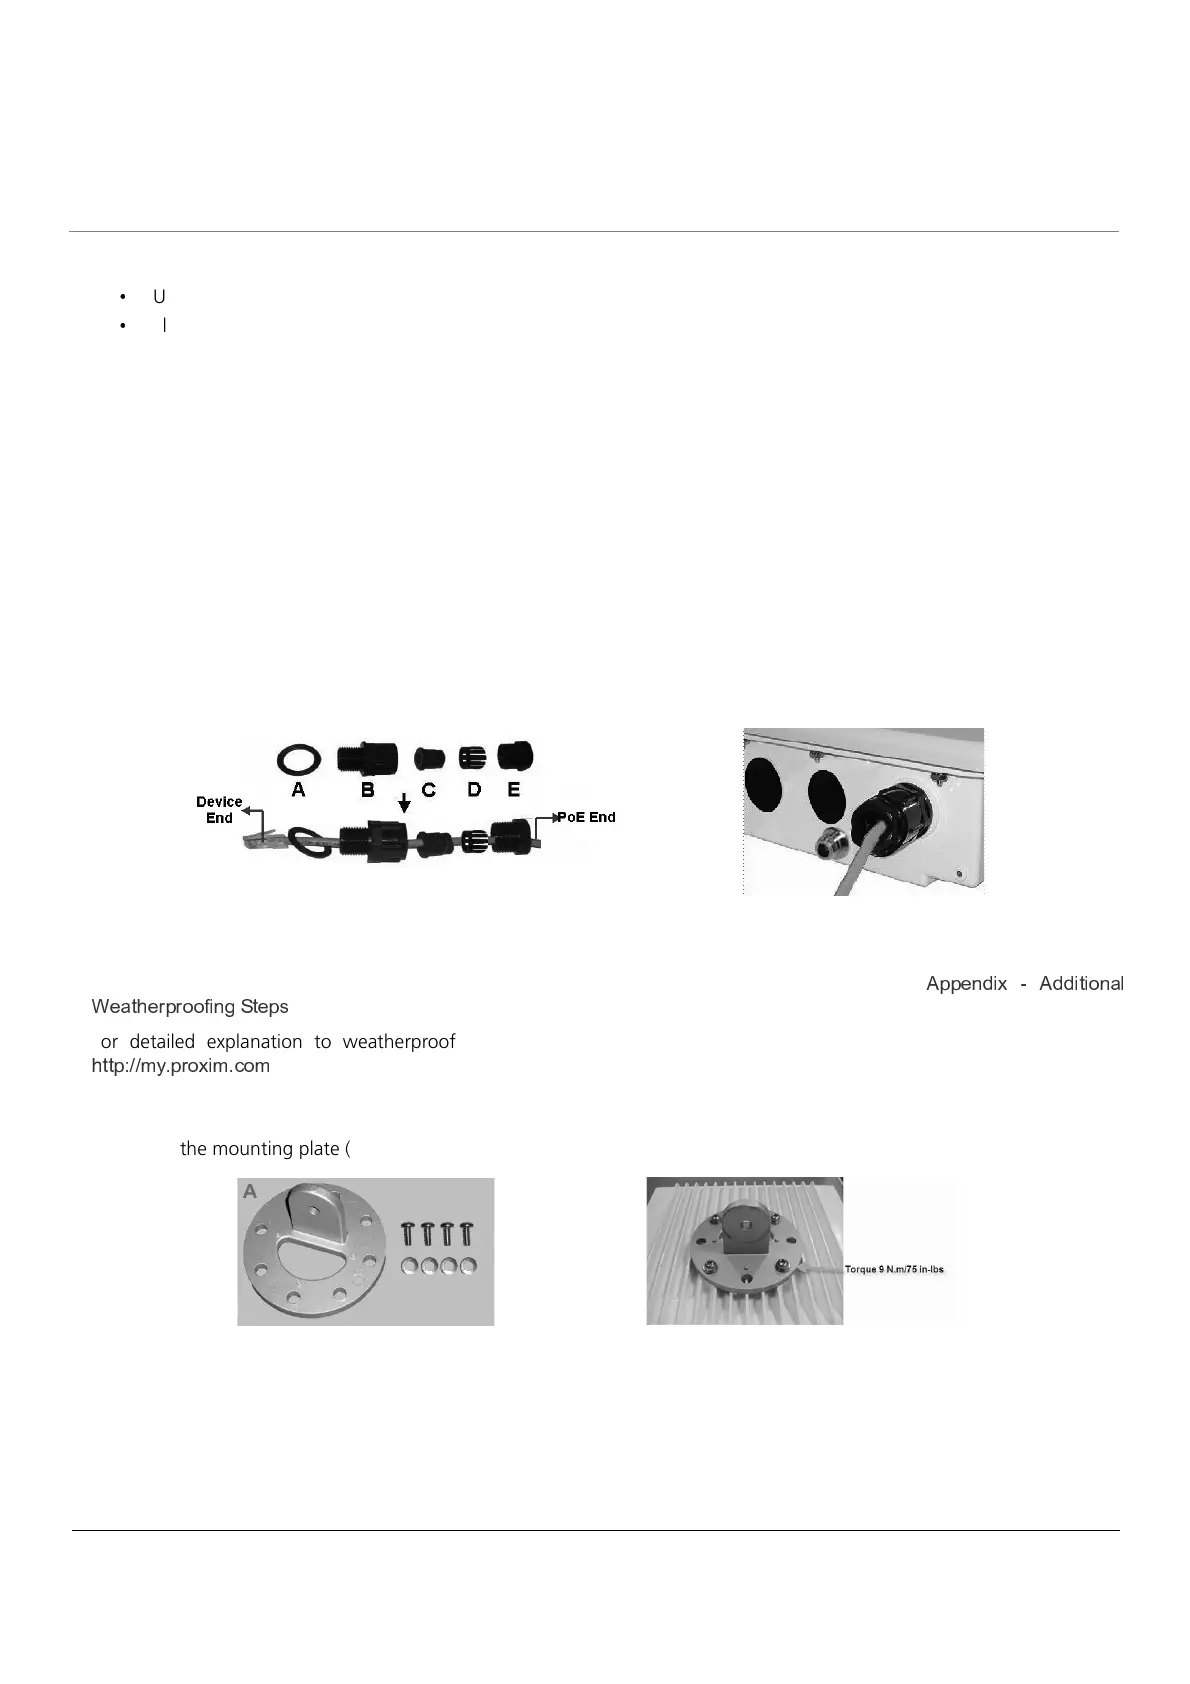
Step 5: Weatherproofing RJ45 Connectors
The following steps explain how to weatherproof the RJ45 connectors:
1. Use a straight-through cable (Cat5e/Cat6) with one end bare.
2. Connect the crimped RJ45 connector end of the cable into the RJ45 Ethernet port inside the enclosure. The cable
connector should latch into the Ethernet port.
3. Slide the Flat Washer (A) into the Connector Body (B) to make it waterproof and onto the bare end of the cable. Next,
fasten the Connector Body into the Ethernet connector hole on the device.
4. Slide the tube-shaped Compression Washer (C) into the Compression Ring (D) and onto the cable from the bare end,
and insert into the fixed Connector Body.
5. Slide the Sealing Nut (E) over the bare end of the cable and fasten it on the fixed Connector Body.
6. Crimp the bare end of the cable with RJ45 connector and connect it to the PWR LAN-OUT port on the PoE Injector.
Figure 3-17 Weatherproofing RJ45 Connector
Additional Weatherproofing Steps
To add an additional layer of protection to the connectors against the environment, see
b O \ M R ¢ b M M R Y R ^ \ K a
ª O K Y [ O L L ^ ^ « R \ W
`
Y O c
.
For detailed explanation to weatherproof RF connections, refer to Antenna Installation Guide, which is available at
[ Y Y S L ^ R S g ^
.
Step 6: Assemble Mounting Hardware
1. Fix the mounting plate (A) by using the provided screws and washers (Torque 9 N
.
m/75 in-lbs).
2. Fix the extension arm (B) to the fixed mounting plate with the provided screw, nut and washers. The extension arm
gives the device more possible tilt, letting you adjust for azimuth or elevation over a larger angle.
 Loading...