change the speed settings in the camera menu. You can access the OSD Menu which stands
for (On Screen Display) for this camera by pressing the “menu” button. This is where you can
navigate into the advanced features such as iris, shutter speed, gain, color balance, contrast,
luminance and much more with the arrow keys.
Tip: You can access the OSD menu remotely using the cameras IP address in any web browser
or with the IP joystick.
Tip: You can control up to 4 cameras with a single IR remote control. Use the shortcut *# and
the corresponding Function key to set up unique camera IDs on your IR remote. Example *#F2
would set a camera to ID 2 on your IR remote.
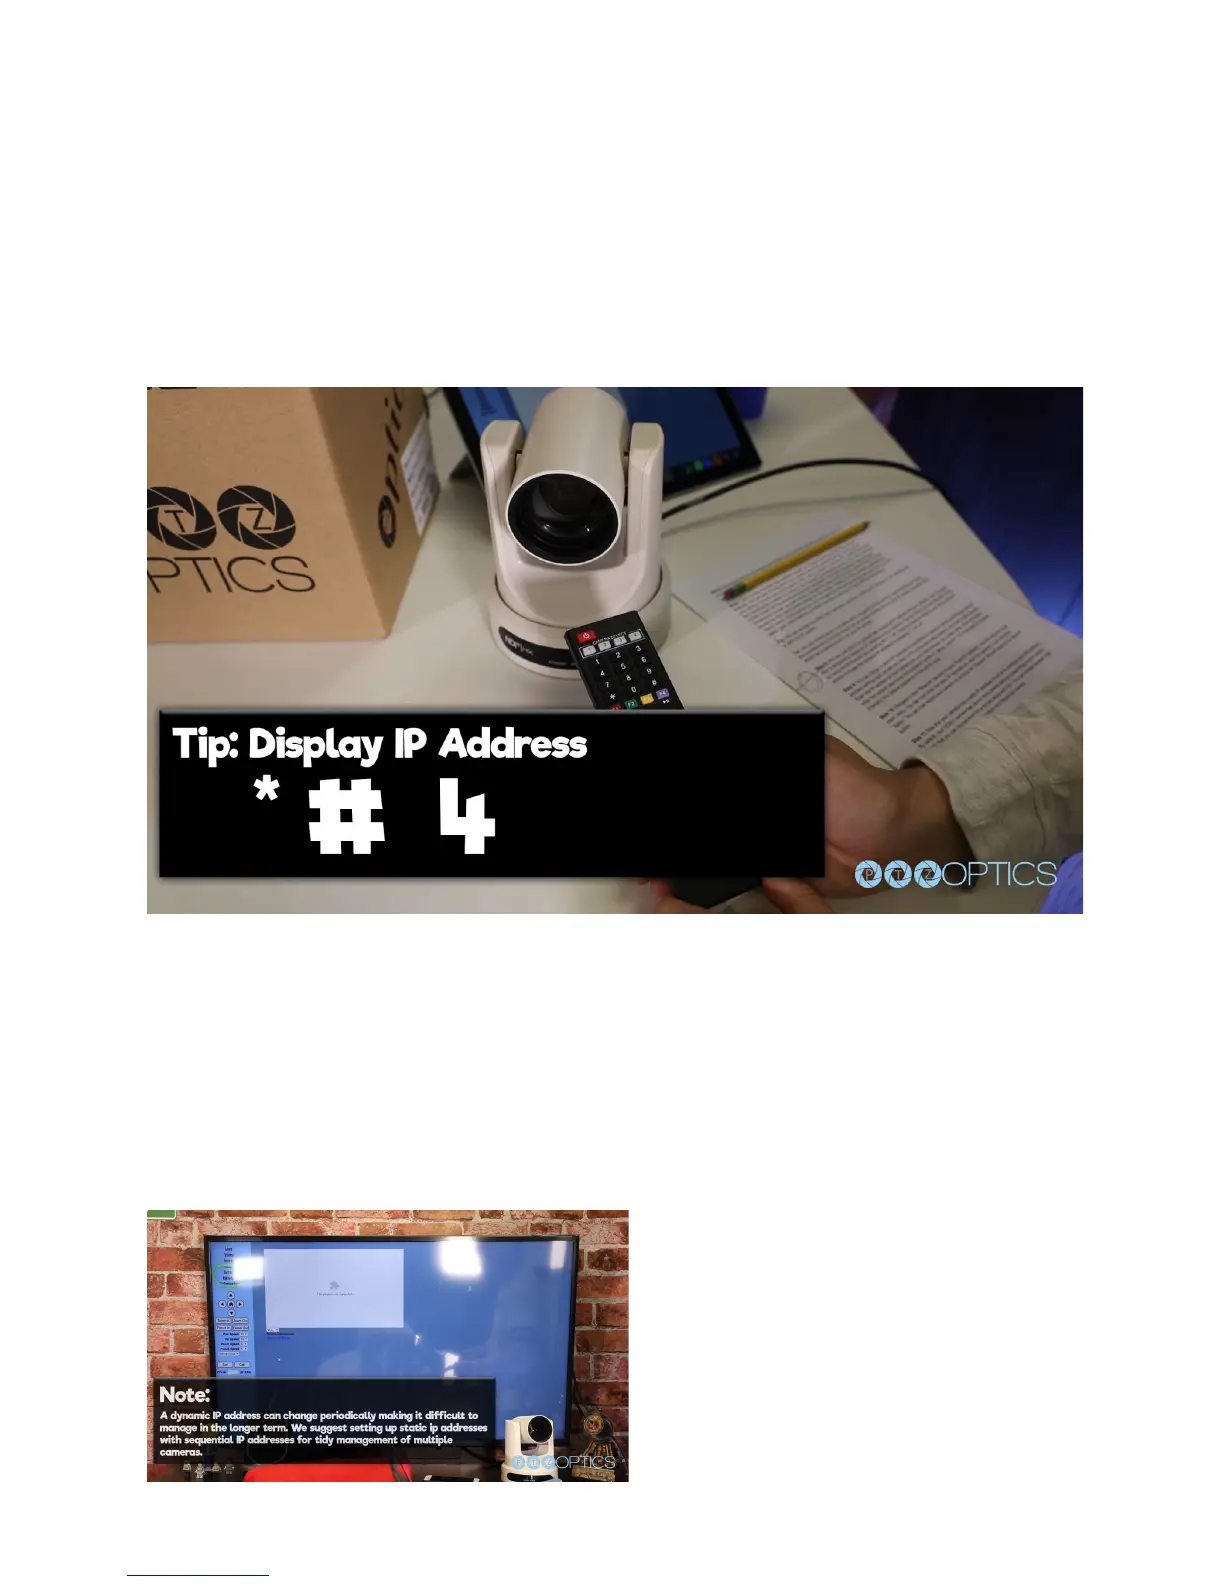
Step 8: You can use DHCP to dynamically assign an IP address for your camera. This is a
great way to temporarily assign an IP address to your camera. You can setup your camera with
DHCP by using the IR Remote and entering “# > * > 4”. Once the camera reboots, you can use
the IR remote to locate the dynamic IP address by pressing “* > # > 4”.
Step 9: You can assign a static IP address
to your camera using our Windows Only IP
address settings tool, or with any Mac or PC
computers web browser. Let’s use a web
browser. Enter the IP address of your
camera into your web-browser and press
enter. when prompted enter the default
username and password which is “admin /
 Loading...