admin”. You may want to consider changing this default password in the admin area.
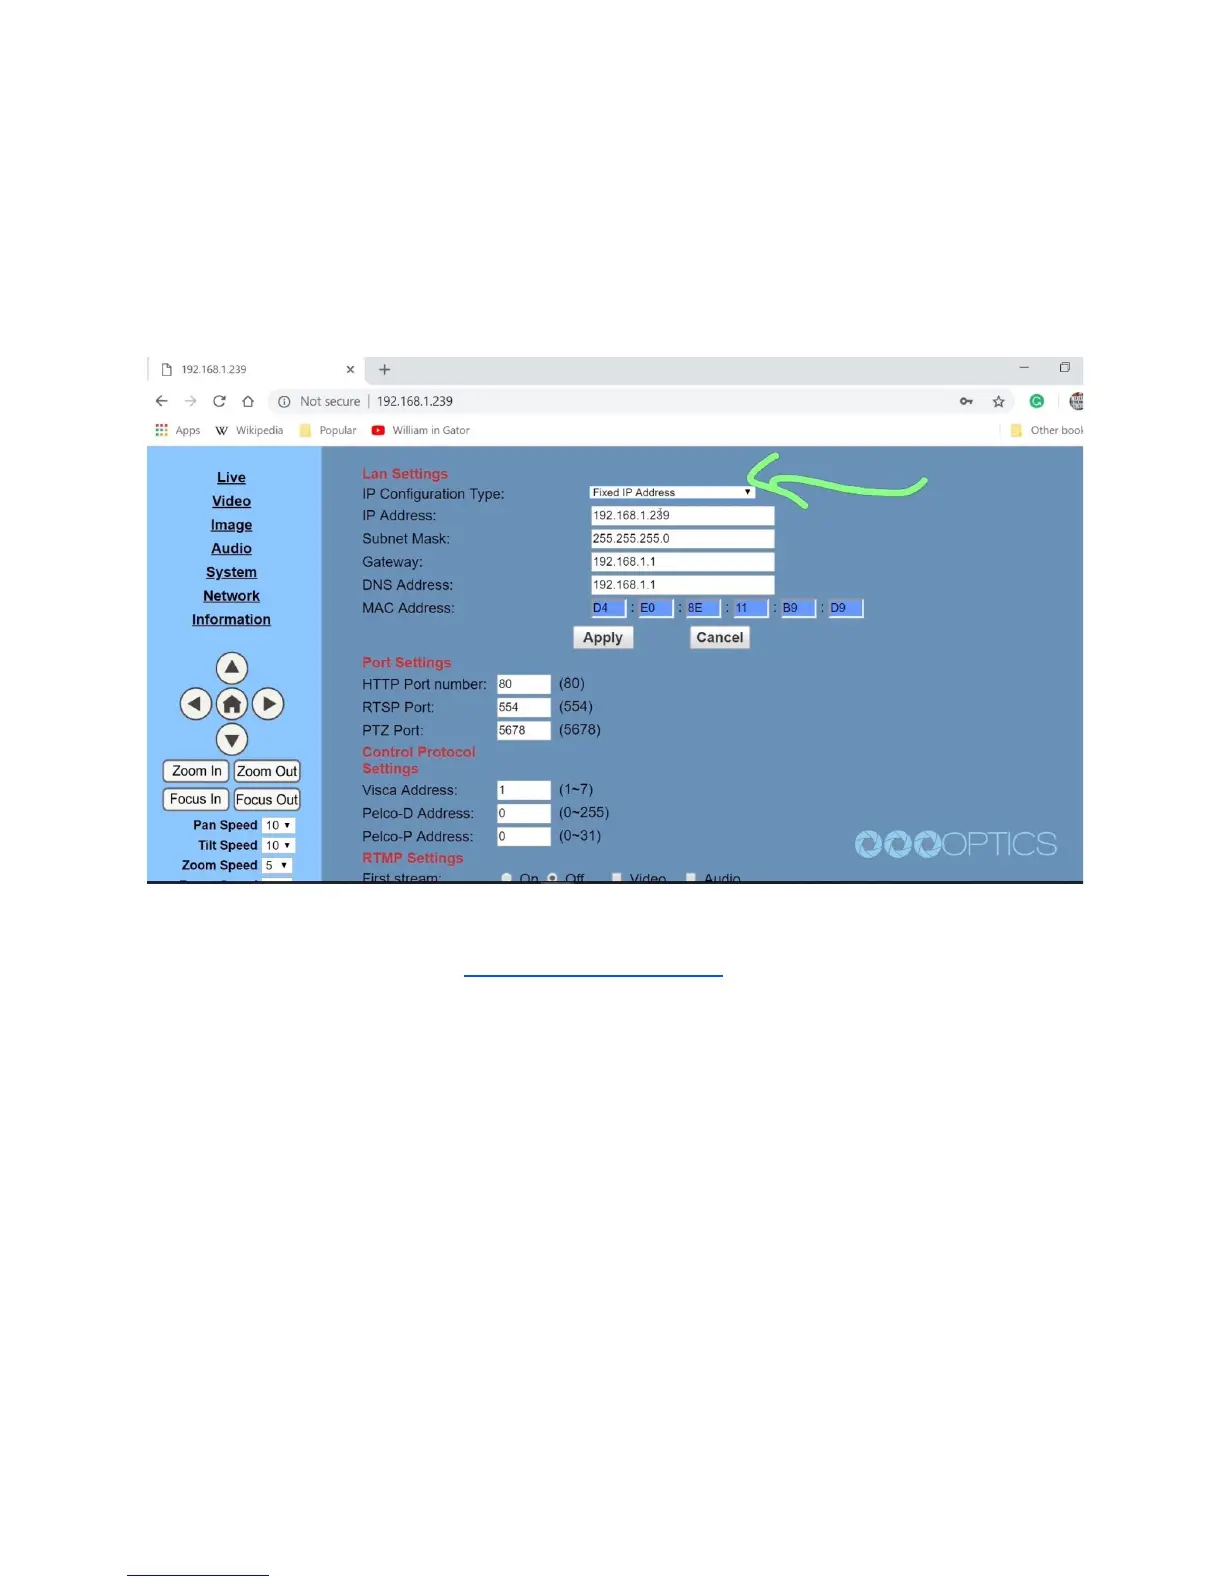
Step 10: Navigate to the “Network” tab and choose “Fixed IP Address” from the very first drop
down menu. You can now enter the static IP address you wish the camera to use and press
“Apply.” You can now reboot your camera by clicking the “System” tab and clicking the “Reboot”
button.
Step 11: Now that your camera is all setup on the network consider downloading the free PTZ
camera applications available at http://PTZOptics.com/apps. You can quickly tweak your
camera's settings and color match multiple cameras with advanced settings. The new apps
available for both Mac and PC. When you first open the PTZOptics Control App you should click
the “Settings Tab” to enter your camera's name and IP Address. Once you have done this you
can click the camera name to select this camera. This application features multiple views
available in the view dropdown menu. Click the “advanced tab” to access controls such as
Shutter Speed, Iris, Brightness, luminance and much more. Finally, you can view your camera
by clicking the Window dropdown menu and clicking the “Preview Window” selection. You can
make this preview window full screen or snap the preview window to the controls. Now you can
view the cameras video from anywhere on your local area network. You can choose from
Stream 1 or Stream 2 (Stream 1 being HD and Stream 2 being SD and which is used for low
bandwidth environments). Let’s snap the video stream to the rest of our video controls.
Step 12: Before we leave this tool, let’s setup a couple PTZ presets. This can be done by
clicking the “Preset” radio button and entering in the name you would like to give your preset.
Once you have done this you can click any of the 9 buttons available and your preset will be

 Loading...