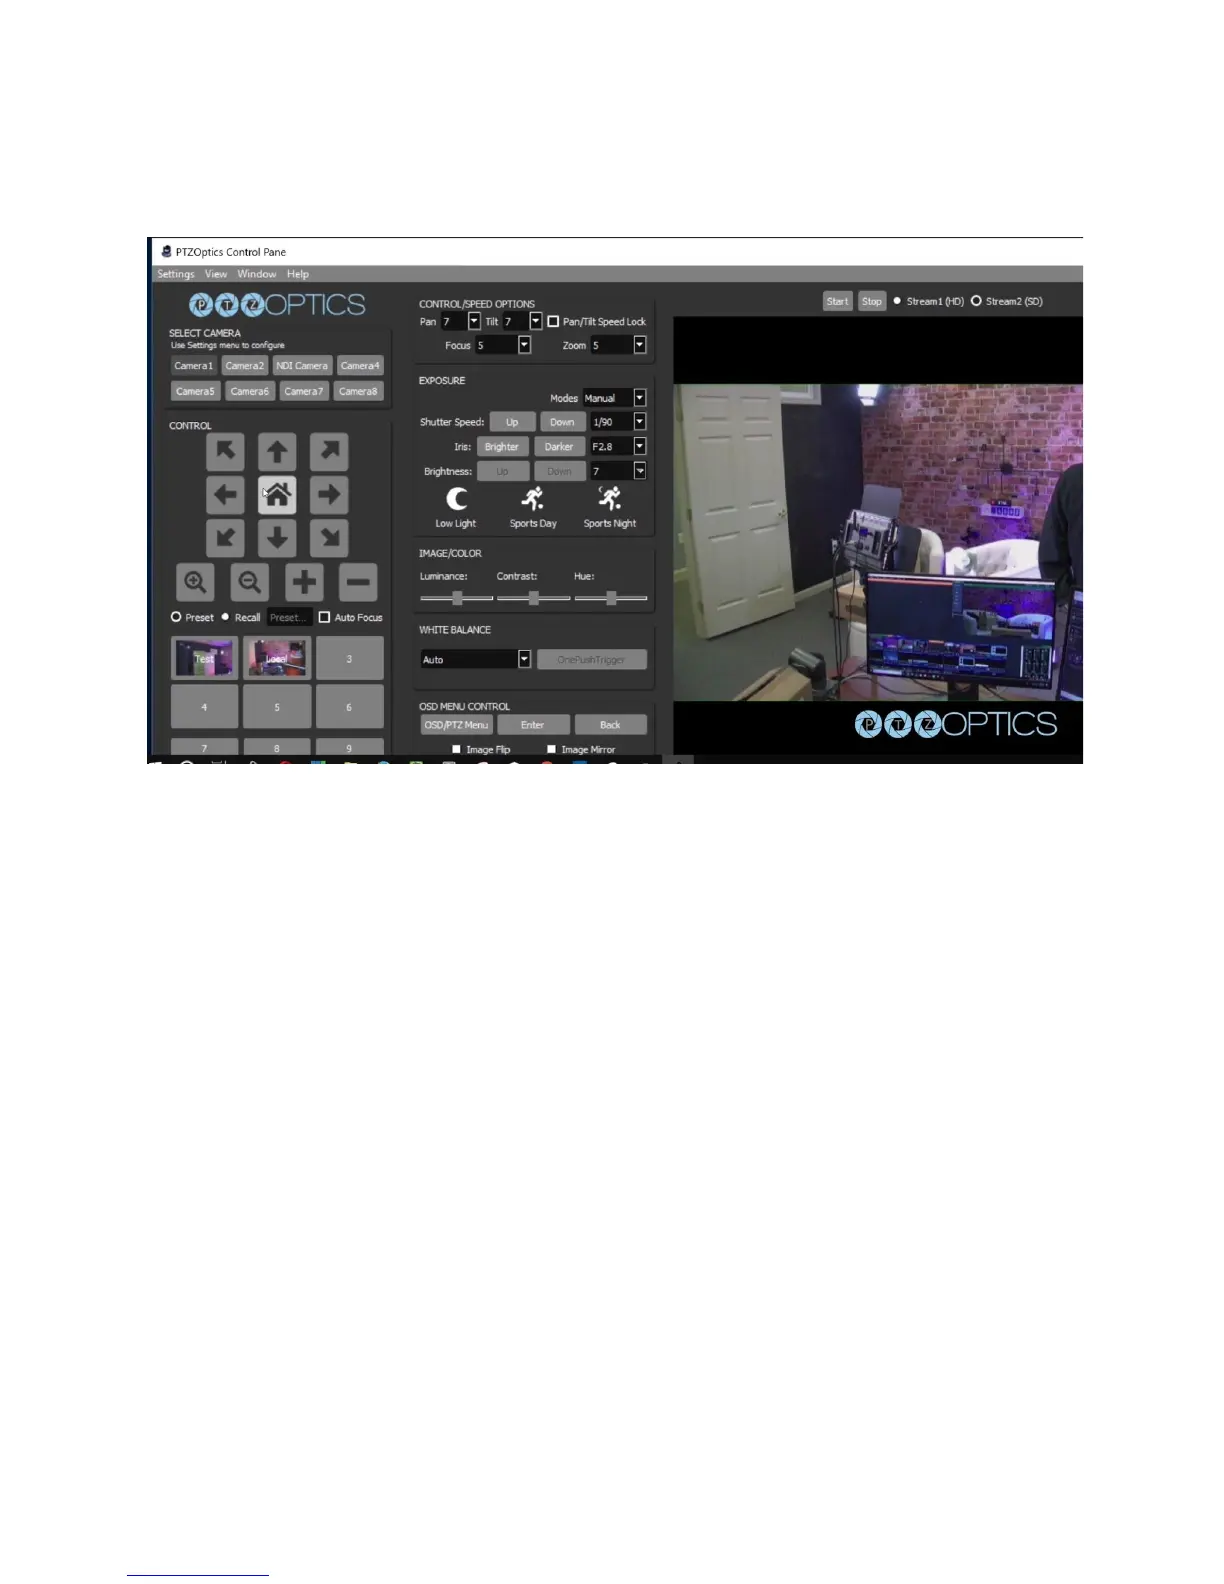
saved. You will notice that the program automatically enters “recall” mode. When you are in
recall mode, clicking these preset buttons will recall your saved pan, tilt and zoom presets.
Step 13: Let’s connect to the RTSP video stream from our camera with Open Broadcaster
Software also known as OBS. The follow steps will be very similar in video production software
such as vMix, Wirecast or xSplit. Open OBS and add a Scene. In this scene we can add a
source with the plus button in the area right next to scenes. Select “Media Source” and name
the input. In the Properties of this media source we will uncheck the first two boxes: Local File
and Restart Playback when source becomes active. Now we simply need to enter our RTSP
information into the input text field which is the following
“RTSP://YOUR-CAMERA-IP-ADDRESS/1”. The last “Slash 1 or Slash 2” represents the two
available RTSP streams you can pull from each camera. Stream 1 is your High Definition
Stream and Stream 2 is your standard definition stream.
Step 14: To add audio into our RTSP stream we will use a Rode Microphone with a line level
output and plug it into the 3.5mm audio input on the back of our camera. The 3.5mm audio input
will provide audio embedded into our IP stream and HDMI output.
Step 15: You can configure your cameras RTSP Settings in the Video Tab of the network
interface. You have the ability to tweak your cameras RTSP settings to deliver reliable high
quality video over IP. Let’s quickly review our recommended settings used for streaming RTSP
video over your network.
 Loading...