19
User Manual EN
Unpacking and Checking the Contents
Caution!
Do not use sharp objects to open the
packaging and to remove protective
material. You may inadvertently dam-
age the paintwork or parts of the tri-
cycle.
– Remove all preassembled parts out of the
packaging.
– Remove the protective material.
– Check that the delivery is complete and
not damaged. If anything is missing please
contact your specialist dealer before carry-
ing on with assembly.
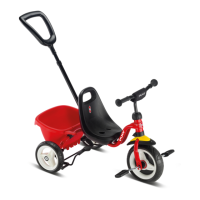
The deliver consists of:
❚ Tricycle frame (including seat mount)
❚ Rear axle (including rear wheels)
❚ Fork (including front wheel with pedals)
❚ Handlebar (including clamp and padding)
❚ Push-bar
❚ Seat (including seat belt)
❚ Backrest
❚ Seat moulding with padding
❚ Storage tray with carrier net
❚ Shoulder bag
❚ 10 mm open-ended spanner
❚ 5 mm Allan key
Mounting Rear Axle On Frame
– Remove the two screws on the right and
left of the rear axle (Fig. 1, A and B).
– Align the rear axle such that the long hand-
brake lever is on the right-hand side and
points forward (Fig. 2, A).
– Lower the frame on to the two spigots on
the rear axle and push down on both sides
as far as it will go (Fig. 2, B).
– Fit the two screws from the front through
the holes in the frame and use the Allan
key to tighten them (5 to 8 Nm).
Mounting Fork On Frame
– Remove the slotted washer (secured with
rubber band) from the handlebar stem
(Fig. 3, A).
– Align the fork such that the stud on the
guard points forward (Fig. 3, B).
– Place the tricycle on its wheels and slide
the handlebar stem from below through
the sleeve in the frame as far as it will go
(Fig. 3, C).
– Slide the slotted washer over the handle-
bar stem and downward until it rests in the
recess of the black plastic cap (Fig. 4, A).
 Loading...