PAGE 10
OPERATING INSTRUCTIONS
251 REV.051117
FAILURE TO FOLLOW OPERATING INSTRUCTIONS WILL
RESULT IN PROPERTY DAMAGE, SEVERE INJURY OR DEATH.
DANGER
SI1013
After the PULLMASTER planetary winch has been installed in accordance with the INSTALLATION
INSTRUCTIONS, the wire rope can be fastened to the cable drum.
IMPORTANT: The ropes, chains, slings, etc. are not part of the winch and are not covered by this manual. Refer
to manufacturer’s handling, inspection and maintenance recommendations to avoid potential
accidents. For selection of ropes, etc. please check following product standards: DIN 15020,
prEN818-1/9, prEN 1492-1/2, prEN 1677-1/3 and other relevant product standards
1) The cable drum of the PULLMASTER planetary winch has two cable anchor slots, one for clockwise and one
for counterclockwise hoisting. Standard rotation for hoisting is clockwise when looking at the hydraulic motor
of the unit. It is critical to select the cable anchor slot which will permit winding of the wire rope on the drum
in the correct direction of rotation. If the wire rope is wound on the cable drum in the wrong direction of rotation,
the winch will have no braking capacity. Each winch is shipped from the factory with a label on the drum
indicating the correct cable anchor slot.
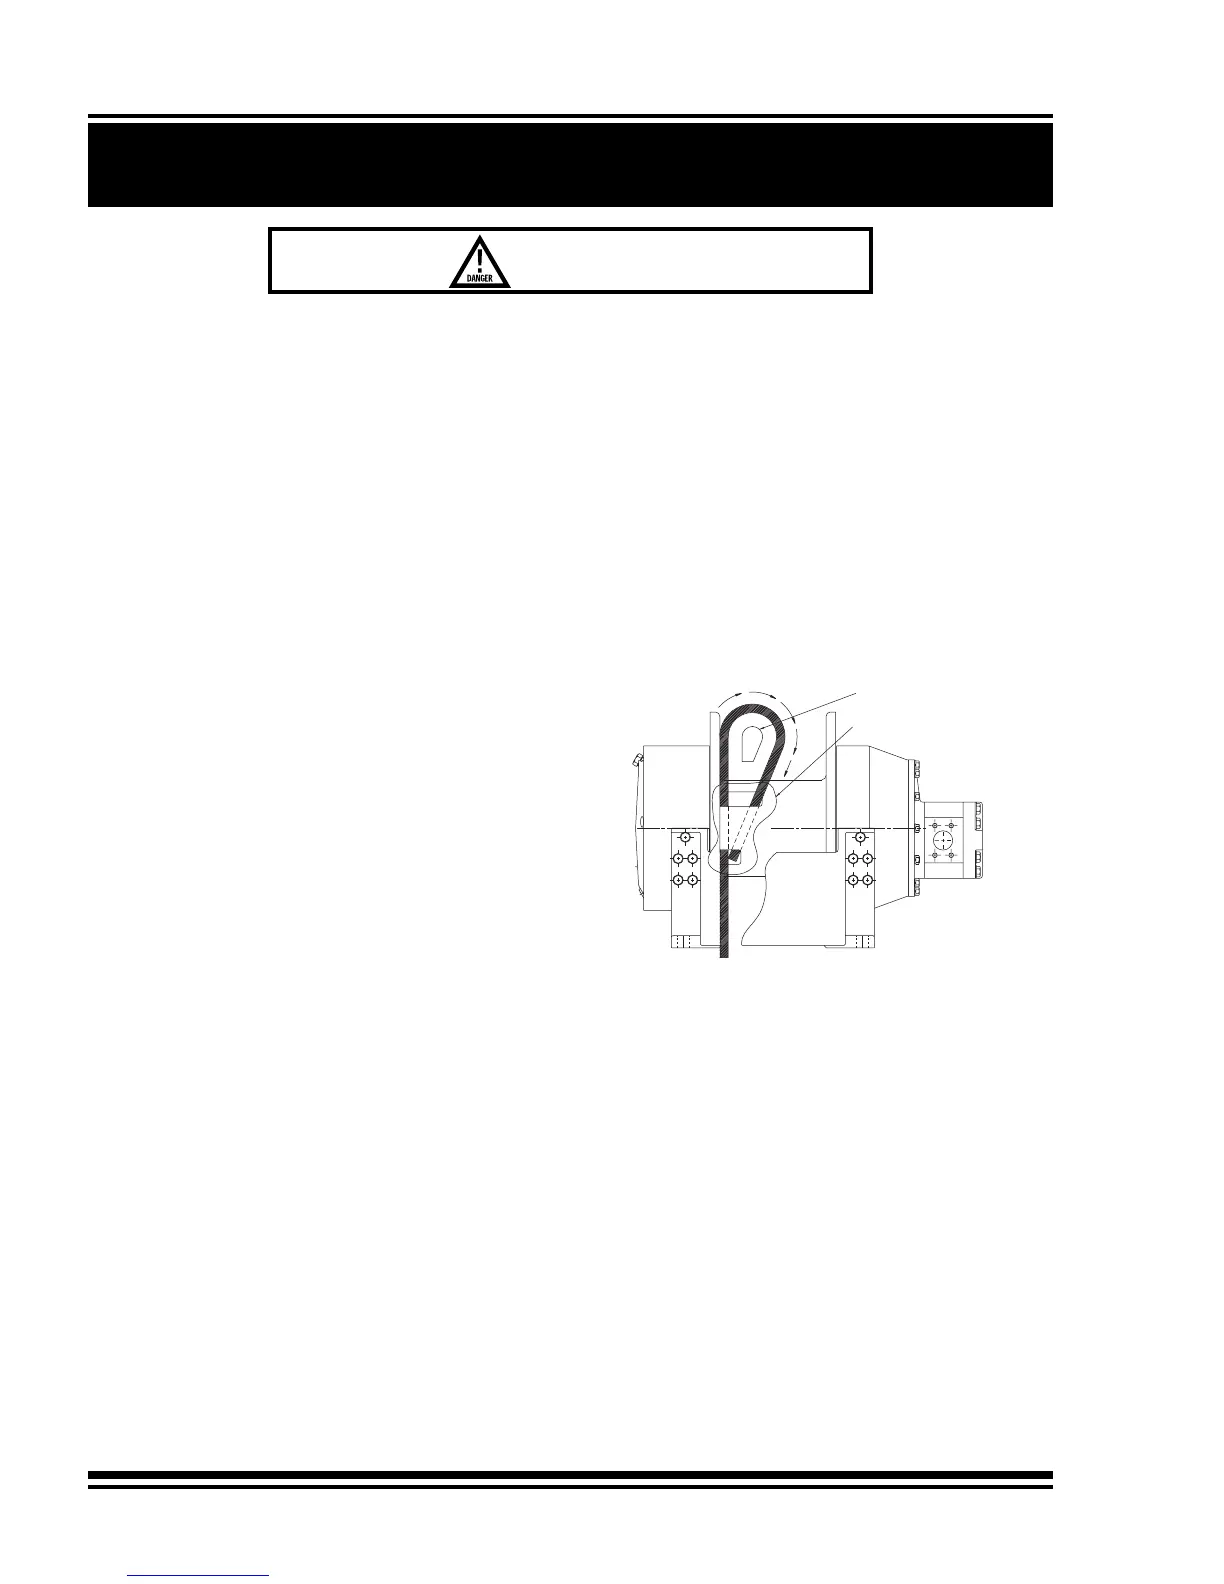
WIRE ROPE INSTALLATION
Clockwise hoisting winch shown.
(Use cable anchor slot on opposite side of
drum for counterclockwise hoisting winch.)
Feed the wire rope through the cable
anchor slot. Loop rope back into slot as
shown. Insert cable anchor into slot, small
end first and long side nearest the drum
flange. Pull rope tight to wedge rope in slot.
2) On wire rope installation, care must be taken that the wire rope is wrapped completely around the cable
anchor and properly pulled into the cable anchor slot in the cable drum. The cable drum requires 5 wraps
of wire rope for safety.
3) The winch operation is controlled by a single control valve lever which has a forward, a reverse and a neutral
position. Speed control in either direction is obtained by modulation of the control valve lever. Maximum line
speed in either direction is obtained when the control valve lever is moved as far as it can go. The disc brake
of the winch will come on automatically when the winch control lever is returned to neutral.
4) Always warm up equipment prior to operating winch, particularly in low ambient temperature. Circulate
hydraulic oil through the winch control valve for several minutes to warm the hydraulic system. To prime the
winch with warm oil, operate the winch at slow speed, forward and reverse, several times.
5) Prevent corrosion damage to winch interior. If not used regularly, run winch up and down at least once every
two weeks.
6) To ensure proper winch installation and function, raise and lower a full test load to a safe height before using
winch for regular operation at the start of each shift.
If, after a new installation, the winch does not function properly, refer to the TROUBLESHOOTING section
of this manual.
CABLE ANCHOR SLOT
CABLE ANCHOR