Removal of Engine from Frame
Dealer Development Center
54
Dealer Development Center
53
Pulsar DTS-i UG-III-180cc Training NotesPulsar DTS-i UG-III-180cc Training Notes
Removal of Engine from Frame :
Remove :
• Put OFF the fuel cock
• Side panel LH
• Side panel RH
Remove :
• Seat assembly by pulling the cable for seat lock release located
on RH side.
• Disconnect the negative terminal of the battery.
• Disconnect the wiring harness socket for fuel level Indicator.
• Fuel pipe connections and moisture drain pipe from fuel tank.
• Disconnect stator plate harness
• Disconnect neutral switch coupler
Remove :
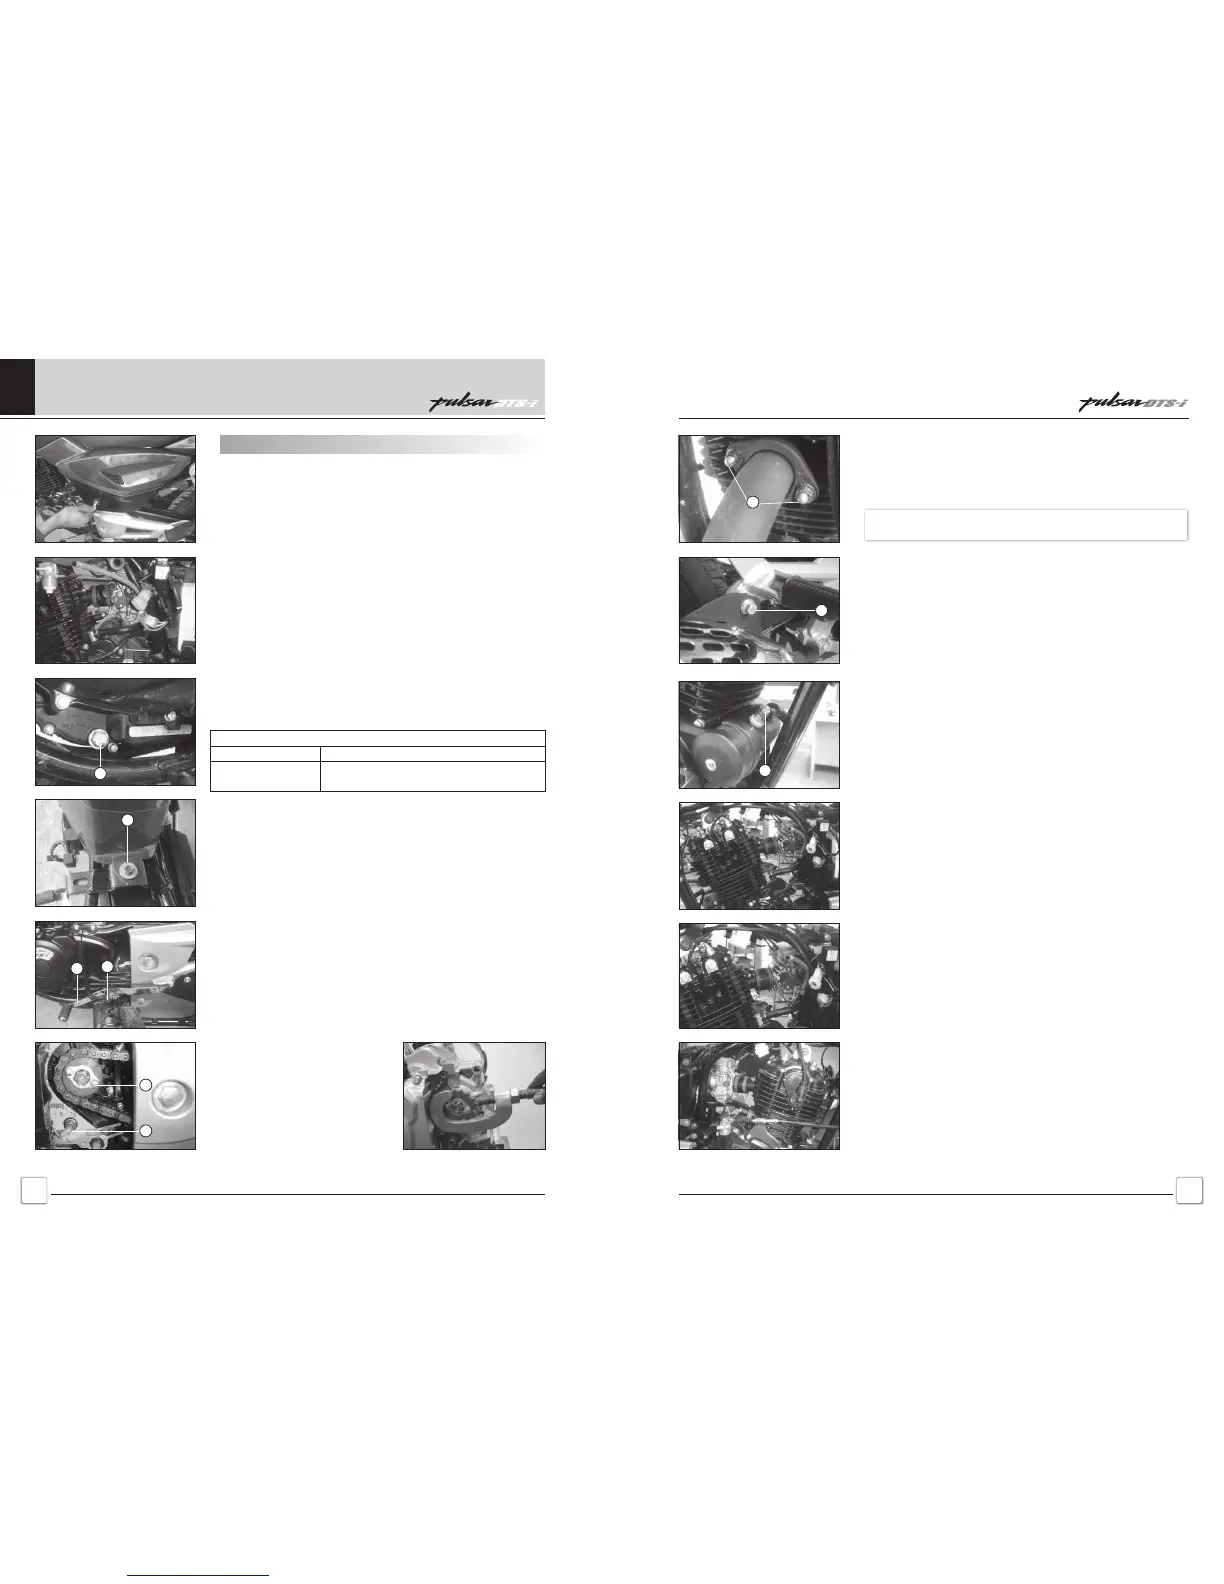
• Drain bolt (A) and drain out the oil from engine.
• Refit the drain bolt with gasket & tighten it.
Remove :
• Bolt (A)
• Petrol tank assembly.
Remove :
• Bolts (A)
• Gear shift pedal bolt (B)
• Drive sprocket cover LH.
Using Special Tool : Sprocket
Holder - 37 1030 53
Remove :
• Bolts (A)
• Plate drive sprocket
• Drive sprocket along with
the chain.
• Neutral switch coupler (B).
A
A
B
A
Recommended Oil Grade and Qty
Grade SAE 20W50 of API ‘SG’ + JASO ‘MA’
Quantity Drain & Refill 1000 ml.
Engine Overhaul 1100 ml.
A
B
Remove :
• 2 nuts (B) for silencer flange
Remove :
• Bolt (A) of silencer bracket mounted on pillion RH side footstep.
• Silencer assembly.
Remove :
• Starter motor connection (A)
Remove :
• PCV pipe from breather
Remove :
• Disconnect the reed switch coupler.
• Spark plug cap LH
Remove :
• Air filter mounting bolts to facilitate the removal of carburettor
with reed switch.
• Clamps of carburettor and disconnect carburettor along with
insulator and dismantle cables from it.
• Bracket bolts securing clutch cable on clutch cover.
• Spark plug cap RH
Note : Always remove the flange mounting first and then rear mounting
to avoid misalignment of studs.
B
B
A
Removal of Engine from Frame
 Loading...