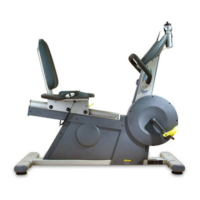
This document describes the Pulse Pursuit and Perform Cycles, which are sophisticated heavy-duty exercise machines designed for health and fitness, aerobic/anaerobic exercise, and general athletic training or weight-loss programs.
Technical Specifications
Electrical:
- Input: 19VDC, 2A
- Power consumption: 50W
- Fuse rating: T5A
- External AC Adapter: 100-240VAC 1.5A 50-60Hz (input), 19VDC 3.7A (output)
- Note: Use only the supplied 70W AC Adapter.
Dimensions:
| Model |
Length |
Width |
Height |
Weight |
| 240 Pursuit |
0.98 m (3.2 ft) |
0.70 m (2.3 ft) |
1.47 m (4.8 ft) |
62.6 kg (138 lbs) |
| 250 Perform |
1.44 m (4.7 ft) |
0.70 m (2.3 ft) |
1.25 m (4.1 ft) |
92.5 kg (204 lbs) |
Operating Environment:
- Temperature: -10°C to +40°C (14°F to 104°F)
- Humidity: Up to 95% relative humidity, non-condensing
Displays:
- LED: 30 x 14 tricolour matrix (w x h)
- LCD: 128 x 64 negative-image STN (w x h) LED backlit
- Note: The Pulse cycles both use a speed independent electronic braking system.
Usage Features
General Features:
- User-friendly multi-language LCD programme control panel.
- Large LED Tri-Colour graphic display screen.
- Five operating modes (one manual, three preset plus one optional).
- Six selectable profiles (five preset and one randomly-generated).
- Microprocessor-controlled electronics for reliability and accuracy of data.
- Ergonomically-designed rider position.
- Low maintenance requirements.
- Hand pulse sensor as standard, with a Polar receiver integrated into the console. A Polar transmitter belt can be supplied as an optional extra.
- Data can be displayed in either imperial or metric units.
- Up to two cycles can be powered from a single power source.
Operational Information:
The machines offer various exercise modes and display options. The control panel features a Programme Control & Information LCD Screen, Graphic Display LED Screen, Information, Help & Options Button, Cardio Theater Button, Programme Selection, Control & Data Entry Buttons, and Buttons for increasing/decreasing Speed & Effort, as well as Start/Stop exercise programme buttons.
Display Information:
- Time: In all modes except Pace mode, LEDs illuminate progressively from left to right as exercise time elapses. When all LEDs are illuminated, the exercise time set has been completed.
- Effort: For Manual or Profile Mode, the number of LEDs illuminated vertically indicates effort. An effort level of 8 for Manual mode means four LEDs will be illuminated in a vertical line at the start of the exercise.
- Profile: Selecting a profile displays a graphical image of that profile. The height of the profile depends on the effort level selected. A flashing column of LEDs shows current position in the exercise.
- Pace: In Pace mode, two outer lines of LEDs are used. The outer line represents the full circuit distance, while the inner represents the computer-controlled pace bike.
- Note: For successive LED illumination or flash, time is calibrated automatically according to the total exercise time. For example, if the exercise time is set to 60 minutes in Manual Mode, it will take 60 minutes for all LEDs to illuminate horizontally.
Programme Selection, Control and Data Entry Buttons:
- General Selection and Numerical Data Entry: Buttons are available for these functions.
- START Button: Press to begin the selected exercise programme.
- STOP Button: Press to stop an exercise programme at any time. Press a second time to return to the mode selection display. The STOP button also acts as a clear button if an error is made.
- '+' and '-' Buttons: Use to increase or decrease the effort needed to turn the pedals. When exercising in Circuit mode, these buttons enable gear changes.
- Information Button: Accesses the Help and Options screen, offering three options:
- Units Button: Cycles between MPH/kCal, KPH/kCal and KPH/kJ.
- Language Button: Enables switching between languages.
- Zoom Button: Allows for larger display of Speed, Distance, Time, Power, or Heart Rate on the LED screen for easier viewing. The Zoom feature can be switched off if required.
- Cardio Theater Button: Switches the Audio channel and alters the volume during exercise.
Exercise Modes:
- Manual Mode: Allows exercise at a steady rate and time.
- Profile Mode: Enables exercise at a pre-programmed variable rate, with a choice of 5 profiles.
- Pace Mode: Allows competition against a computer-controlled 'pace bike' that travels at a constant speed over a distance.
- Heart Rate Control Mode: Undertakes general fitness training within medically approved heart rate bands:
- 60%-70% for weight management (Fat-Burning).
- 70%-80% for aerobic exercise (Cardio).
- 80%+ for competitive training.
The computer calculates the "target rate" as beats per minute (bpm) from user data and automatically adjusts effort to maintain the target rate.
- Fitness Level: A seven-minute test measures fitness level improvements. The test cycles at a constant 60 rpm under an increasing workload over the period of the test.
Heart Rate Monitor:
The device includes a hand pulse sensor and supports an optional Polar chest strap monitor. The chest strap monitor is used by attaching it around the chest, ensuring the sensor strip is placed against the skin. A flashing 'P' at the top right-hand corner of the programme control screen confirms a heartbeat is detected. If the monitor fails, moisten the electrodes on the back of the monitor strip with a wet finger and try again.
Maintenance Features
Routine Maintenance - Daily:
- Wipe down the Pursuit / Perform Cycle's side panels, seat, console, and hand grips with a mild soap solution on a damp cloth.
- Wipe dry with a soft cloth.
- Spray the metal frame (but not the control panel) with a proprietary silicone-based polish and wipe off with a dry soft cloth.
- Note: Do not clean the frame with water-based solutions.
Routine Maintenance - Weekly:
- Thoroughly clean the entire machine using the same cleaning methods as for the Daily Clean.
- Inspect the frame for rust, bubbling, or paint chips.
- Note: This check is important as perspiration will corrode damaged or unpainted surfaces very quickly. This maintenance check helps maintain the clean and professional appearance of your machines.
- Do not clean the frame with water-based solutions.
Routine Maintenance - Quarterly:
- Because of the amount of pressure exerted on the cycles through heavy exercising, it is possible (although unlikely) for fasteners to become loose.
- Therefore, it is necessary to do a visual or tool check with the necessary spanners or allen keys that all following nuts and bolts are tight: Feet Strut Nuts & Bolts, Handle Bar Bolts, Console Bolts, Seat Pad Bolts, Pedal Arm Bolts, Condition of Seat, Condition of Handlebars.
- Regularly check the machine for damage, wear, general smooth and safe operation. Do NOT use the machine if any part appears worn, damaged, or faulty.
Corrective Maintenance:
Corrective maintenance is limited to replacing the control panel. This involves:
- Reading all instructions before commencing work.
- Ensuring the Pursuit / Perform Cycle is switched off and unplugged.
- Using a screwdriver to remove console screws that secure the top and bottom halves together.
- Carefully lifting the top half into a vertical position (taking care not to strain cables) and unplugging connectors from the printed circuit board (PCB). Remove the top half.
- Using the allen key supplied, remove the four console bolts that secure the bottom half of the control panel to the frame post.
- While holding the control panel with one hand, tap lightly on the underside to ease the panel off the frame post. Store both halves of the control panel in a safe place.
- Attaching a new console (bottom half) to the frame and securing with console bolts.
- Attaching connectors to the new control panel (top half).
- Carefully lowering the top console into place and securing with console screws.
- Switching on power and checking that the new panel operates correctly. (It may be necessary to adjust the contrast. Refer to Section 4.4 on Page 18).
Warranty:
- Pulse Fitness warrants new equipment purchased directly from Pulse Fitness or from authorised distributors or resellers, for its own use not for resale, that the 240F / 250F Cycle shall be free from defects in materials and workmanship for a period of 12 months from the date of purchase.
- This warranty does not extend to pedal straps.
- This warranty does not cover any part of the equipment which has been:
- Modified, altered or subjected to abuse, misuse, negligence or accident, or improperly operated, maintained or stored.
- Improperly installed or installed in conjunction with any equipment for which it was not designed.
- Repaired or replaced by any party other than Pulse Fitness or its authorised service agents.
- Damaged or destroyed by disasters such as fire, flood, lightning or earthquake.
- In no event shall Pulse Fitness be liable for any special, incidental, consequential or other damages, costs or expenses.
- If a defect involves a components part or accessory that is already in service and can reasonably be replaced or serviced by the purchaser, Pulse Fitness will be responsible only for providing, at no charge, a suitable replacement and instructions for the purchaser.
- Warranty will be void if non genuine Pulse Fitness parts are used in replacement work.