STEP3:SeesawBaseAssembly
WARNING:Toavoidyourngersbecomingcaughtduringassembly,
youmustattachtheboltsonlyasnotedbelow.
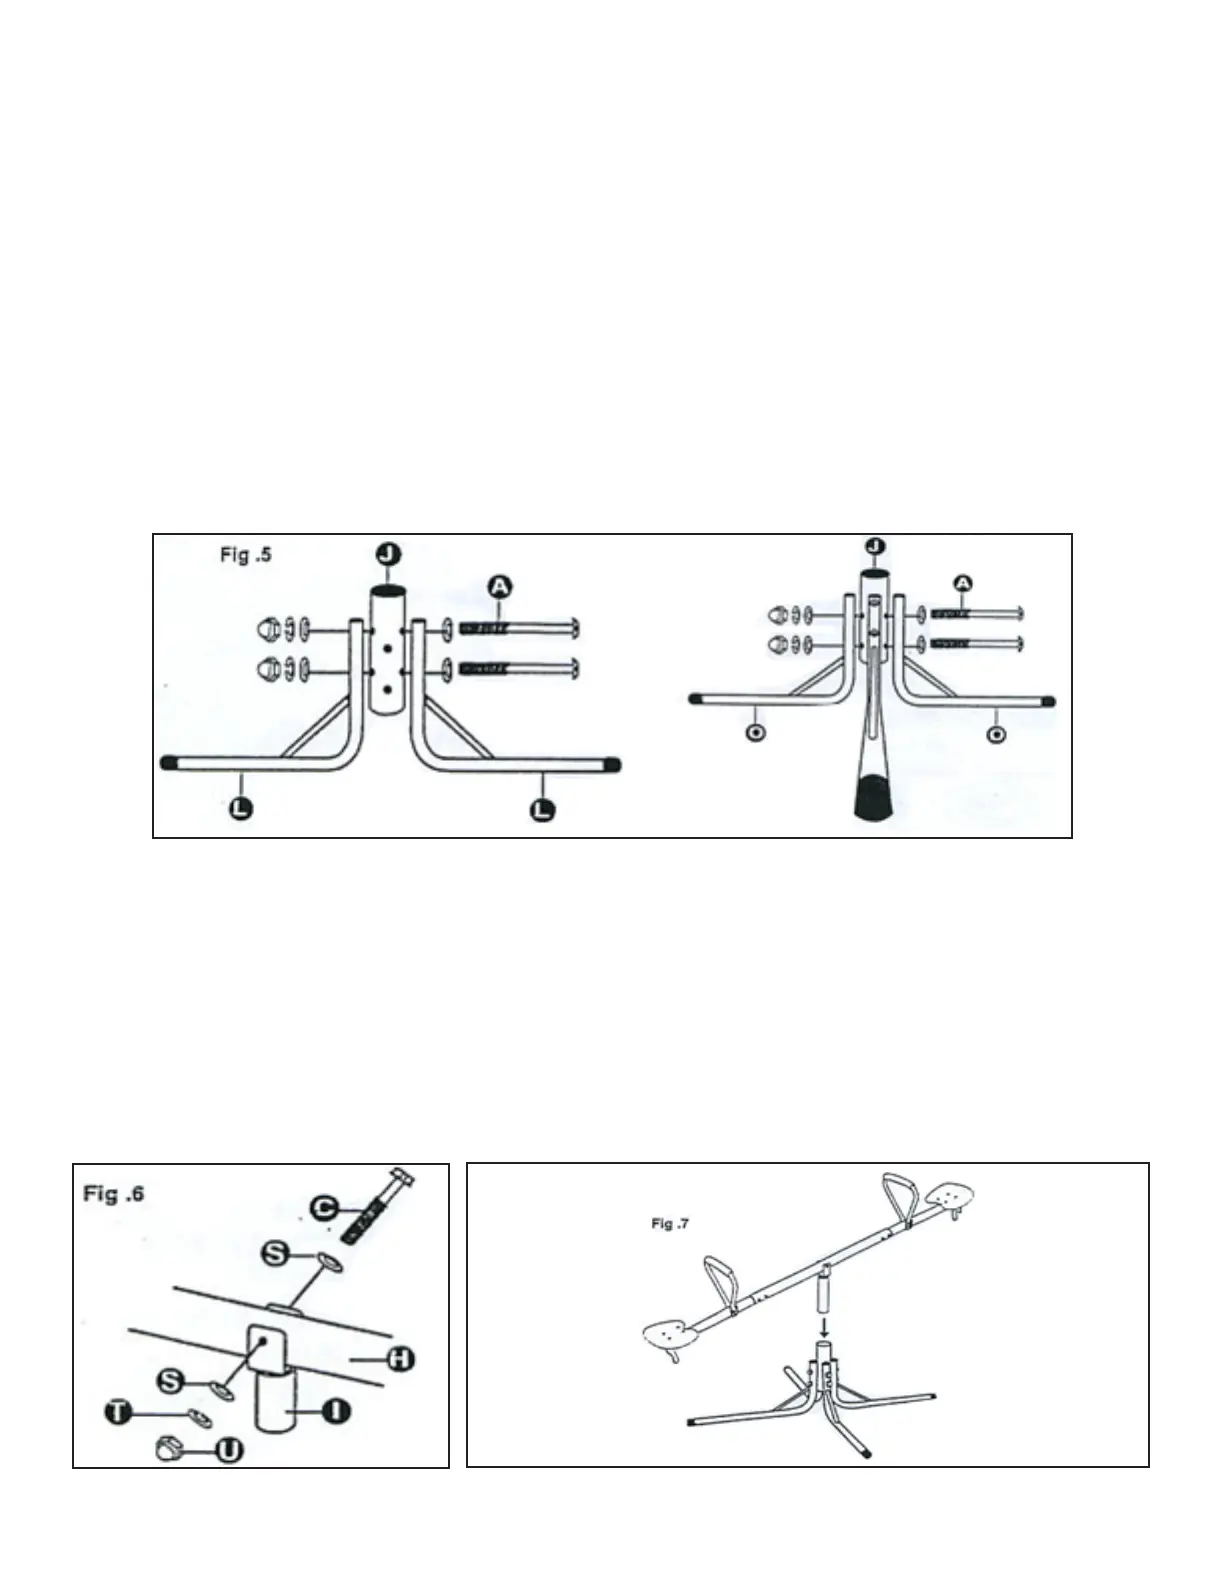
A. Attach 2x Seesaw Legs (L) to the Lower Support Tube:
Using 2x M6 110mm Bolts, 4x M6 Washers, 4x M6 Lock Washers, and 2x Nuts attach 2 Legs (L) to the Lower
Support Tube (J) as shown in the diagram. NOTE: The (L) Legs must go into the upper pair of pre-drilled Bolt
Holes in the Support Tube.
B. Attach remaining 2x Seesaw Legs (O) to the Lower Support Tube:
Using 2x M6 110mm Bolts, 4x M6 Washers, 4x M6 Lock Washers, and 2x Nuts attach 2 Legs (O) to the Lower
Support Tube (J) as shown in the diagram. NOTE: The (O) Legs must go into the lower pair of pre-drilled Bolt
Holes in the Support Tube.
Ensure that the legs have been assembled correctly and are even at their bases before continuing
STEP4:SwivelAssembly
A. Attach the Swivel to the Main Bar:
If not already present, slide the Plastic Tube (W) onto the end of the Upper Support Swivel (I). Next, line
up the Upper Support to the Hole in the center of the Main Bar. Secure the Swivel to the Main Bar using the
70mm Hex Bolt (C), 2x M8 Washers (S), 1x M8 Lock Washer (T), and 1x M8 Nut (U).
B. Join the Upper and Lower Assemblies:
Insert the completed Main Bar Assembly into the Seesaw Base Assembly. Ensure the Plastic Tube (W) re-
mains securely afxed. Lastly, insert a Plastic Cap (X) into each Leg End if not already present.


 To Next Page
 Loading...