1
5
6
7
8
9
10
11
12
13
14
15
16
3 4
2
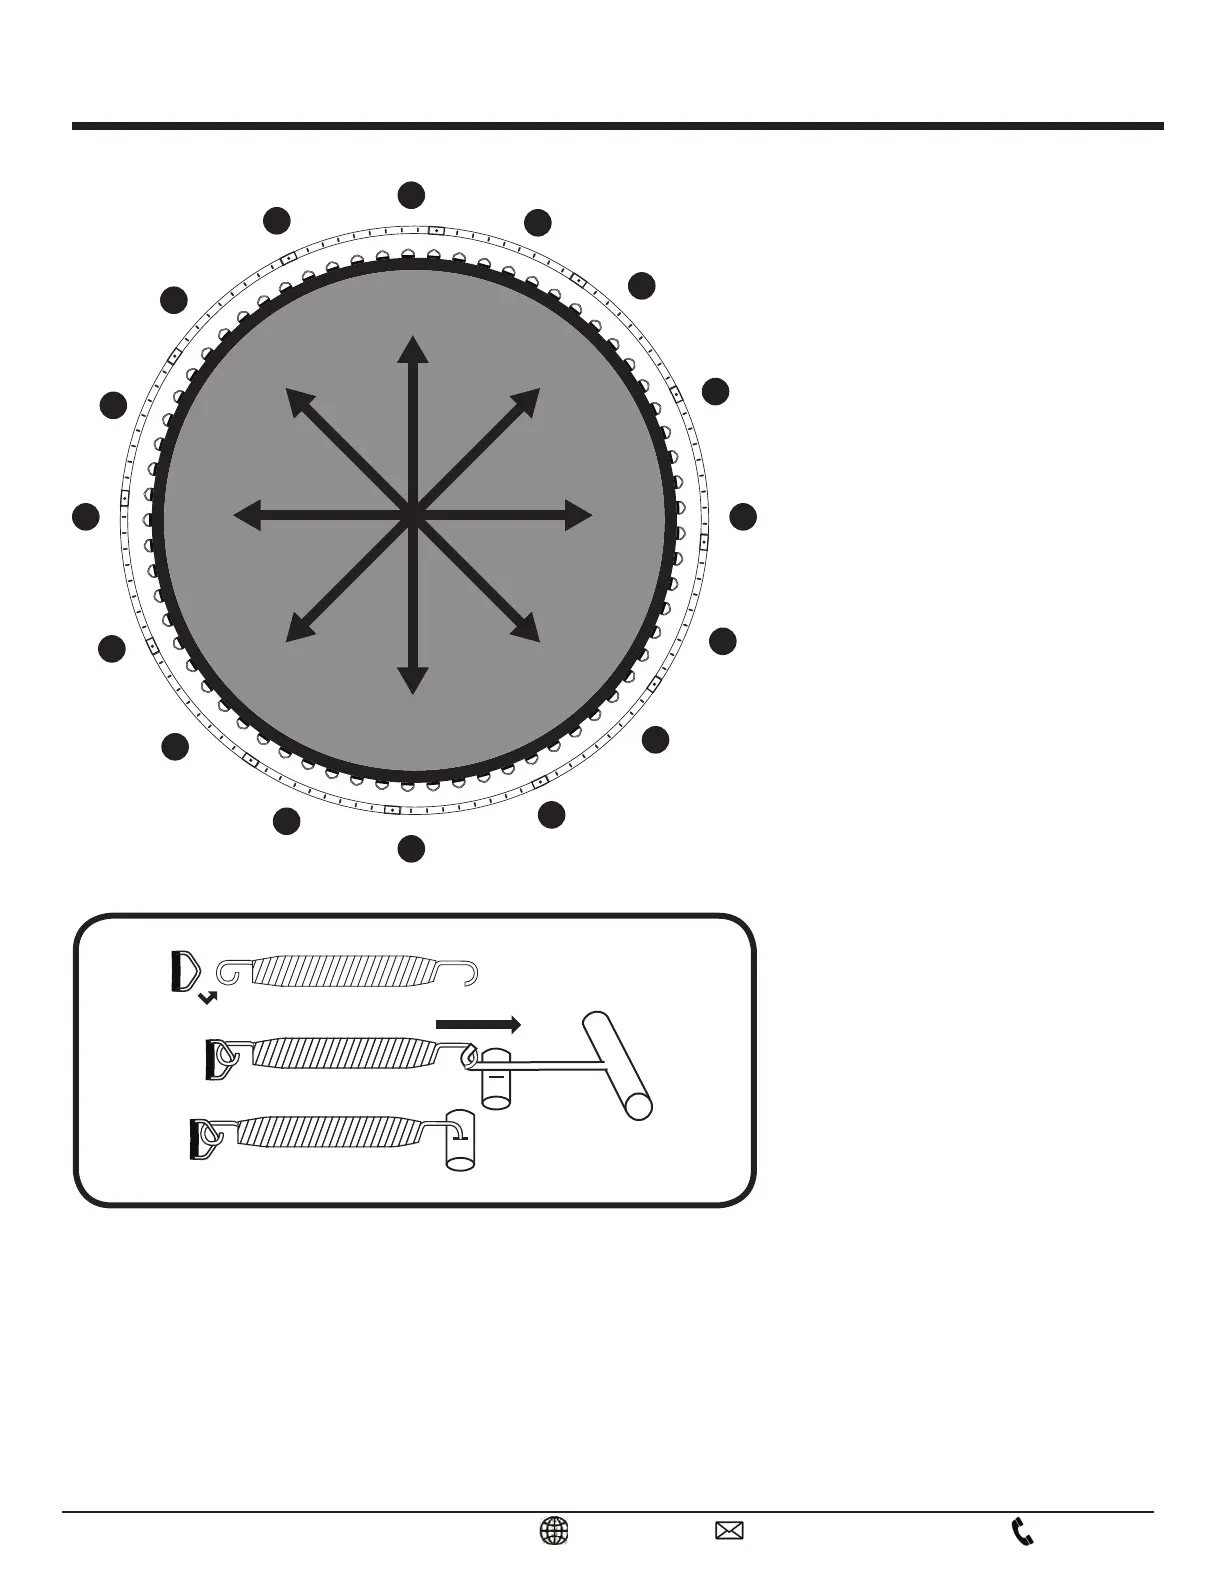
TRAMPOLINE ASSEMBLY INSTRUCTIONS
STEP 9:
Place the Jumping Mat (Part 1) in the
middle of the frame and unfold it
completely.
NOTE: Make sure the stitching of the
Jumping mat is facing the floor
In order to avoid ripping and to distribute
tension when attaching springs to the
frame, follow the numbered order shown.
Once a spring is attached to the Jumping
mat, you must attach the other in the
opposite direction of the mat.
Once the first 16 Springs (Part 7) have
been placed, Attach all remaining Springs
using the Spring Tool (Part 10) that was
provided clockwise.
NOTE: Failure to use appropriate tools
may result in injury or pinching due to
tension of the springs. We recommend you
use gloves when attaching springs to the
frame.
HOW TO USE SPRING TOOL:
In order to insert the spring properly, hook
the curved end to the V-ring of the jumping
Mat. Then, pull on the Long Round end
with the T-Hook until it is attached on one
of the corresponding openings of the Top
Rail as shown.
14
CustomerService@GQBrands.comGQBrands.com
1-866-498-5269