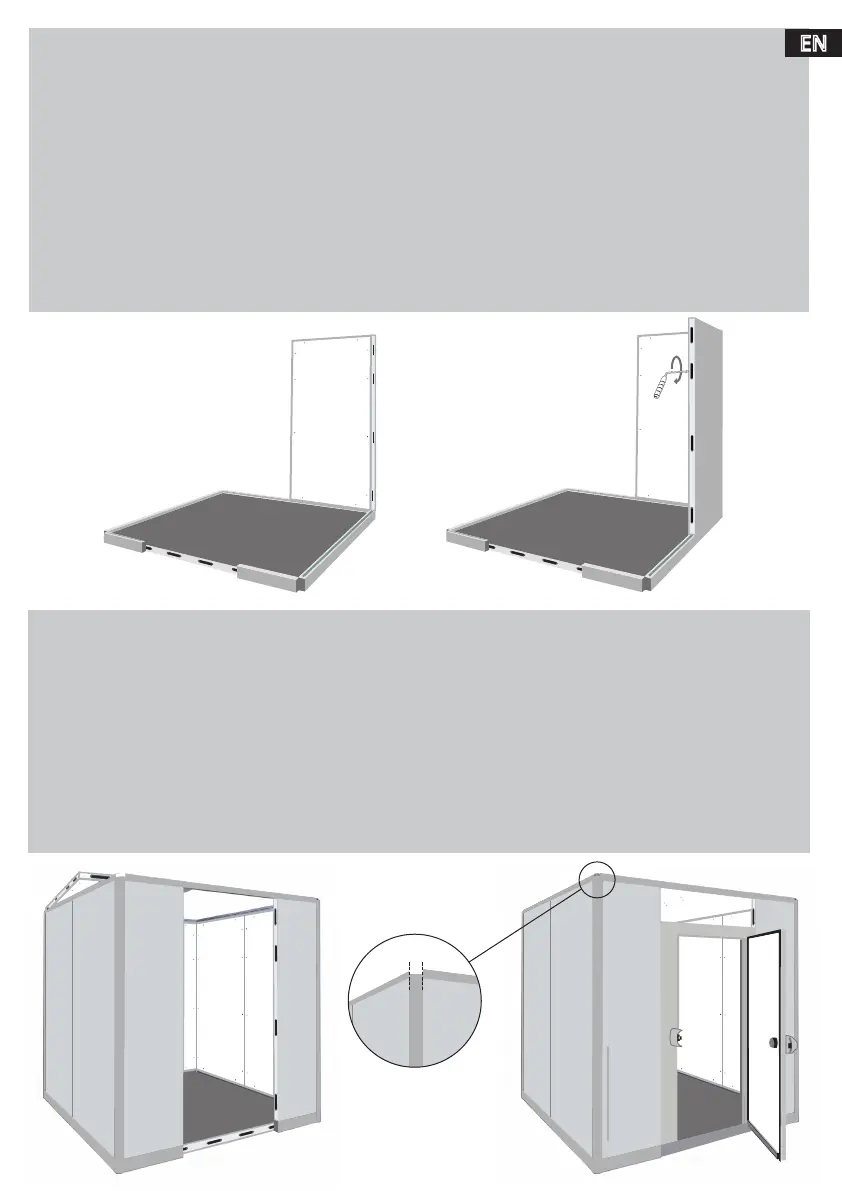
3. Setting up the Vertical Panels:
3.1. Separate all the vertical angles
(Piece C3) from the ceiling angles (Piece C4) in order to facilitate the
assembling of the cold room.
NOTE: The panels are positioned with the holes of the angle to the interior of the cold room.
3.2. With the help of another person, hold the first vertical angle in one of the corners of the cold room.
3.3. Line up the first vertical panel
(Piece D) with the floor angle and fix the angle rotating the key in the
holes.
3.4. Now join the vertical panel to the vertical angle
(Piece C3) by the same fixing process.
3.5. Put the 2nd vertical panel up-right to the first, using the other side of the vertical angle.
3.6. Install the remaining panels following the clock ´s hands.
NOTE: Always confim that they are well secure to the floor angles, to the vertical angles and to each other.
IMPORTANT NOTE: The panels with doors should be installed in the same way, although these don´t have
floor angles to fix them on. Don´t forget to take out the keys and open the door before fixing them.
4. Putting up the Ceiling:
4.1. Put the ceiling angles
(Piece C4) on the vertical panels lining up and positioning the fixing angles to the
exterior of the cold room. Fix them to each other rotating the angles with the help of an hexagonal key.
4.2. Repeate these steps until all the ceiling angles are installed correctly.
NOTE: These ones can also be installed while you are placing the vertical panels.
Make sure of the correct ceiling alignment with the vertical panel.
4.3. With the help of one or more people put- up the ceiling panels (Piece G) to the height of the ceiling
angles
(Piece C4). Position the openings of the fixing angles to the interior of the cold room.
4.4. Proceed to the adjusting, lining-up and rotating the angles with a screwdriver.
NOTE: If Omega Ceiling
supports exist (Piece J) to install, don´t forget to put them up during the assembling of the ceiling panels.
IMPORTANT NOTE: Don´t let go the ceiling panels until they are fixed at least on two of the sides!
EN