When choosing a cold room with floor, the assembling is initiated by applying the Ventilation Strips
(Piece A – Optional)
; of the
Floor Panels
(Piece B)
and only then the Floor Angles
(Piece C2)
.
In this model, all elements are simply settled on the floor, without any interference when fixing it to surfaces.
2.3. Door installation:
2.3.1.
Place the sides of the door (interior) on the oor, aligned with the location where it is to be installed.
The door should be within the limits of the cold room.
(See Illustration)
2.3.2.
Remove the two tops that hide the 2 holes of the cylinders base.
2.3.3. Measure the distance between the holes and mark them on the oor, then drill the holes.
2.3.4. Insert the plugs and x the rubber cylinder to the oor.
2.3.5. Now raise the door and t it in the base´s holes in the cylinder.
You are now prepared to start installing the vertical panels.
2(B). MATRIX WITH FLOOR
2.1. Placement of the
Ventilation Strips:
2.1.1.
Arrange the various profiles that form the
ventilation strips
(Piece A) in the installation place of the
cold room in intervals of 40 cm. NOTE: The panels are put in perpendicular to the length of the cold room.
2.1.2. The strips placed at the ends of the cold room should be 20 cm far from its previous.
NOTE: If you chose reinforced floor panels all the strips should have 20 cm
distance between them.
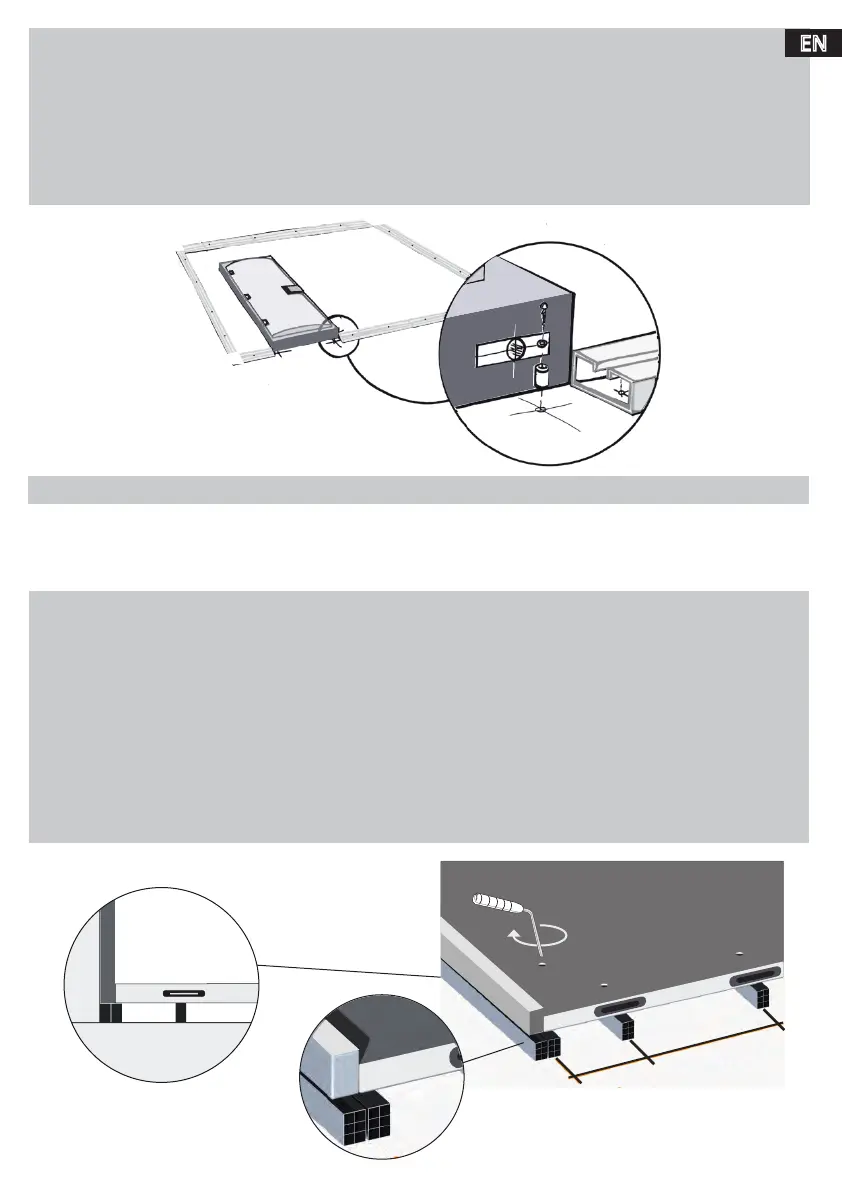
2.1.3. Put the first floor panel
(Piece B) parallel to the floor strips.
NOTICE: Be sure that the white surface of the panel is turned down.
2.1.4. Put the following panels lined up according to the drawing of your cold room.
2.1.5. Fix them rotating the key ¼ of turn in the panel’s holes, always confirming if they are well secured on
to each other. Fill in all of the perimeter of the cold room with the floor angles
(Piece C2).
Start in one of the sides where an outside ventilation strips exists
(Piece A).
2.1.6. Fix them to the floor panels rotating the key.
20
40
EN