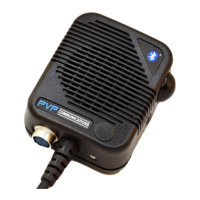
The PVP Communications, Inc. Motor-One™ Wireless Speakermic is a specialized communication system designed for motorcycle use, integrating portable and mobile radio communications with a helmet-mounted headset. This system aims to provide durable, strong, and easily installable communication solutions for law enforcement and other professionals operating motorcycles.
Function Description:
The Motor-One™ system allows for seamless communication through a shouldermic, which can be used independently or connected to a helmet headset for enhanced functionality. It supports both portable radio communication and integration with the motorcycle's mobile radio and siren PA system. The core of the system is a wireless transceiver, enabling a unique pairing link between the shouldermic and a motorcycle kit.
Operating Modes:
-
Helmet Disconnected:
- When the accessory connector is attached to the portable radio, the radio is turned on.
- The PTT (Push-To-Talk) switch on the shouldermic is used to transmit via the shouldermic microphone. The PTT switch on the portable radio itself does not activate this accessory microphone.
- Receive audio from the portable radio is muted at the radio and routed to the shouldermic speaker.
- The shouldermic contains a rechargeable Li-Ion battery that powers the internal wireless transceiver and requires daily charging.
- If the internal Li-Ion battery fails, the shouldermic and helmet headset will still operate with the portable radio, but wireless functionality will be lost.
-
Helmet Attached:
- The helmet headset connector is attached to the shouldermic.
- The shouldermic speaker mutes, and portable radio receive audio is routed to the helmet earphones.
- The shouldermic microphone mutes, and the helmet microphone activates when the PTT switch on the shouldermic is pressed.
- The wireless transceiver in the shouldermic automatically powers on (auto power-on mode), and the status indicator LED begins flashing.
-
Mount Motorcycle (Paired Mode):
- After the shouldermic and motorcycle kit are paired, the status LED on both devices displays a green pulse every 7 seconds, indicating an active wireless connection.
- Handlebar PTT Switches:
- Black Switch: When pressed, keys the motorcycle mobile radio, transmitting helmet microphone audio over the mobile radio. The larger red PTT status LED on the motor illuminates.
- Red Switch: When pressed, keys the Siren PA feature, broadcasting helmet microphone audio through the siren speaker.
- PA Broadcast Volume Adjustment: When performing a PA broadcast for the first time, volume adjustment is crucial to prevent feedback (squealing) or insufficient audibility. Volume is adjusted at the siren amplifier. An additional PA gain adjustment is available at the transceiver module using a small flat blade screwdriver. When testing, ensure the siren speaker is directed to an open area, and the helmet microphone is on-axis and close to the user's mouth (within 1/4").
- Mobile Radio Transmit Volume Adjustment: For mobile radio broadcasts, volume adjustment is necessary to avoid wind noise distortion at speed or insufficient audibility. This is adjusted with a small flat blade screwdriver at the transceiver module. It's important to set the helmet microphone volume to match the mobile radio handmic volume by comparing transmissions using another radio. When testing, ensure the helmet microphone is on-axis and close to the user's mouth (within 1/4").
Usage Features:
- Power On/Off Modes: The wireless transceiver can be configured for "auto power-on" or "manual power-on" mode using the black "Power on-off" switch.
- Auto Power-On: (Factory pre-programmed and recommended) The transceiver powers on automatically when battery power is applied, which occurs when the helmet headset is connected.
- Manual Power-On: Requires connecting the headset and pressing and holding the power on-off switch for 2-3 seconds until the status LED lights.
- Power Off: Reverse the 2-3 second procedure for power off. The status LED transitions to a solid color before powering off.
- Changing Power-On Modes:
- To enter manual power-on mode: With the transceiver powered on, press the power switch quickly 3 times within one second.
- To enter auto power-on mode: With the transceiver powered on, press the power switch quickly 4 times within one second.
- Pairing Procedure:
- The shouldermic must be "paired" to a motor kit to establish a unique wireless link. This pairing is remembered by both devices even after power-off.
- Steps:
- Connect the helmet to the shouldermic (shouldermic powers on, LED flashes).
- Power off the shouldermic by pressing the power switch for 2-3 seconds until the LED transitions to a solid color, then release.
- Verify the motor kit is powered off (ignition on or direct battery connection).
- From the powered off condition, press the power switch at the control head for 7-9 seconds until the LED toggles red-green-red-green, then release (motor kit enters pairing mode).
- From the powered off condition, press the power switch at the shouldermic for 7-9 seconds until the LED toggles red-green-red-green, then release (shouldermic enters pairing mode).
- Within 15 seconds, the wireless connection will be established, and both devices will display a green status LED flash every 7 seconds.
- Helmet Connector Polarization: The helmet connector is polarized and must be rotated to the proper position to snap into place. The cable coils should lay against the officer's uniform (just above the badge if worn at the lapel) to simplify connection.
- Remote PA Option: For shouldermics with the Remote PA option, pressing the Remote PA switch at the shouldermic keys the PA and transmits helmet microphone audio. This feature is rated for operation within 15 ft of the motorcycle.
- Audio Routing: Helmet earphone receive audio is always obtained from the portable radio. Turning off the portable radio will result in loss of helmet earphone audio.
Maintenance Features:
- Daily Charging: The shouldermic's internal rechargeable Li-Ion battery should be charged daily.
- Troubleshooting: If the internal Li-Ion battery fails, the shouldermic and helmet headset will still operate with the portable radio, maintaining basic communication functionality.
- Installation Instructions: Users are advised to follow installation instructions carefully to avoid damaging radio equipment or kit components. Support is available Monday through Friday, 7 AM to 4 PM Pacific Time, USA, by calling (310)212-5432.
Warranty:
PVP Communications, Inc. provides a one-year warranty from the date of original retail purchase, covering defects in material or workmanship. The company will repair or replace defective parts or equipment at its option. The warranty does not cover misuse, neglect, incorrect electrical or mechanical installation, unauthorized modifications, accidents, or repairs/alterations performed outside of PVP Communications, Inc. The warranty is extended only to the original owner and is not transferable. In case of a warranty claim, the product should be shipped prepaid to PVP Communications, Inc. Transportation charges, insurance fees, and labor costs for shipment, removal, or reinstallation are not covered. Loss or damage during shipment is the freight carrier's responsibility. Repair under this warranty is the exclusive remedy. PVP Communications, Inc. is not liable for incidental or consequential damages or for breach of any express or implied warranty. Any implied warranty of merchantability or fitness for a particular purpose is limited to the duration of the warranty. Some states may not allow limitations on incidental or consequential damages or implied warranty duration. The company reserves the right to make design changes and improvements without obligation to incorporate them into previously manufactured products. This warranty is effective for all products manufactured after 01/01/95.