User Manual
使用マニュアル
- 27 -
12 注意事项
•
強い振動を避け、自己で分解、改造、修理しないでください。
•
液体や他の物がコントローラー内部に入らないようにし、損傷を防止してください。
•
湿気、高温、油煙などの場所に保管しないでください。
•
内部に電池があるため、コントローラーを火に投げ込まないでください。爆発の危
険があります。
•
子供は大人の監督のもとで本製品を使用してください。
•
品質の問題や提案がある場合は、販売業者またはアフターサービスの担当者に連
絡してください。
13 製品仕様
製品型番
PXN-P50S
接続方法
ワイヤレス/有線接続
動作電流
動作時50mA、振動時220mA以下
動作電源
内蔵750mAhリチウム電池
製 品サイズ
約 163*106*61 mm
パッケージサイズ
約 195.5*150*75.5 mm
本体重量
約 210 g
使用温度
10~40 ℃
使用湿度
20-80 %
コントローラーが機能が乱れたり、フリーズしたり、他の異常が発生した場合、電源ボタン
を短く押して電源を切り、その後電源ボタンを8秒間長押しすると、コントローラーが1回
振動し、工場出荷時の設定に戻ります。工場出荷時の設定に戻った後、再度ペアリングし
て 接 続してくだ さい 。
復元内容: キーリピート設定をクリアし、コントローラーのキーリピート速度はデフォルト
で5 回/秒、コントローラーの振動設定はデフォルトで中程度、コントローラーのスリープタ
イムはデフォルトで5分、コントローラーのマクロ設定を工場出荷時の設定に復元します。
11 リセット 機 能
- 26 -
10 スリープ機能
コ ントロ ーラ ー の 状 態
スリープモードに入る
初回ペアリング状態
再接続状態
動作状態
電源オフ状態で
「
L3+L
」
ボタンを押しながら、
「
十字キー上/下
」
で自動
スリープ時間を調整できます
接続がない状態が30秒続くと
接続がない状態が60秒続くと
何も操作や動きが5分間ないと
5分間のスリープ中、
LED1が一瞬点灯します
10分間のスリープ中、
LED1とLED2が一瞬点灯します
20分間のスリープ中、
LED1とLED2とLED3が一瞬点灯します
スリープが解除されると、
LED1とLED2とLED3とLED4
L
09 充電機能
充電電源:標準的USB 5V電圧で、スマートフォン充電器、コンピュータなどのUSBポート
を使用してコントローラーを充電できます。コントローラーの充電完了時間は約2~3
時間です。
動作状態
電源オフ状態
電池残量状態コ ントロ ーラ ー の 状 態
インジケーターライトの状態
低電量
ゆっくり 点 滅
点滅
ゆっくり 点 滅
長く点 灯
充電中
フル充 電
充電中
フル充 電
消灯
•
アプリモード(デバイスに接続する必要はなく、アプリにのみ接続)
ステップ 1
「 」ボタンと「 」ボタンを同時に3秒間長押しし、コントローラーの
LEDが4つ点滅してアプリモードに入ります。
ステップ 2
アプリを開いてコントローラーが自動的に接続されるのを待ちます。
コントローラーのLEDが長く点灯し、接続が成功したことを示します。
- 20 -
対応プラットフォーム:SWITCH、PC、Android、iOS
SWITCHデバイス:SWITCH、SWITCH LITE、SWITCH OLED
PCデバイス:Windows 7 / 8 / 10 / 11
iOSデバイス:iOS 13.0以上
Androidデバイス:Android 8.0以上
02 システム要件
電源ON:電源ボタンを3秒間長押しして電源を入れ、ペアリングモードに入ります。
電源OFF:電源ボタンを短く押して電源を切ります。
03 電源のオン/オフ
Switchにコントローラーを接続した後、モバイルアプリ「PXN controller」を使用
してコントローラーの機能を調整できます。
iOS の場合は、App Store で 「PXN Play」 を検 索してダウンロ ードします。
Android のダウンロード: Google Play で 「PXN Play」 を検索します。
- コントローラーのマクロ機能設定と共有
- コントローラーのスティック感度調整
- コントローラーの振動強度調整
- コントローラーのボタン連射調整
- コ ント ロ ー ラ ー の ス ティック と ジャ イ ロ の キ ャリブレ ー ション
- コ ントロ ーラー のスリープ タイム 調 整
その他の機能は引き続き開発中です。
04 モバイルAPP機能
•
モード切替え
コ ントロ ーラー が アプリモ ードの 場 合 、コ ントロ ーラー の「 」ボタンと「 」ボタン
を同時に5秒間長押しするとXinputモードに切り替わり、「 」ボタンと「 」
ボタンを同時に5秒間長押しするとSwitchモードに切り替わります。
- 21 -
SWITCHドックのUSBポート
OTG
アダプタ
•
SWITCH本体の再接続とウェイクアップ
BT接続モードでコントローラーの「 」ボタンを押すと、再接続が行われ、SWITCH
本 体 がウェイクアップされます。
•
有線接続
SWITCHのホーム画面から 「 設定」→「コントローラーとセンサー」→
「Proコントローラーの有線通信」を選択し、「Proコントローラーの有線通信」
が オンに なっていることを確 認してくだ さい 。
-
SWITCH本体と接続する
* 有線接続を行う前に、コントローラーを電源オフま
た は スリープ 状 態 にしてくだ さい 。
ステップ 1
Type-CデータケーブルとOTG変換アダプターを
使用してコントローラーとSWITCH本体を接続します。
ステップ 2
LEDライトの最初のランプが点滅し、コントローラー
の接続が成功しました。
(注:OTG変換アダプターは別途購入が必要です。)
-
SWITCHのドックと接続する
* 有線接続を行う前に、コントローラーを電源オフま
た は スリープ 状 態 にしてくだ さい 。
ステップ 1
Type-Cデータケーブルを
使用してコントローラーとSWITCHのドックを接続します。
ステップ 2
LEDライトの最初のランプが点滅し、コントローラーの接続が成功しました。
「コントローラー」 →
「持ちかた/順番を変える」
電源ボタンを 3 秒間
長 押しします
•
ワイヤレス接続
ステップ 1
SWITCH本体のメイン画面下部から、
コントローラーを選択して「握り方/順序の変更」
に進みます。
ステップ 2
コントローラーの電源ボタンを3秒間
長押ししてペアリングモードに入り、現在の残量が
表示された後、コントローラーの4つのLEDが循環的
に点滅して接続状態に入ります。
ステップ 3
接続が成功すると、コントローラーのLED
ライトが1番目のライトを点灯させ、接続が成功
したことを示します。
05 SWITCHプラットフォームの使用方法
- 25 -
電源を入れた後、「 ボタン + 左スティック上/下」を押しながら、モーターの振動強度
を調整できます。コントローラーの振動はデフォルトで中程度に設定されています。振動
調整には記憶機能があります。
•
コントローラーの振動調整機能
シャット ダ ウン
強力モード
L
振動なし
弱振動(30%)
中程度の振動(70%)
強力な振動(100%) LED1+LED2+LED3が1回点滅します
LED1+LED2が1回点滅します
LED1が1回点滅します
すべてのLEDが消灯します
アクションキ ー : 左 ス テ ィ ッ ク( 上 、下 、左 、右 )、右 ス テ ィ ッ ク( 上 、下 、左 、右 )、十 字 キ ー
(上、下、左、右)、ABXY、L/R/ZL/ZR/L3 /R3/ / 。
プログラミングキー : M1 、M2。
① キーを押したまま、プログラミング キー M1 または M2 のいずれかを押すと、
キーの白色ライトが常に点灯し、プログラミング状態に入ります。
② 左ジョイスティック(上下左右)、十字キー(上下左右)、ABXY、L/R/ZL/ZR/L3など、
プログラムする必要のあるアクションキーを押します。 /R3で入力します。
③ プログラミング後、プログラミングキーを押すと、白色のライトが消え、オレンジ色の
ライトが点灯したままになります。 (マクロプログラミングの各グループに対して、最大
64 個のアクション キーをプログラムできます。アクション キーの数が 64 を超えると、
プログラム後オレンジ色のライトが点灯し続けます。)
① キーを押したまま、プログラミング キー M1 または M2 のいずれかを押すと、
キーの白色ライトが常に点灯し、プログラミング状態に入ります。
② もう一度プログラミングキーM1またはM2を押すと、マクロキーのプログラミングが
解除されます。 クリアが完了すると、白色のライトが消え、オレンジ色のライトが点灯
したままになります。
マクロプログラミング機能の設定:
マクロプログラミング機 能クリア:
バックキーを無効にする:コントローラーでM1またはM2ボタンを押しながら キーを押す。
バックキーを有効にする:コントローラーでM1またはM2ボタンを押しながら キーを押す。
バックキー機能を無効にした状態で、アプリを使用してバックキーの設定を行い、設定を保存
して適用すると、対応するバックキー機能が有効になります。
マクロプログラミングのキー割り当てを素早く無効化
•
マクロプログラミング(MACRO)機能
- 18 -
12
Attention
•
Avoid strong vibrations; do not disassemble, modify, or attempt repairs.
•
Prevent water or other liquids from entering the controller to avoid damage.
•
Avoid storing in humid, high-temperature, or oily environments.
•
The controller contains a battery; do not dispose of it in a fire, as it may explode.
•
Children should use this product under adult supervision.
•
For any quality issues or suggestions, please contact the retailer or customer
support.
13 Product Specifications
Model
PXN-P50S
Connection Method
Wireless / Wired Connection
Working Current
50mA during working, <220mA during vibration
Working Power
Built-in 750mAh lithium battery
Product Size
About 163*106*61 mm
Package Size
About 195.5*150*75.5 mm
Product Weight
About 210 g
Operating Temperature
10~40 ℃
Operating Humidity
20-80 %
When the controller experiences function confusion, freezes, or other anomalies,
short press the [Power Switch] to enter the power-off state, then long press the
[Power Switch] for 8 seconds. The controller will vibrate once to indicate successful
factory reset. After the factory reset, proceed to re-pair and connect.
Restoration includes: clearing Turbo function, resetting the controller's Turbo rate
to default (5 times/second), reverting the controller's vibration setting to medium,
resetting the controller's sleep time to default (5 minutes), and restoring the
controller's macro configuration to factory settings.
11 Reset Function
- 17 -
10
Sleep Function
Controller State
Enter Sleep State
Initial Pairing State
Reconnection State
Working State
Press [L3 + L] in Power OFF
state, then the auto sleep time
can be adjusted by operating
UP/ DOWN of D-pad.
30 seconds of no connection
60 seconds of no connection
5 minutes of no action or movement
Sleep after 5 minutes,
LED1 will flash once
Sleep after 10 minutes,
LED1+LED2 will flash once
Sleep after 20 minutes,
LED1+LED2+LED3 will flash once
Sleep function OFF,
LED1+LED2+LED3+LED4 will flash once
L
09
Charging Function
Power Supply for Charging: Standard USB 5V voltage. The controller can be
charged using a mobile phone charger, computer, or other USB interfaces.
The controller takes about 2-3 hours to be fully charged.
Working State
Power OFF State
Battery StateController State
Indicator State
Low Battery
Slow Flashing
Flash
Slow Flashing
Remain ON
Charging
Full Charge
Charging
Full Charge
OFF
- 11 -
Supported Platform: SWITCH, PC, Android, iOS
SWITCH Device: SWITCH, SWITCH LITE, SWITCH OLED
PC: Windows 7/ 8/ 10/ 11
iOS Device: iOS 13.0 and above
Android Device: Android 8.0 and above
02
System Requirement
Power ON: Long press [Power Switch] for 3 seconds to power ON and enter pairing.
Power OFF: Short press [Power Switch] to reset and power OFF.
03
Power ON / OFF
After connecting the controller to the device, controller functions can be
configured through the mobile app.
•
APP Mode (No need to connect the devices, only connect to the APP)
Step 1
Long press + buttons for 3 seconds, and the controller's LED4 will
flash to enter the APP Mode.
Step 2
Open the mobile app and wait for the controller to connect automatically.
The controller's LED4 will stay on to indicate a successful connection.
•
Mode Switching
When the controller is in APP mode, long press + buttons for 5 seconds to
switch to Switch mode, or long press + buttons for 5 seconds to switch to
Xinput mode.
Download for iOS: Search [PXN Play] on the App Store.
Download for Android: Search [PXN Play] on Google Play.
- Controller Macro Function Setting and Sharing
- Controller Joystick Sensitivity Adjustment
- Controller Vibration Intensity Adjustment
- Controller Turbo Function Adjustment
- Controller Joystick and Motion Sensor Calibration
- Controller Sleep Time Adjustment
* More functions are under continuous development.
04
Mobile APP Function
- 12 -
USB Port of SWITCH Dock
OTG
Adapter
•
SWITCH Reconnection and Wake-up
In Wireless connection mode, press button on the controller can reconnect and
wake up the SWITCH.
•
Wired Connection
Click [Setting] on the SWITCH homepage
→
[Controllers and Sensors]
→
click
[Pro Controller Wired Connection]. Please make sure this option state is ON.
- Connect with SWITCH Console
* Please make sure the controller is OFF/ under Sleep
state before the wired connection.
Step 1
Connect the controller to the SWITCH using
a Type-C data cable and an OTG adapter.
Step 2
LED1 indicator on the controller will flash to indicate
a successful connection.
(Note: The OTG adapter needs to be purchased separately)
- Connect with SWITCH Dock
* Please make sure the controller is OFF/ under Sleep
state before the wired connection.
Step 1
Connect the controller to the SWITCH Dock
using a Type-C data cable.
Step 2
LED1 indicator on the controller will flash to
indicate a successful connection.
•
Wireless Connection
Step 1
Click [Controller]
→
[Change Grip/ Order] on the SWITCH homepage.
Step 2
Long press [Power Switch] for 3 seconds to enter pairing. After displaying
the remaining battery, the controller's four LED lights will flash in a loop, indicating
connection status.
Step 3
Once connected successfully, the controller's LED1 will stay on to indicate
a successful connection.
05
How to use on SWITCH
Controller → Change Grip/Order
Long press
[
Power
Switch]
for 3 seconds
- 14 -
•
Wired Connection
Step 1
Connect the controller to a USB port on the PC
using a USB data cable.
Step 2
The computer will prompt that new hardware is
detected and installation is complete. The controller's
LED2 indicator light will flash to indicate a successful connection. Once connected,
the controller will be in Xinput mode. (When fully charged, the LED2 indicator light
will remain on.)
PC
•
Wireless Connection
Step 1
Under the controller off state, long press the + buttons for
3 seconds. Release the buttons when the LED2 light rapidly flashes, indicating
pairing mode.
Step 2
In the PC Bluetooth settings, search for "Xbox Wireless Controller" and
initiate the pairing connection.
Step 3
Once connected successfully, the controller's LED2 light will remain on.
•
Mode Switching
After connecting the controller to the Dongle, simultaneously long press the [ ]
and [ ] buttons for 3 seconds to switch modes.
PC SWITCHPC X-input
long press the [ ] and [ ] buttons for
3 seconds to switch modes
( LED2 ON ) ( LED1 ON )
PC D-input
( LED3 ON )
BT and other devices > Device
BT
Other
Open
Add device
Xbox Wireless Controller
Add device
08
Auxiliary Function
The buttons that can be set for TURBO function are: A, B, X, Y, L, R, ZL, ZR.
•
Turbo Function
Manual
Turbo
Auto
Turbo
Clear
Turbo
Clear
all Turbo
Function
Button
Turbo Rate
Adjustment
+
Function
Button
+
Function
Button
or
+
After the initial setup, long pressing the function
button to launch Turbo manually, and
indicator will flash in orange.
+
Up
Down
R
+
Hold down button and adjust the Turbo
rate by operating the Right Joystick Up/Down.
The default rate is 5 times/second.
5 times/second, LED1 will flash once.
10 times/second, LED1+LED2 will flash once.
15 times/second, LED1+LED2+LED3 will flash
once.
After the second configuration, press the
function button to launch Turbo automatically,
and indicator will flash in orange. Press the
button again to pause the Turbo function.
After the third setting, the programmed Turbo
function will be cleared, and indicator will
not flash in orange.
Clear the Turbo function set for all function
buttons.
- 15 -
•
Wireless Connection
Step 1
Under the controller off state, long press the + buttons for
3 seconds. Release the buttons when the LED2 light rapidly flashes, indicating
pairing mode.
Step 2
In the Bluetooth settings of Android or iOS device, search for
"Xbox Wireless Controller" and initiate the pairing connection.
Step 3
Once connected successfully, the controller's LED2 light will remain on.
07
Connect with Android/ iOS
Available Devices
BT Open
Xbox Wireless Controller
- 10 -
Thank you for choosing and supporting PXN, please read this manual
carefully before starting to enjoy your gaming experience.
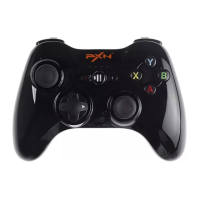
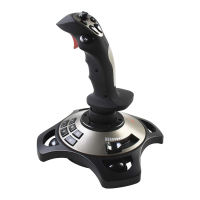
Left
Joystick
A/B/X/Y
Button
Screenshot
Button
D-pad
Programming
Button M1
Programming
Button M2
Power
Switch
L Button
ZL Button
Type-C
Charging Port
R Button
ZR Button
LED
indicators
Secondary
Function
Button
Right
Joystick
HOME
Button
Button Button
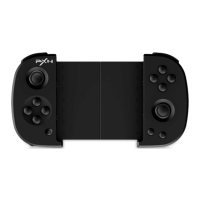
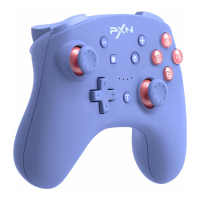
01 Product Overview
English
日本語
Action Buttons: Left Joystick (↑/ ↓/ ←/ →), Right Joystick (↑/ ↓/ ←/ →),
D-pad(↑/ ↓/ ←/ →), A/ B/ X/ Y/ L/ R/ ZL/ ZR/ L3/ R3/ / .
Programming Buttons: M1, M2.
- 16 -
After powering on and connecting, hold down [ ] and operate the Left Joystick
Up/Down to adjust the motor vibration intensity. The default vibration setting is
medium. The vibration adjustment feature includes a memory function.
•
Controller Vibration Adjustment Function
OFF
High
L
High Vibration
Low Vibration(30%)
Medium Vibration(70%)
High Vibration(100%) LED1+LED2+LED3 flash once
LED1+LED2 flash once
LED1flash once
All LED OFF
① Hold down button, then press either the M1 or M2 programming button.
The button's white indicator light will stay on, indicating programming mode.
② Press the action button that needs to be programmed, such as
Left Joystick (↑/ ↓/ ←/ →), D-pad(↑/ ↓/ ←/ →), A/ B/ X/ Y/ L/ R/ ZL/ ZR/ L3/ R3.
③ After programming, press the programming button, the white indicator goes off,
and the orange indicator remains on. (For each set of macro programming, you can
program up to 64 action buttons. When the number of action buttons exceeds 64,
the programming will end with the orange indicator staying on.)
① Hold down button, then press either the M1 or M2 programming button.
The button's white indicator light will stay on, indicating programming mode.
② Press one of the programming buttons, M1 or M2, to clear the programming of
the corresponding macro button. After clearing, the white light will turn off, and the
orange light will remain on.
- Macro Programming Configuration:
- Macro Programming Clear:
Disable Back Button: Hold down M1 or M2 on the controller, then press button.
Enable Back Button: Hold down M1 or M2 on the controller, then press button .
When the back button function is disabled, if you configure the back button settings
through the app and save and apply, the corresponding back button function will be
enabled.
- Macro Button Quick Deactivation
•
Macro Programming Function
-24 -
08 アシスト機 能
TURBO機能を設定できるボタンは:A、B、X、Y、L、R、ZL、ZR。
すべて のファンク ションキ ーで 設 定した バ ースト
機能を解除します
•
連射(TURBO)機能
マニュアル
ターボ
オート
ターボ
ターボを
解除
すべての
ターボをクリア
ター ボレート
調整
+
+
マニュアル
ターボ
マニュアル
ターボ
+
マニュアル
ターボ
2 番目の設定後、ファンクション キーを押すと
バーストが自動的にトリガーされ、 キーの
オレンジ色のライトが点滅します。 もう一度
押すとバーストを一時停止します
3回目の設定後に設定したバースト機能を
キャンセルすると、 キーのオレンジ色の
ライト が 点 滅 し なくな ります
+ or
加速する
減速する
R
+
キーを押したままにし、[右ジョイスティックを
上下] に動かしてバースト レートを調整します。
デフォルトは 5 回/秒です。
LED1 は 5 回/秒で 1 回点灯し、
LED1+LED2 は 10 回/秒で 1 回点灯します。
15回/秒 LED1+LED2+LED3が1回点灯した場合
最初の設定後、ファンクションキーを長押し
してバーストをトリガーすると、 キーの
オレン ジ 色 のラ イト が 点 滅 します
•
ワイヤレス接続
ステップ 1
コ ントロ ーラー を 電 源 オフの 状 態 で、コ ントロ ーラ ー の「 」と「 」
ボタンを3秒間長押しし、LED2が高速に点滅すると手を離してください。
コ ントロ ーラー は ペ アリングモ ードに 入 ります。
ステップ 2
AndroidまたはiOSデバイスのワイヤレス設定画面で
「Xbox Wireless Controller」を検索してペアリングします。
ステップ 3
接続が成功すると、コントローラーのLED2が点灯し続けます。
07 AndroidおよびiOSプラットフォームの使用方法
使用可能なデバイス
BT Open
Xbox Wireless Controller
All trademarks are the property of their respective owner. Technical specifications are subject
to change. lnformation contained herein is subject to change without prior notice. ShenZhen
PXN Electronics Technology Co., Ltd. shall not be made liable for any errors that may appear.
Please keep this information for later reference.
Nintendo SWITCH /Amiibo/NS/SWITCH is a registered trademark of Nintendo Co., Ltd.
“ ” is a registered trademark of ShenZhen PXN Electronics Technology Co., Ltd.
The controller features built-in NFC sensing function. When
the controller is connected to the SWITCH console via wireless
connection, and if the game supports Amiibo function, you can
use an Amiibo figure at the designated spot [ ] on the
controller to activate corresponding in-game items.
(It is recommended to use authentic Amiibo figures)
- 13 -
L
•
NFC Function
•
Controller Motion / 3D Joystick Calibration
When motion function is abnormal or the joystick experiences drifting, you can utilize
the controller calibration feature.
Step 1
In sleep mode, simultaneously press the [L3+R]
buttons to enter calibration mode. The controller's four
LED lights will alternate flashing in two groups.
Step 2
Rotate the left and right sticks simultaneously for 2-3 times and ensure the
sticks reach the outermost positions.
Step 3
Place the controller on a level tabletop, then press the [ ] button on the
controller. After releasing the button for 3 seconds, the sensor and 3D joystick
calibration will be automatically completed. The controller will enter sleep mode
at this time.
Rotate the 2 joysticks for 2~3 times Place the handle horizontally Press [ ] button
•
Dongle Connection
Step 1
Insert the Dongle into a USB port on the PC.
Step 2
Under the controller off state, long press the
[Power Switch] for 3 seconds, then press the button
on the Dongle. The Dongle's white light will rapidly
flash, indicating pairing mode.
Step 3
Once connected successfully, the controller's
LED2 light will remain on and the controller will default
to Xinput mode. (Note: The Dongle is not included;
separate purchase is required for use)
06
How to use on PC
PC
- 22 -
ゲームコントローラーにはNFCセンサーが内蔵されており、
コントローラーはBluetoothでNintendo Switch本体に接続
された後、対応するゲームがAmiibo機能をサポートしている
場合、正規のAmiiboフィギュアを使用して、コントローラーの
「 」ロゴの部分で対応するゲーム内のアイテムを
アクティベ ートできます。
(注:正規のAmiiboフィギュアの使用をお勧めします。)
L
•
NFC機能
•
コントローラーの体感/3Dジョイスティックのキャリブレーション
2つの ジョイスティックを
2~3回してください
ハンドル を水 平
に 置 いてくだ さい
「 」ボタンを
押してくだ さい
•
レシーバーの接続
ステップ 1
レシーバーをPCのUSBポートに挿入してください。
ステップ 2
コントローラーを電源オフの状態で電源ボタンを
3秒間長押しし、その後レシーバー上のボタンを押してください。
レシーバーの白いLEDが高速点滅してペアリングモードに入ります。
ステップ 3
接続が成功すると、コントローラーのLED2が点灯し、
コントローラーはデフォルトでXinputモードになります。
(注:レシーバーは標準付属品ではなく、別途購入が必要です)
06 PCプラットフォームの使用方法
体感機能が正常でない場合やジョイスティックが中央に戻らない場合には、
コントローラーのキャリブレーション機能を使用できます。
ステップ 1
スリープ状態で、コントローラーの 「L3+R」
ボタンを同時に押して、キャリブレーションモードに入り
ます。コントローラーのLEDライト4つが2つのグループに分かれて交互に点滅します。
ステップ 2
両方のスティックを同時に2~3回振り、スティックが最も端に触れることを
確 認 し ま す 。
ステップ 3
この状態でコントローラーを水平なテーブルに置き、コントローラーの
「 」ボタンを押し、ボタンを3秒間押したままにしてから離すと、センサーキャリブ
レーションおよび3Dスティックのキャリブレーションが自動的に完了します。この時点
でコ ントロ ーラー は スリープ 状 態 に 入 ります。
PC
- 23 -
•
有線接続
ステップ 1
USBデータケーブルを使用してコントローラー
をPCのUSBポートに接続してください。
ステップ 2
PCは新しいハードウェアを
検出し、インストールを完了するように促されます。
コントローラーのLED2が点滅します。(電池残量が満タンの場合、LED2が点灯
し続けます)これにより、接続が成功し、接続後はXinputモードになります。
PC
•
ワイヤレス接続
ステップ 1
コ ントロ ーラー を 電 源 オフの 状 態 で、コ ントロ ーラ ー の「 」と「 」
ボタンを3秒間長押しし、LED2が高速に点滅すると手を離してください。
コ ントロ ーラー は ペ アリングモ ードに 入 ります。
ステップ 2
PCのワイヤレス設定画面で「Xbox Wireless Controller」を検索
してペアリングします。
ステップ 3
接続が成功すると、コントローラーのLED2が点灯し続けます。
•
モード切替え
コントローラーをレシーバーに接続した後、同時に「 」と「 」ボタンを3秒間
長 押ししてモ ードを切り替えます。
PCのSwitchモードPCのXinputモード PCのDinputモード
同時に「 」と「 」ボタンを3秒間長押ししてモードを切り替えます
( LED2 が点灯 ) ( LED1 が点灯) ( LED3 が点灯 )
BT とその 他 のデバイス→ デバイス
BT
その他
Open
デバイスの 追 加
Xbox Wireless Controller
デバイスの 追 加