2
Open the box and you will nd below parts:
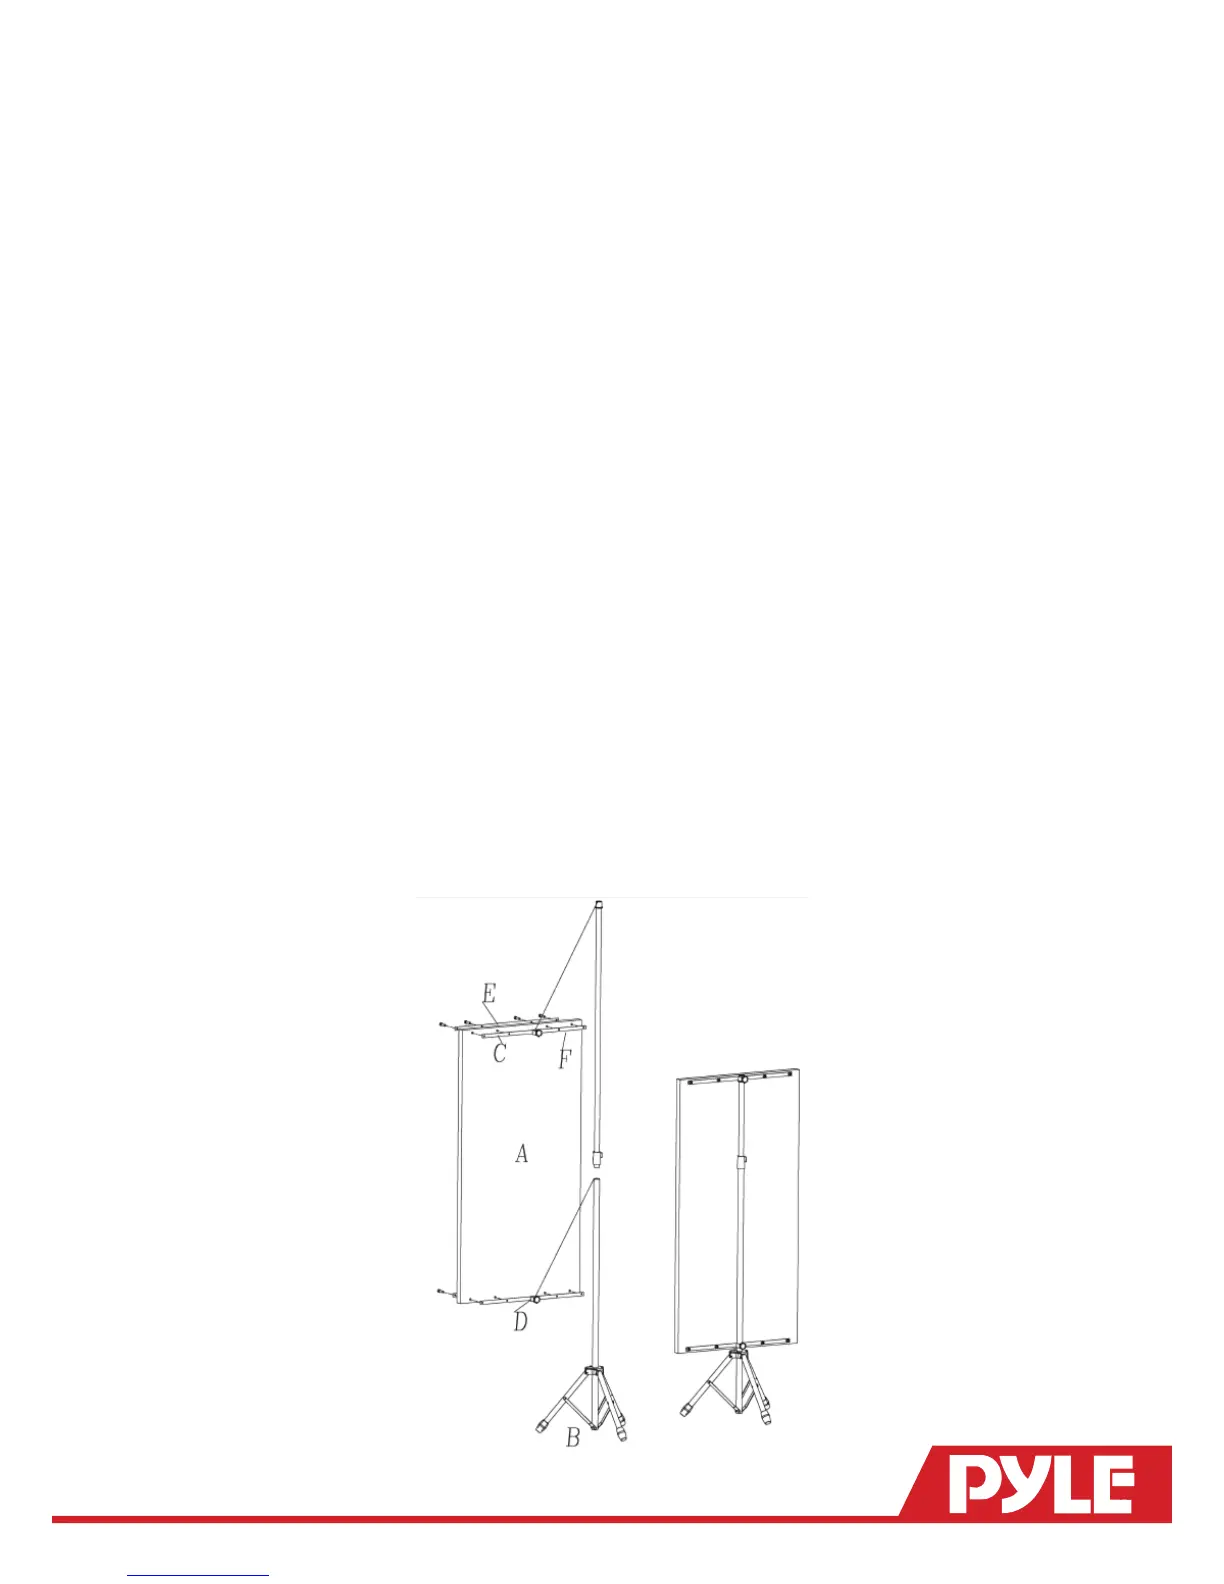
1* Foam (A)
1* Stand (B)
1* Steel at bar welded with a small round tube (C)
1* Steel at bar welded with a big round tube (D)
2* Steel at bars (maybe connected with above two bars)(E)
8* Bolts( maybe connected with above two bars)(F)
1* Allen key(G)
1. Align the at bar (C)(E) and (D)(E) with 4 holes on the foam(A) and use Allen key(G) and bolts(F) to put
them together. Don’t tighten the bolts too much.
2. Open the legs of the stand.
3. Pull away the top tube of the stand and take away the height adjusting knob in the middle of the
stand.
4. Put the at bar welded with big round tube(D) on the stand.
5. Install back the height adjusting knob back on the stand and install back the top tube.
6. Put the round tube of (C) on the top of the top tube of the stand and tighten the knob.
7. Adjust the height of the stand or adjust the height of the foam.
8. Pull down the bottom at bar a little down and make the foam to be as at as possible then tighten
the knob to keep the foam in tension.
*Thefoammaybenotatintherstfewhoursbecauseofthepackingbutitwillrecovertoit’sshape
verysoon,sodon’tworry.