1. The detector will tolerate animals of up to
20kg when the height of the animal is less
than 1 metre.
2. Do not install the detector looking at stairs.
3. Avoid placing the detector in direct sunlight.
4. Do not mount the detector near heaters or
radiators.
5. Do not mount the detector near open
windows or air vents.
6. Mount the detector on a stable surface.
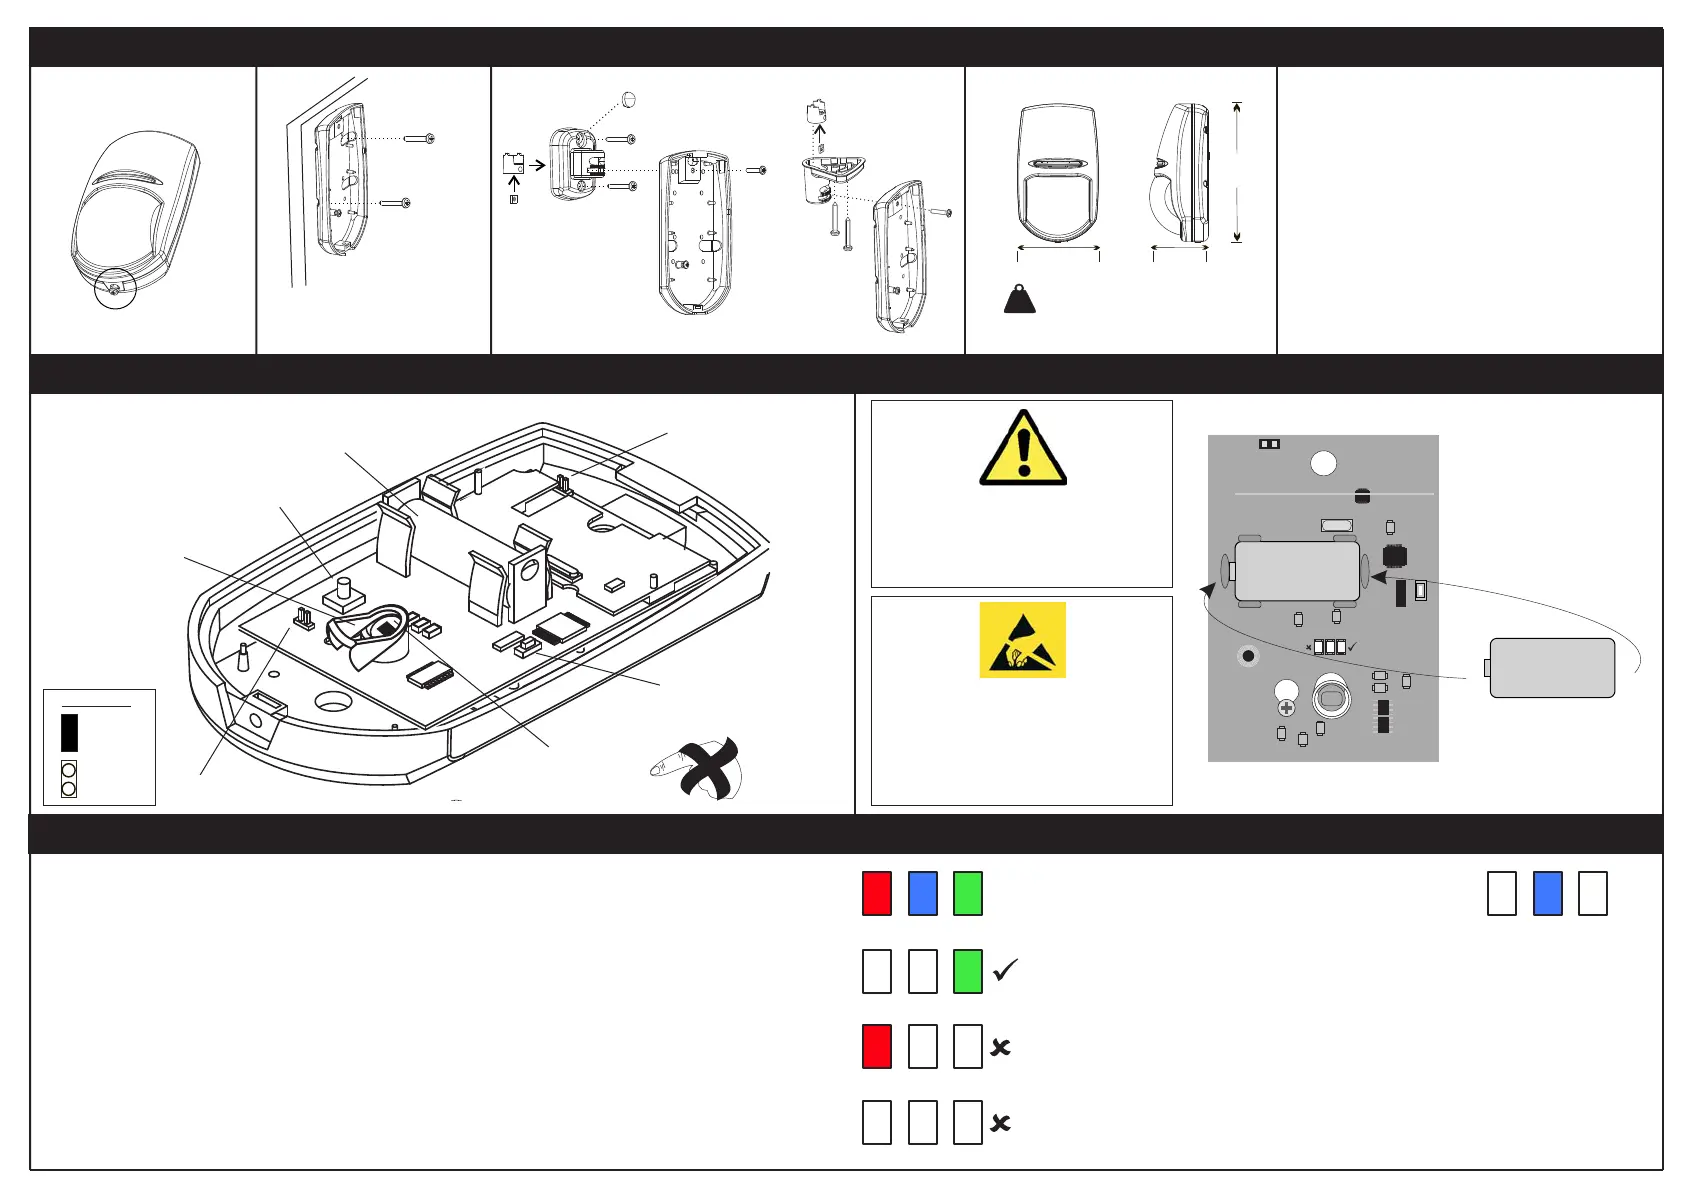
CASE LID
SCREW FITTING
NOTE: When mounting the
Part number: FPKXBRACKET
Wall Ceiling
detector, ensure that it is
not tilting backwards.
Installation Wall Mounting
The KX12DW-WE Printed Circuit Board
Learning the KX12DW-WE onto the Enforcer Control Panel
Changing The Battery
Optional Bracket Fitting Dimensions Avoiding False Alarms
69mm
(2.72”)
3mm
(0.12")
50mm
(2.2”)
117mm
(4.61”)
Kg
= 105g (3.4 oz) without bracket
RINS1421-1
Header On
= HIGH)
Header Off
= LOW
SENSITIVITY
DIGITAL SIGNAL
PROCESSING SELECT
To prevent possible damage to components,
any static charge on your body needs to be
eliminated before touching the inside of the
unit. This can be accomplished by touching
some grounded/earthed metallic conductor
such as a radiator/pipework immediately
before replacing the batteries.
The batteries supplied have been chosen to
provide long service life whilst, for safety
reasons, having limited output current.
Replace only with approved batteries.
Tamper Spring
Sensitivity Settings
Piro Sensor
DO NOT TOUCH
Learn Button
Battery
Header for Rear Tamper
+
-
When you are ready to learn the device to the
control panel receiving equipment, and when the
equipment is in the learn mode (see Enforcer
Programming Manual) follow the procedure
below.
1. Make sure the battery is installed correctly
and the plastic wrapping removed.
2. Press and Hold the Learn button until the
3 LEDs start cycling through the different
colours, then release the Learn button.
3. The device is correctly learnt when the
Green LED flashes.
The three coloured LEDs give a
visual indication of the signal
strength.
Green indicates good signal strength
and is a good location to install.
Red indicates poor signal
strength and the device should not
be installed in that position.
If no LED illuminates then the device
is completely out of range.
RED BLUE GREEN
The blue LED will illuminate
when the device is activated.
RED BLUE GREEN
RED BLUE GREEN
RED BLUE GREEN
RED BLUE GREEN
mralA
CR123A
LITHIUM
BATTERY
+
-
REAR TAMPER
NVM RESET
CR123A
LITHIUM
BATTERY
+
-
Pet mirror must
not be removed
 Loading...