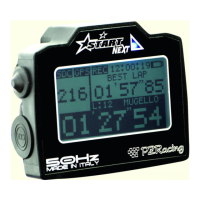
Start Next & Start Basic ST400
User Manual - v1.0 – 20/07/2022
Index
1 – Introduction......................................................................................................................................................................................................................... 1
1.1 – GPS Technology.......................................................................................................................................................................................................... 1
1.2 – Package content.......................................................................................................................................................................................................... 1
1.3 – Technical features...................................................................................................................................................................................................... 2
1.4 – Important information for correct usage................................................................................................................................................................... 2
2 – Chronometer components.................................................................................................................................................................................................. 2
2.1 – Touch screen.............................................................................................................................................................................................................. 2
3 – Installation.......................................................................................................................................................................................................................... 3
3.1 – Positioning................................................................................................................................................................................................................. 3
3.2 – Power......................................................................................................................................................................................................................... 3
3.3 – Internal memory....................................................................................................................................................................................................... 4
4 – How to use Start................................................................................................................................................................................................................. 4
4.1 – Switch on/off............................................................................................................................................................................................................. 4
4.2 – Registering sessions.................................................................................................................................................................................................. 4
4.3 – Screens...................................................................................................................................................................................................................... 4
4.4 – Menu and icons......................................................................................................................................................................................................... 5
4.5 – GPS Signal................................................................................................................................................................................................................. 6
5 – Configuration, SETUP menu............................................................................................................................................................................................... 7
6 – How to use and choose the finish line/circuit.................................................................................................................................................................... 8
6.1 – Closed circuit............................................................................................................................................................................................................. 8
6.2 – Point to point............................................................................................................................................................................................................ 8
6.3 – Acceleration............................................................................................................................................................................................................... 8
6.4 – Dyno Bench (solo Start Next).................................................................................................................................................................................... 8
7 – Storage of a new finish line/circuit..................................................................................................................................................................................... 8
8 – Session analysis.................................................................................................................................................................................................................. 9
8.1 – Viewing sessions and lap times................................................................................................................................................................................. 9
8.2 – Deleting a session...................................................................................................................................................................................................... 9
9 – Viewing values in real time................................................................................................................................................................................................. 9
10 – PC connection (only Start Next)....................................................................................................................................................................................... 9
10.1 – USB data download.................................................................................................................................................................................................. 9
10.2 – Wi-Fi........................................................................................................................................................................................................................ 9
11 – Gear indication (only Start Next with box expander)...................................................................................................................................................... 10
11.1 - Setting the gear using RPM/SPEED ratio (only Start Next).................................................................................................................................... 10
11.2 - Setting the gear using the analogue input (only Start Next)................................................................................................................................... 10
12 – Linear potentiometer calibration (only Start Next)........................................................................................................................................................ 10
13 – Accelerometer (only Start Next)...................................................................................................................................................................................... 10
14 – Self-diagnosis................................................................................................................................................................................................................... 11
15 – Firmware installed and date of first use........................................................................................................................................................................... 11
16 – Replace the startup image................................................................................................................................................................................................ 11
1 – Introduction
Thank you for choosing a PZRacing product. Start is a state-of-the-art GPS chronometer. There are many advantages to this technology: you will no
longer need to place a bulky infra-red transmitter at the side of the track, you can even view split times on the display and thanks to specially designed
software, you can view all the trajectories covered on a given track. Start is the only chronometer in the world to use a 50Hz receiver and a touch screen
pad with "Gloves Sensitive" technology which makes it possible to use the device even when wearing gloves.
Start Next and Start Basic are two chronometers of the same product line and they function in the same way. However, Start Basic
does not allow data acquisition and box expansion connection.
Please note: PZRacing products are water resistant but not waterproof; do not wash the product with pressurised water and keep
the lateral tab closed at all times; failure to do so could cause permanent damage to the product.
1.1 – GPS Technology
The Global Positioning System (also known as GPS) is a satellite positioning and navigation system which, thanks to a network of artificial satellites in
orbit, sends information about geographic coordinates and the time to a GPS receiver, in any weather conditions and on any place on Earth. Its
functioning principle is based on a spherical positioning method which measures the time taken by a radio signal to cover the distance from a satellite to
a receiver. One of the main features of GPS receivers is the update frequency expressed in Hertz (Hz); this measurement unit indicates how many times
per second the satellite receiver is capable of updating its position. Start has a state-of-the-art GPS receiver with an updating frequency of 50Hz (50
times per second), which translates into higher precision in calculating the time and visualising trajectories.
1.2 – Package content
– Start Next / Start Basic
– USB cable type C
– Fixing Velcro strap
– No.4 screws for plastic adaptor
– Plastic adaptor for bolt
– M6x3cm bolt for fixing onto the bracket
– Self-locking M6 nut
– Metal washers
– No.1 anti-vibration PVC plane washers
– No.1 anti-vibration PVC conical washers
PZRacing Via de Gasperi 5 – 61032 Fano (PU) Italy - Tel: +39 0721 820434 – Email: tech@pzracing.it