Do you have a question about the Q Acoustics 3000FSi and is the answer not in the manual?
Manual overview and safety guidelines for product installation and use.
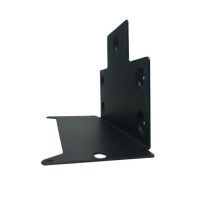
List of components provided with the subwoofer wall bracket.
List of necessary tools for the installation process.
Attach vibration damping pads to the wall bracket in the specified position.
Mark screw hole positions, ensuring the bracket is perfectly horizontal.
Secure the bracket to the wall, ensuring the wall and fixing method support the load.
Position the subwoofer onto the mounted bracket, aligning feet and holding back flat.
Loosely insert the front two screws, but do not tighten fully.
Align the rear screws and screw them in loosely.
Tighten all four screws evenly until the subwoofer sits flat on the bracket.
Consult the subwoofer's full manual to complete the system installation.
| Material | Metal, Plastic |
|---|---|
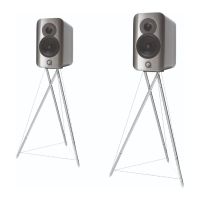
| Placement | Floor |
| Certification | CE |
| Compatibility | M20, Q 3010i, 3020i |
| Product color | White |
| Number of legs | 4 leg(s) |
| Number of pivot points | 4 |
| Package type | Box |
| Quantity per box | 2 pc(s) |
| Spikes included | Yes |
| Depth | 290 mm |
|---|---|
| Width | 250 mm |
| Weight | 6200 g |
| Height (max) | 682 mm |