THE INSTALLATION PROCEDURE
The rst steps of the installaon will vary depending on whether the Leak Detector is being installed as part of a new QETTLE
system installaon or whether you are retro-ng it to an exisng installaon. Please follow the applicable secons outlined
below...
Installaon as a Retro-t
1. Switch o the electricity to your tap’s boiler tank by using the switch located on the front of the tank.
2. Run the boiling water unl the water runs cold—this will take a good couple of minutes or so.
3. Under the sink, shut o the water supply to your tap’s lter unit using the adjacent shut-o valve. Run the ltered cold and
ltered boiling water alternately again to de-pressurise the system.
4. Unscrew the inlet hose to the lter housing from the shut-o valve. The hose will contain water, so we recommend having a
towel or cloth to hand and a receptacle to catch any residual water.
5. Now follow the remaining steps outlined in the ‘Main Installaon Process’ secon below.
Installaon with a new QETTLE system
1. You should begin installing the Leak Detector once you have completed the steps outlined in ‘THE PLUMBING’ secon found
on page 5 of the QETTLE system installaon guide. Once you have got to that stage please follow the remaining steps out-
lined in the ‘Main Installaon Process’ secon below.
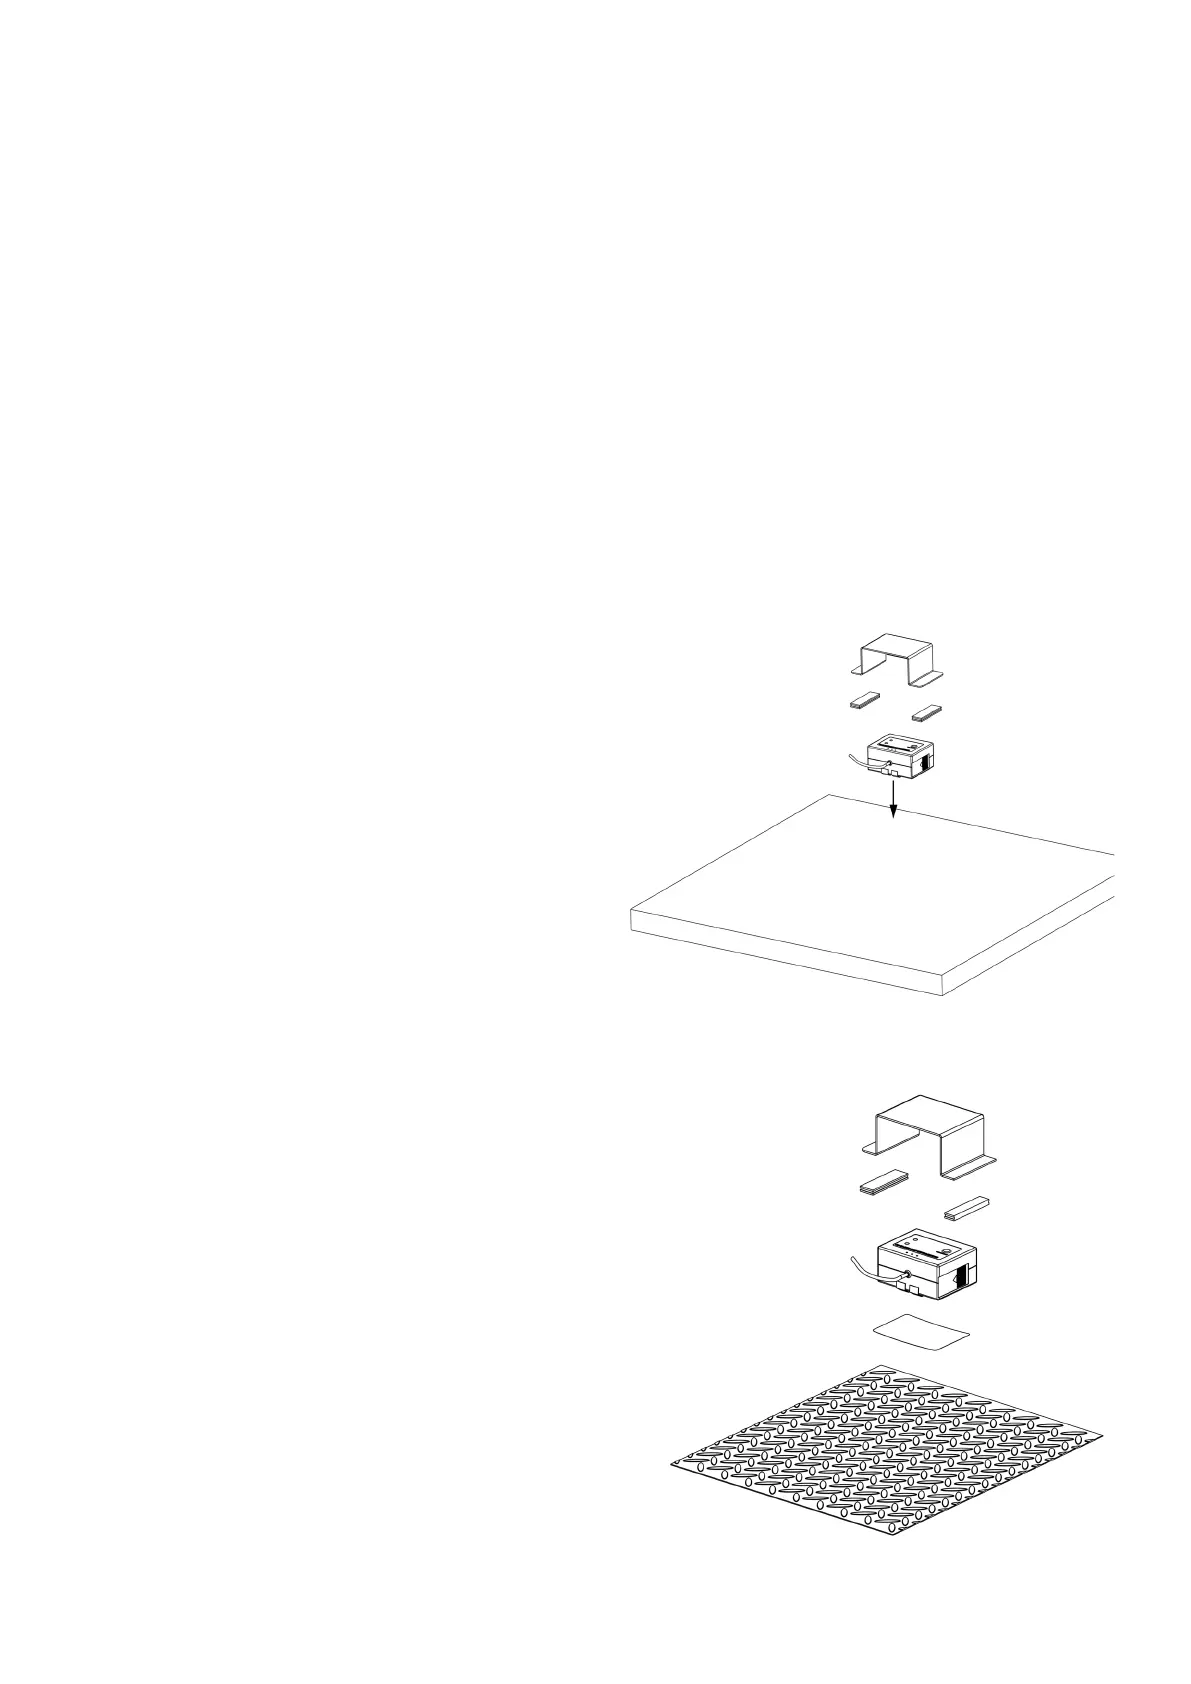
MAIN INSTALLATION PROCESS
• Screw the Auto-Shut o valve (1) on to the mechanical shut-
o valve supplied with the QETTLE system sucient to make
a waterght seal. IMPORTANT NOTE Do not overghten.
• Screw the ltered water inlet hose on to the Auto-Shut o
valve sucient to make a waterght seal. IMPORTANT NOTE
Do not overghten.
• Plug the cable from the Leak Detector (2) into the port on
the cable aached to the Auto-Shut o valve (1).
• Place the leak detector cover (3) into posion. The cover
should be posioned with the opening easily accessible to
allow for easy removal of the leak detector (IMPORTANT
NOTE if you placing the leak detector on to a cabinet with a
metal base you must sck the Scker (4) provided on to the
metal base rst. The Scker prevents a circuit being made
and the Auto-Shut o from triggering when it is placed in
posion). Remove the backing on the Velcro pads and rmly
push the cover into posion.
• Install the 9V Baery (5) into the leak detector. Remove the
cover on the side of the leak detector and install the baery.
Once the baery is installed the leak detector will beep and
both the lights on the front will turn on for 3 seconds.
• Press and hold the reset buon on the front of the leak
detector for 5 seconds. The leak detector will beep and the
blue light on the front will turn on for 3 seconds. The leak
detector is now acve.
• Place the leak detector in posion underneath the cover. Be
careful not to accidentally acvate the leak detector when
sliding underneath the cover when the base of the cabinet
is metal.
• Turn the water supply back on to the system using the me-
chanical shut o valve and check for leaks.
• Turn the power back on to the boiler. The system is now
ready for use.
IMPORTANT NOTE: use the scker provided when
installing the leak detector on a Metal Cabinet Protector.
 Loading...