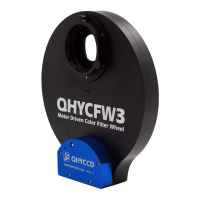
Third generation filter wheel safety instructions and precautions
Safety instructions:
1. Do not insert your fingers into the round holes on the filter wheel, otherwise the filter disc may
cause finger injury.
2. The copper nails in the filter wheel cannot be disassembled, otherwise the filter wheel will loosen
and affect normal use.
3. When the camera uses the control line to control the filter wheel, it is forbidden to use the USB
cable to connect the filter wheel at the same time to prevent the power supply from damaging the
filter wheel.
4. For the frameless filter, when using the screw to press the lens, it must be pressed by the plastic
gasket, but not directly with the metal nut of the screw. Otherwise there is a risk of crushing the lens.
Precautions:
1. Open the package, check the product, check whether the accessories are complete, and check the
"Filter Wheel QHYCFW3 Accessories Table"
2. Before installation, you need to prepare the tools needed to install the filter wheel: tweezers,
medium cross screwdriver, clock screwdriver.
3. After the installation is complete, please use the software to control the color wheel rotation to
see if the rotation is smooth and whether every position can come. Whether there is a serious card in
the middle (if there is a slight card in the middle, it will not affect the use, the color wheel will
continue to rotate until it reaches the target).
4. Do not push hard when installing the filter wheel. Failure to do so may result in bearing crushage
and other malfunctions or damage.
Important Notes:
QHYCFW3 support two socket mode. One is the 4PIN QHYCFW socket. If your QHYCCD camera has
the 4PIN socket you can connect it directly with QHYCFW3. There is the 12V power in the 4PIN socket
. So it does not need any extra power supply. If you have no QHYCCD camera or the camera has no
4PIN QHYCFW socket. You can use the USB socket to connect with the computer. And the QHYCFW3
can be powered and controlled with USB port. Please note the current requirement when using the
USB cable is higher (780mA) than the USB2.0 port can supply and some computer will limit the
current to 500mA. In this condition, QHYCFW3 can draw the power from the QHYCFW socket port
(the 6PIN RJ11 port in the QHYCFW3) and you need a 12V to RJ11 cable to power the QHYCFW2.
When using this method. The current drawing from USB cable will reduce to less than 100mA when
motor rotating. (* The 12V to RJ11 cable is in the standard item list after 2019.4).

 Loading...