11
EN
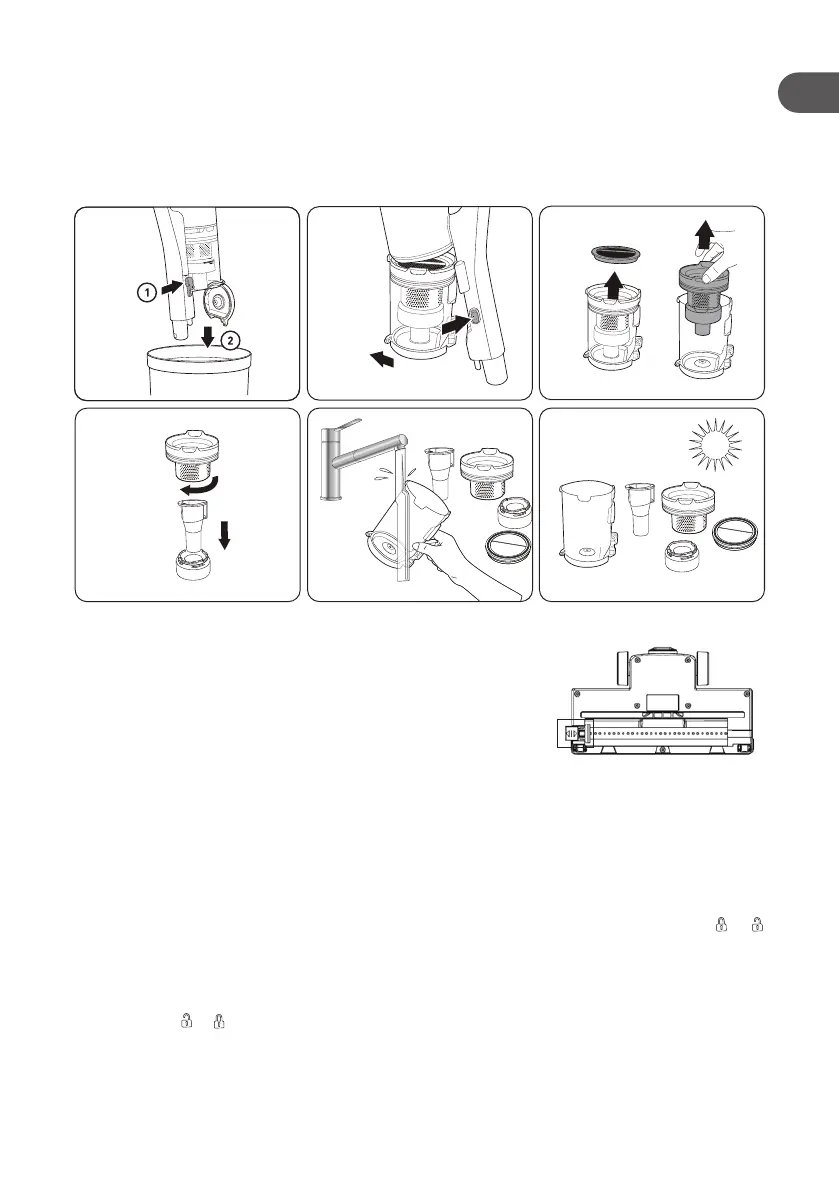
3. Remove the lter from the lter protection by turning it anti-clockwise and lifting it upwards.
Clean the lter with a dry cloth or a soft brush. Run cold water over the outside of the lter and
lter protection until the water runs clear, if necessary. Wash the lter regularly or as required.
Lay the lter, and lter protection on its side to dry completely.
4. When completely dry, reinstall the lter protection into the duct container rst. Put it in the lter
protection and lock it into place by turning it clockwise. Make sure it is tted properly. Then, t
the lter into the lter protection.
5. Reattach the dust cup in the main body.
6.3 Maintaining the oor nozzle
Note: If you run over a hard or sharp object or notice a noise
change while vacuuming, check for blockages or objects caught
in the roller brush.
1. To remove the roller brush from the oor nozzle, slide the
locking plate to the right. Gently pull the roller brush out from
the side.
2. Clean the roller brush and remove any stubborn dirt. Cut any
threads or hairs that have wound themselves around the roller
brush with a pair of scissors. Wipe the roller brush compartment with a soft, damp cloth. Let it
dry completely.
3. Replace the roller brush into its compartment until it locks securely in place. Slide the locking
plate to the left.
6.4 Maintaining the motorised pet tool
Note: If you run over a hard or sharp object or notice a noise change while vacuuming, check for
blockages or objects caught in the roller brush.
1. To remove the roller brush from the motorised pet tool, slide the locking plate from to .
Gently pull the roller brush out from the side.
2. Clean the roller brush and remove any stubborn dirt. Cut any threads or hairs that have wound
themselves around the roller brush with a pair of scissors. Wipe the roller brush compartment
with a soft, damp cloth. Let it dry completely.
3. Replace the roller brush into its compartment until it locks securely in place. Slide the locking
plate from to .

 Loading...