39
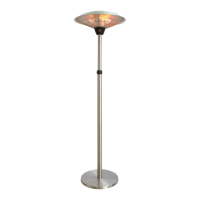
ASSEMBLY (picture 2)
Required tools
• Open end wrench 10 & 13 mm
• Adjustable opening wrench (2) 20 cm (8’’) long
• Slip joint pliers 23 cm (9’’) long
• Philips screwdriver w/ medium blade
• PIumbing tape for joints
• Spray bottle of soap solution for leakage test
Parts supplied
• Stand (1) with tank housing (8)
• Assembly post (7) with 3 pcs post brackets
• Gas connector suitable for:
- 8-12 mm hose (as separate item in the box)
- G1/2 conforming fitted as standard
• Note: gas regulator not included
• Reflector 820 mm consisting out of 4 pieces with:
- 9 pcs washers Ø 8 mm
- 9 pcs M6*10mm bolts
- 9 pcs M8 cap nuts
• 3 pcs 60 mm pins for reflector support
• 4 pcs bolts M6 X 10 mm for assembly post and burner
• 6 pcs bolts & nuts M6 X 35 mm for post and post brackets
• 3 pcs bolts M8 X 16 mm for post brackets and stand
• Bracket with 2 wheels including:
- 2 bolts M8*20
- 2 nuts M8
Step 1: picture 3
• Put the 3 pcs post brackets (9) on each position on the base (10) as shown in
picture 2.
• Use 3 pcs M8 x 16 mm bolts to join the post brackets (9) and base (10).
Step 2: picture 4
• Put the post (7) on the top of 3 pcs post brackets (9).
• Use 6 pcs M6 x 35 mm bolts and nuts to connect the post (7) to the 3 pcs post
brackets (9). Tighten the bolts and nuts.
Step 3: picture 5
Step 4: picture 6, 7, 8
• Secure the 3 pcs 60 mm pins (reflector support bolts) on the cap of flame
screen (2).
• Connect the gas hose (QA1) to the gas connector. (picture 7)
Please note
- The gas hose (QA1) is NOT included with the heater. Hose must be purchased
separately
- Minimum / Maximum length gas hose: 60-80 cm
- Screw connection (France G1/2) is fitted as standard
4


 To Next Page