Do you have a question about the QQH Z1-9 and is the answer not in the manual?
Headsets, speakers or digital audio equipment extension interface.
Supply power(5~20V voltage input); Transmit the audio, video signal.
Audio and video signal transmission. (It does not provide power)
Only supply power(5~20V voltage input);
Press to open OSD menu, scroll to control cursor, scroll up for shortcut menu.
Long press for 3s to turn screen on/off. Short press to back to previous page.
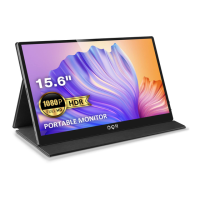
Listen to music, movies, games, and multimedia files.
Comes with hidden foldable kickstand.
Connect to power supply using USB-C to USB-A Cable and Adapter, or Mini HDMI for video output.
Only works with full-function USB-C port supporting audio/video.
Connect via USB-C to USB-C or USB-C to USB-A with external power supply.
Connect via USB-C to USB-C. Phone powers monitor, or reverse charge phone with external power.
Connect via Mini HD to HD cable. Requires external power supply or USB-A to USB-C.
Requires Lightning to HDMI adapter (not included). Both adapter and monitor need power.
Connect via Mini HD to HD. External power supply recommended first for smooth transmission.
Adjust resolution, orientation (Landscape/Portrait), and display modes (Duplicate/Extend).
Use System Preferences > Displays to set main, extended, or mirror display modes and rotation.
Adjust brightness and volume using the trackwheel (0-100 range).
Adjust Brightness (0-100), Contrast (0-100), Black Level (0-100), and Sharpness (0-4).
Configure ECO scene modes, DCR (Dynamic Contrast Ratio) on/off, and ASPECT ratio (4:3/16:9).
Select preset color modes (Cool/Warm) or adjust RGB values (Red/Green/Blue) in User Mode.
Configure language, OSD Timer duration, and OSD Menu transparency.
Reset settings to default, mute display, and adjust display volume.
Select signal source (HDMI/Type-C) and enable/disable Low Blue Light.
List of compatible laptop and tablet brands and models from Apple, Google, Lenovo, DELL, HP, Microsoft, ASUS, HUAWEI, HONOR, Xiaomi.
List of compatible phone brands and models from Apple, Samsung, HUAWEI, OPPO, ASUS, HONOR, Razer, Xiaomi, HTC, SONY.
Protect screen with case, avoid hard objects, handle cables gently, wipe screen regularly.
Turn off and unplug. Use lint-free cloth. Avoid alcohol/acetone cleaners; never spray directly.
Troubleshoot power LED not on and 'No Signal'/'Power Saving' errors by checking cables and ports.
Resolve flickering by restarting. Fix color defects by inspecting USB cable and restarting.
Ensure HDR/ECO/CDR modes are off. Reset monitor to factory settings if adjustments are greyed out.