11
TSC-50-G3 In-Wall Mounting (continued)
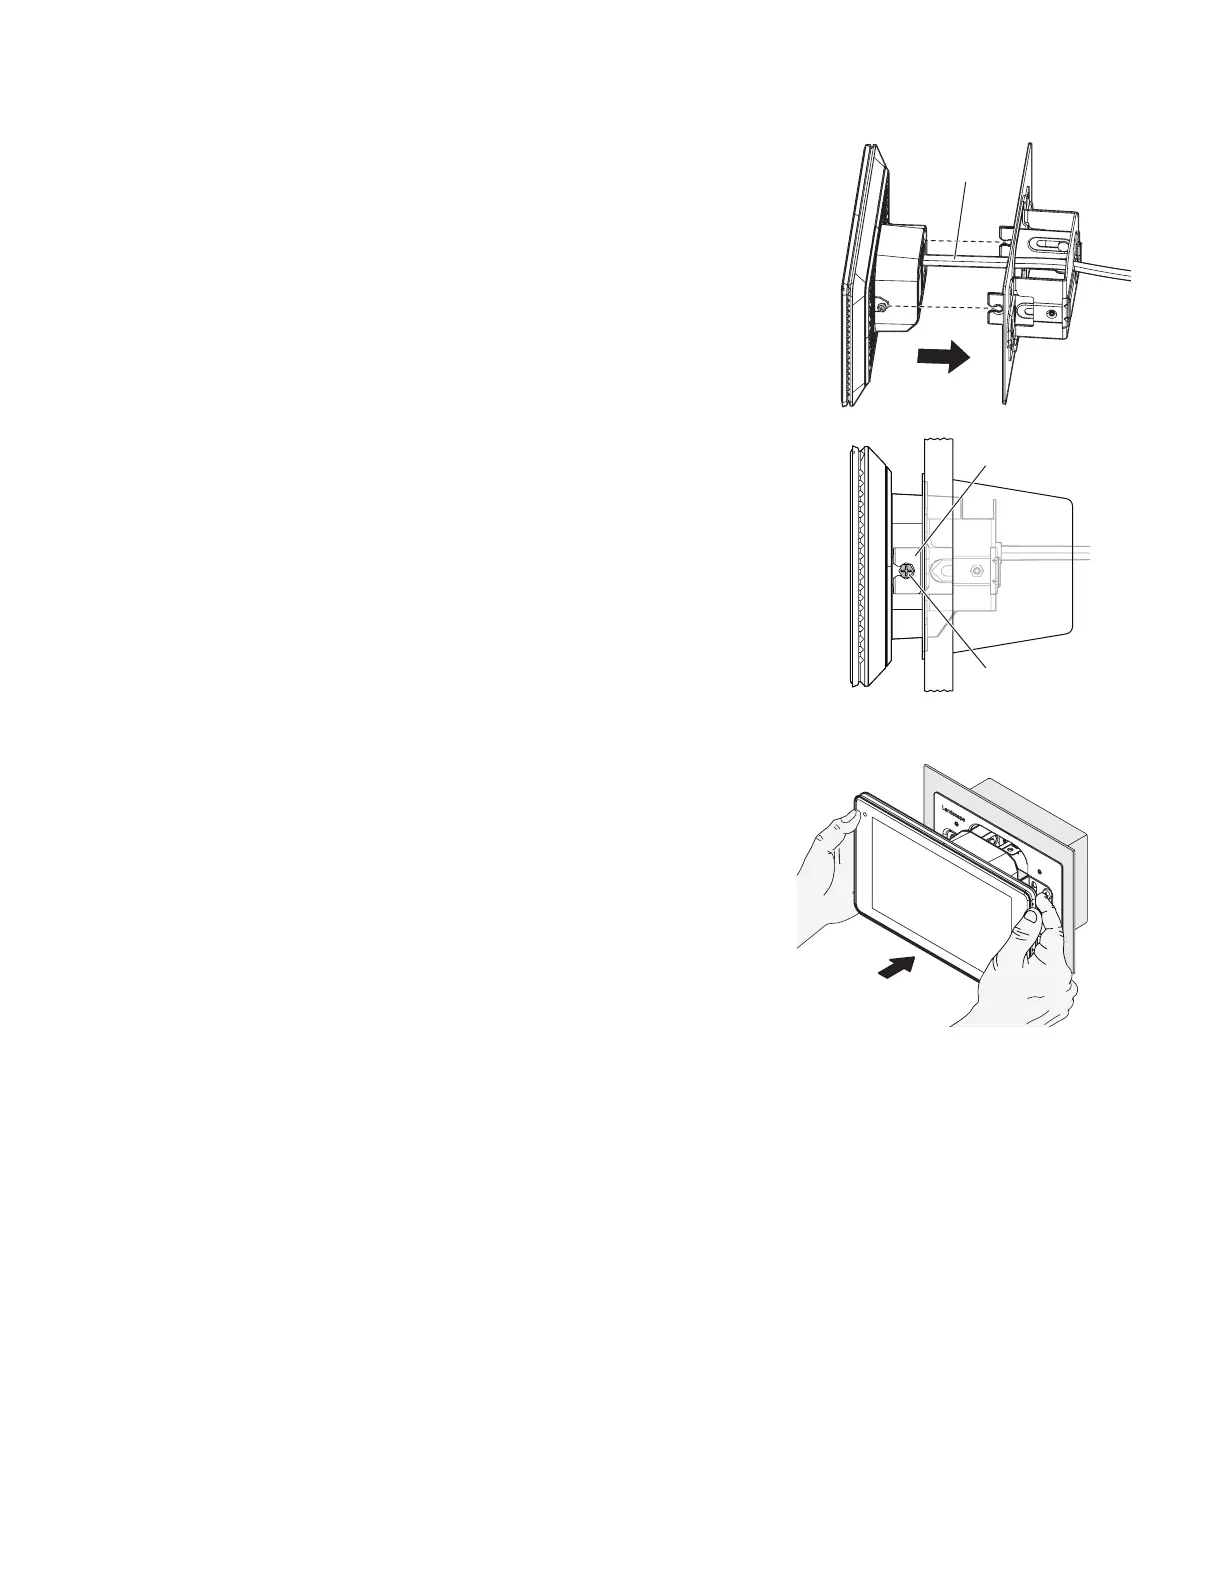
6. Attach the LAN cable to the TSC-50-G3 rear panel RJ45. See — Figure4.
7. Slide Touch Screen Controller onto the wall mount bracket arm such that the head
of each screw on the Touch Screen Controller is on the outside of the arm within the
countersink. Fasten the screws using the supplied screwdriver. See — Figure5.
8. Using both hands placed on either side of the Touch Screen Controller, push the
Touch Screen Controller assembly into the wall mount bracket until the magnet on
the unit docks with the wall mount bracket. See — Figure6. Care must be taken to
avoid damaging the arm or spring mechanism. Do not use excessive force. If there is
significant resistance, STOP! Pull the Touch Screen Controller forward and ensure that
the arm is straight (pulled forward completely) and ensure that the LAN cable is not in
the way before attempting to push the assembly into the wall mount bracket.
LAN Cable
— Figure4 —
Screw
Arm
— Figure5 —
— Figure6 —
 Loading...