20
WARNING!
Before using the tool, read all instructions carefully.
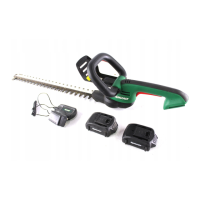
Charging the battery
WARNING!
The charger and battery pack are specically designed to work together so do
not attempt to use any other devices. Never insert or allow metallic objects into
your charger or battery pack connections; an electrical failure and hazard will
occur.
The battery needs to be charged before rst use and whenever it fails to
produce sufcient power on jobs that were easily done before.
WARNING! NEVER LEAVE THE BATTERY AND CHARGER UNATTENDED
WHEN CHARGING THE BATTERY.
This product comes with a Lithium-ion battery pack. Lithium-ion batteries don’t
lose charge when they are not in use, and don’t lose charging capacity over
time. Nevertheless, it is best practice to charge the battery when empty or
insufcient to do the job.
The charging procedure
WARNING! The battery cannot be charged immediately after use, it should cool
down for a period of time first. The LED light (9) switching from green to red
means it can be charged.
Connect the charger (7) to the charging station (8).
Plug the charger into an appropriate AC power outlet. When the LED light (9) changes to
green, the charger is ready for use.
Slide the charging station (8) into the battery pack (6), make sure the station is fully seated
in the battery pack. When the LED light (9) switches to red, the battery pack is on charge.
The battery pack will be fully charged after one hour. The LED light (9) will switch to green
once the battery is fully charged.
To release the battery, press the round button on the battery (6) and pull the charging
station (8) off.