Check that the electricity supply voltage is the same as
that listed on the specification plate and in the
machine’s documentation.
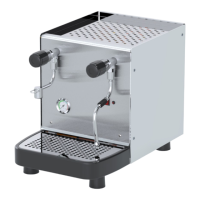
3.2 Installation
Place the machine on the workbench, and
connect the water supply tube from the
stopcock (1) to the water softener (2).
Drain the output of the water softener into a
bucket, until the water flows clean.
It is recommended to use water with a hardness
between 5-8 dHº (8-14 fHº) to avoid calcification and to
obtain an optimal quality of the product.
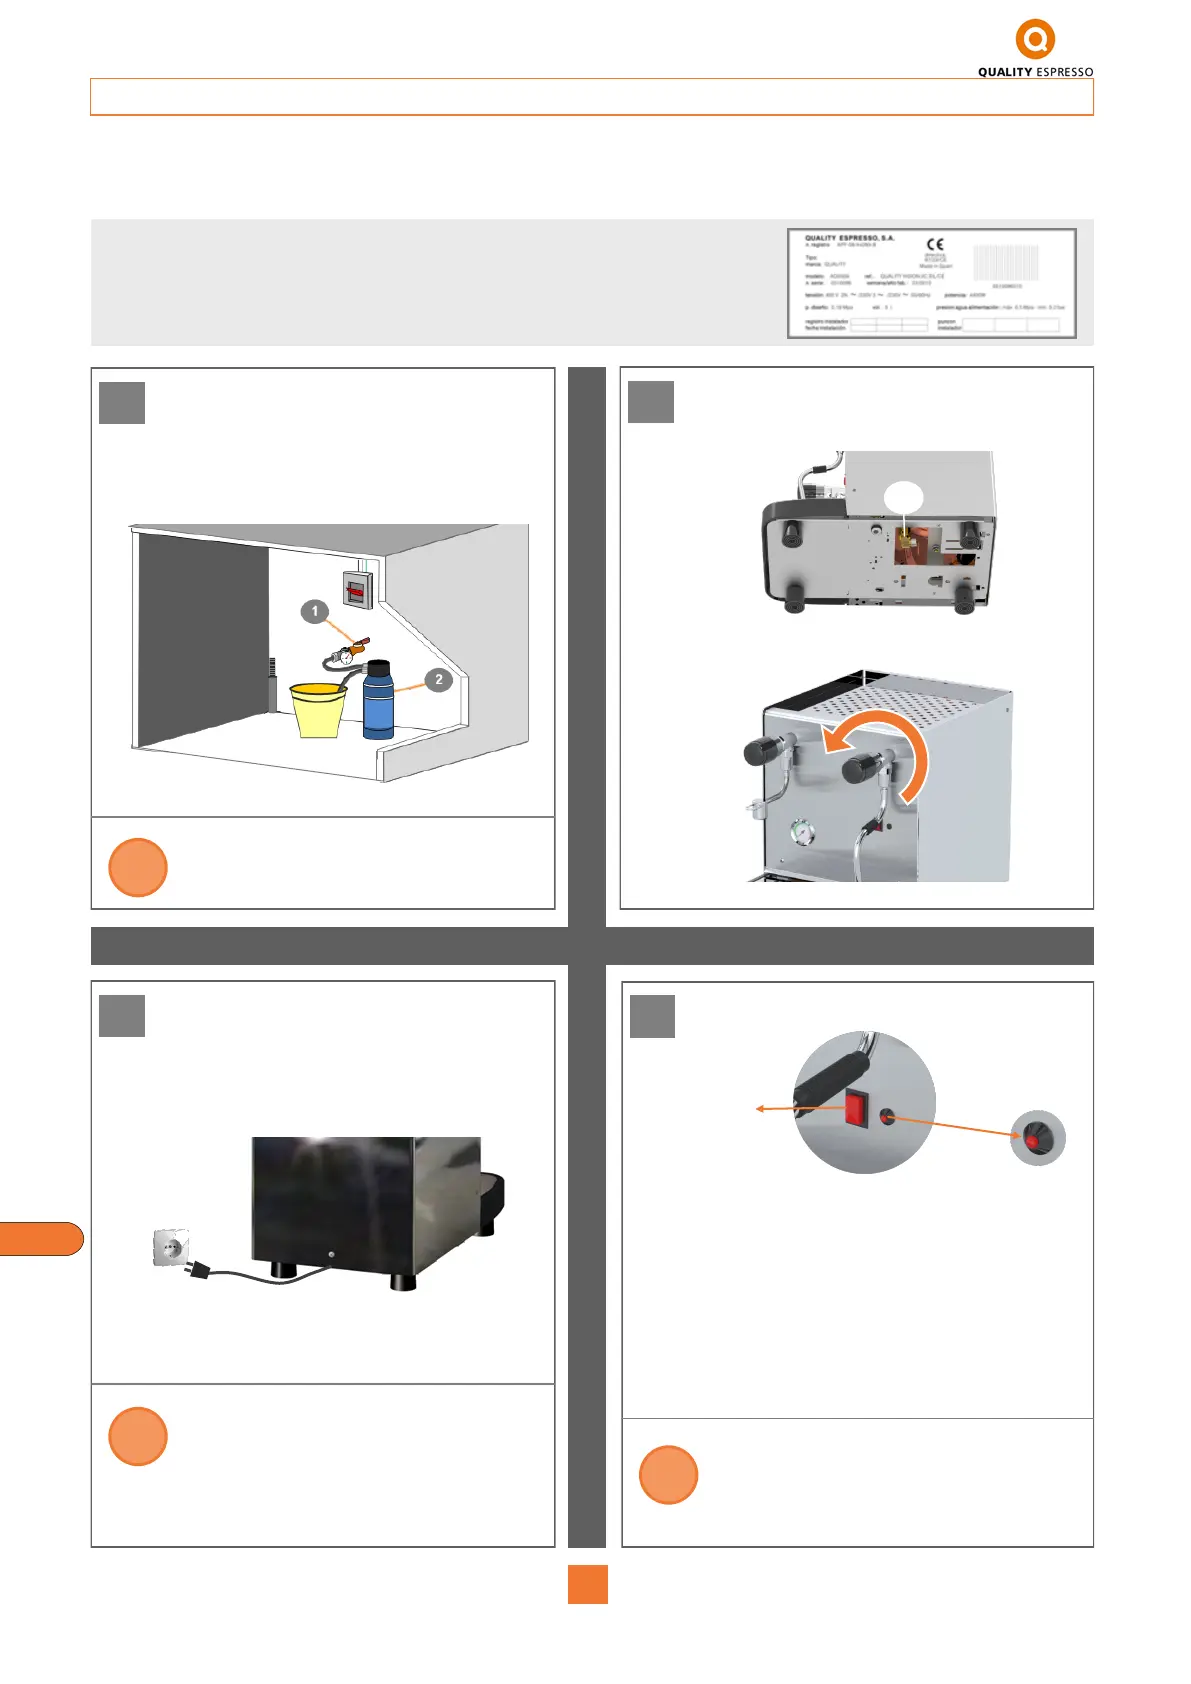
3.2.1 Machines with mains water connection
Once the machine has been unpacked, the following steps should be performed:
1
i
Connect the output of the water softener to the
machine’s water input (3).
Supply water by opening the stopcock (1).
Open the steam tap.
2
33
Connect the plug to the appropriate socket
according to the current electrical standards
of the area.
You should not use extension cords or outlet adapters
of any kind to connect the machine to the electricity
network.
The network connection cable should never be rolled
up; instead, it should be fully extended to avoid
possible overheating.
3
i
Press the main power switch.
- At this moment the boiler will automatically fill with water,
a process that is indicated by the led located next to the
main power switch.
Once the filling process has finished, the indicator will turn
off and the boiler heating cycle will start. This process lasts
for approximately 15 minutes, and at this moment the
steam tap should be closed.
After this time and with pressure reading of approximately
1.3 bars on the gauge, the machine is ready to work.
If an adequate water level is not detected in the boiler within
a certain time, the water level LED indicator (next to the
main power switch) will blink, indicating a water level
warning. This warning can be cancelled by turning the
machine off and on again.
4
i
Main switch
Water level LED
Indicator
EN
3