Step 2
Connecting The Subwoofer
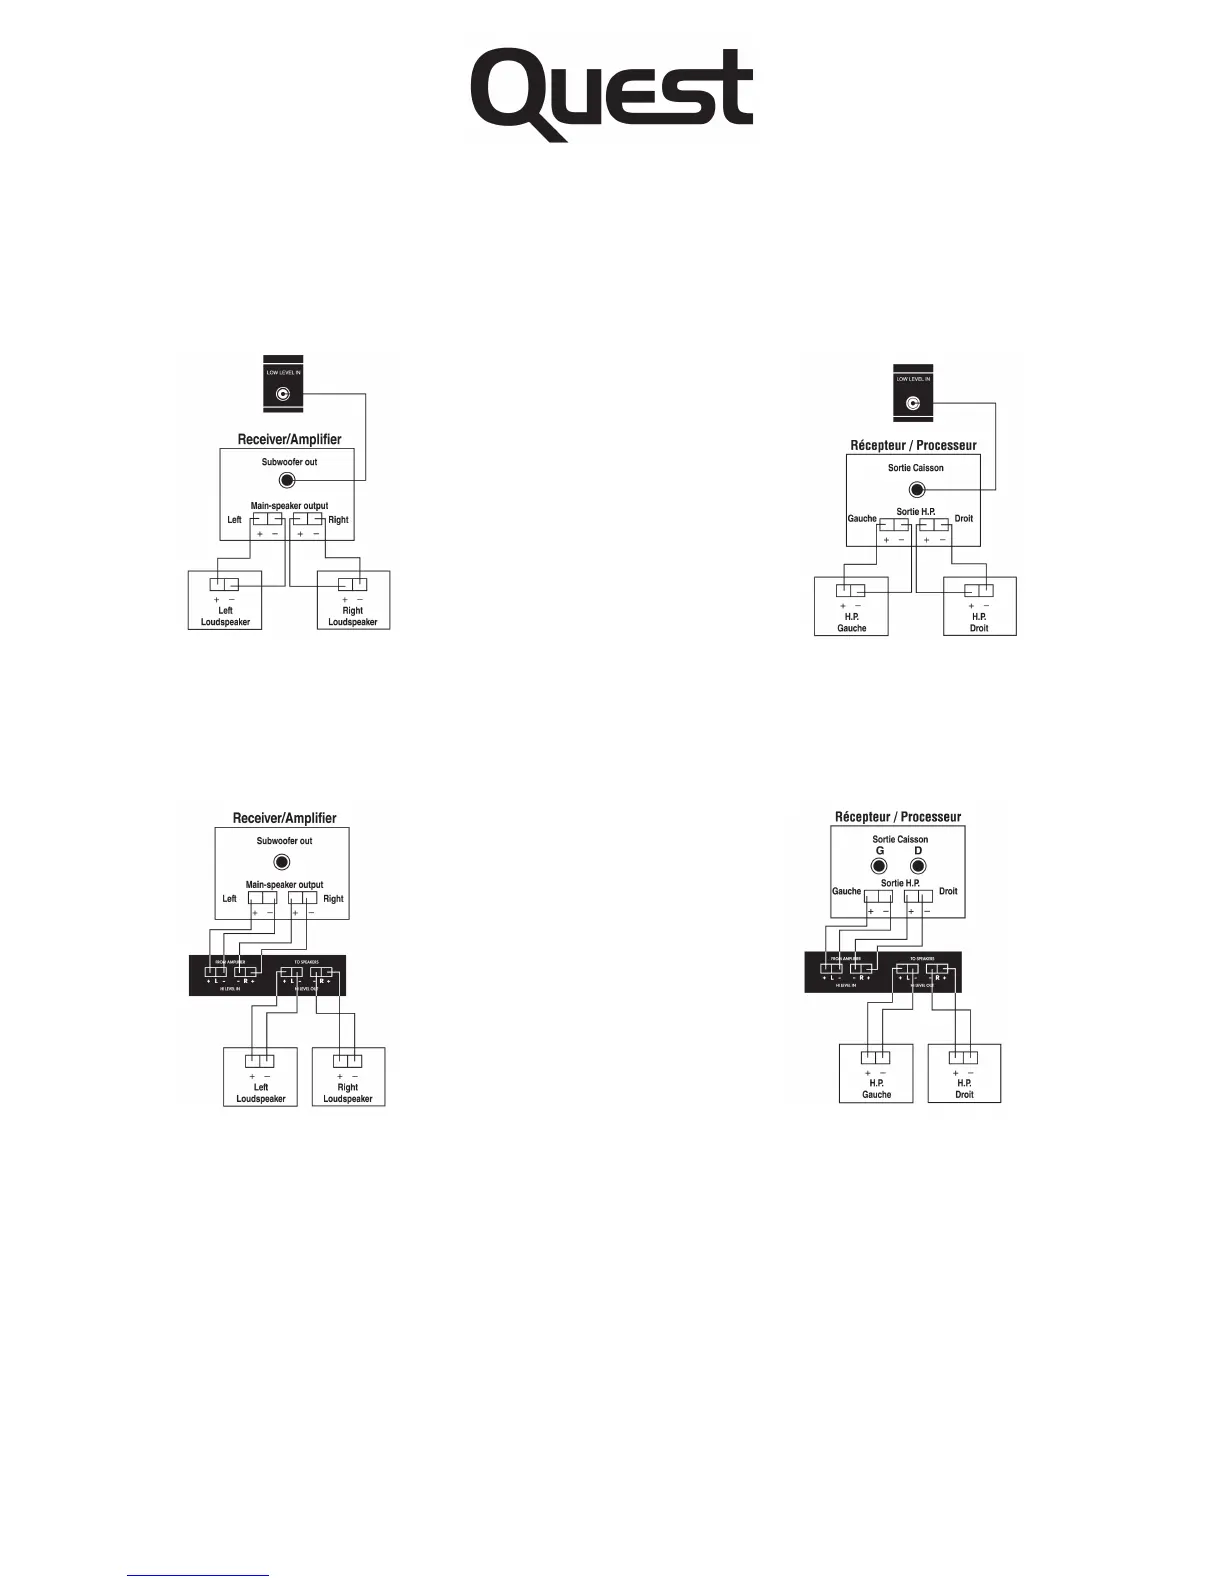
A) Line Level Connection (known as "Low-Level"):
Connect the audio/video receiver or processor’s subwoofer output, to
the Quest Subwoofer’s input.
B) Speaker Level Connection (known as "High-Level").
Connect the audio/video receiver’s Left/Right main channel outputs to
the Quest L/R Speaker Level Inputs. Make sure to connect "+" (Red) to
"+" ( Red), and "-" ( Black) to "-" (Black). (Optionally, you may connect
your Left/Right speakers as shown below).
High-Level connection Tip:
When using small satellite speakers, connecting the Quest subwoofer
with the Speaker Level inputs and then connecting L/R satellites to the
"Speaker out" will automatically limit the low frequency sent to the small
speakers with the high-pass filter built into the Quest subwoofer. This is
helpful to small speakers, in that they will then not be required to
reproduce frequencies that may be beyond their operating range.
You may now plug your subwoofer’s power cord to the A/C wall
outlet.
You are now ready to use your new Quest subwoofer.
Étape 2
Reliez le caisson sous-grave
A) Raccordement avec l’entrée de bas niveau (RCA) ("Low level in"):
Reliez la sortie RCA caisson sous-grave du récepteur ou le processeur
audio/vidéo, à l'entrée de bas niveau du caisson.
B) Raccordement avec l’entrée de niveau haut-parleur (Spkr-in):
Reliez les sorties principales droite/gauche du récepteur audio/vidéo
aux entrées de niveau haut-parleur (Spkr-in) droit/gauche. Assurez-vous
de bien relier la borne " + " (rouge) à " + " (rouge), et la borne " -"
(noir) à " - " (noir).
Conseil pratique pour le raccordement avec niveau haut-parleur:
Si vous utilisez des haut-parleurs satellites de petite taille, vous pouvez
relier le sous grave avec l’entrée de niveau haut-parleur, et puis relier
les satellites de gauche/droit à la sortie de niveau haut-parleur. Ceçi à
pour effet de limiter automatiquement les basses fréquences envoyées
aux satellites avec le filtre passe-haut intégré du caisson. Dans ce cas,
les haut-parleurs ne seront pas exigés de reproduire des fréquences qui
peuvent être au-delà de leur plage de fonctionnement.
Vous pouvez maintenant brancher le cordon AC du caisson à la prise
murale.
Vous êtes maintenant prêt à utiliser votre nouveau caisson sous-grave.
Subwoofer Line-Level/Low-Level Input
Entrée sous-grave de bas niveau
Subwoofer High-Level/
Speaker-Level Input
Entrée sous-grave de
niveau haut-parleur
 Loading...