EasyManua.ls Logo

Quickie Sedeo Lite Q700M - User Manual

Quickie Sedeo Lite Q700M
9 pages
Print Icon
To Next Page IconTo Next Page
Loading...
Q700M/Q500M SEDEO LITE
SEAT MOUNTING MATRIX
© 2021 Sunrise Medical (US) LLC
03/2021 P/N 253324 Rev. B
Pg 1 of 9
Customer service: +1 (800) 333-4000
or visit www.SunriseMedical.com
Please read these instructions carefully before beginning the assembly. Failure to understand and
follow assembly instructions may result in injury to technician and/or end user and may void the
warranty. If you have any questions call Sunrise Medical Technical Support at +1 (800) 333-4000.
Parts:
1. 4 ea Adapter plate screws (A)
2. 4 ea Seat screws (B)
3. 1 ea Adapter plate RH (C)
4. 1 ea Adapter plate LH (D)
5. 6 ea Interface screws (E)
6. 1 ea SEDEO Lite Seat (F)
7. 1 ea Module (Tilt, Lift, Tilt Lift Combo,
Filler) (G)
8. 1 ea Interface (H)
A. REMOVE SEAT/ADAPTER PLATES/ MODULE
1. Remove Seat (F): Note position of seat screws (B) on the
seat (F) as well as the position to the adapter plates (C, D).
Remove the 4 seat screws (B) holding the seat to the
adapter (C, D) and remove the seat (F) (Fig 1). (Use 5mm
hex key)
2. Remove adapter plates (C and D): If your chair does not
have adapter plates (C, D) skip this step, move on to step 3.
Note the position of the adapter screws (A) to the plates (C,
D) as well as to the module (G). Remove the 4 screws (A)
holding the adapter (C, D) to the module (G) and remove
the adapter plates (C, D) (Fig 1). (Use 5mm hex key)
Note- tilt module is shown, but directions apply to all
modules (lift, tilt, tilt lift combo, or  ller).
3. Remove module (G): Note the position of the interface
screws (E) to the interface (H) as well as to the module (G).
Remove the 6 screws (E) holding the module (G) to the
interface (H) and remove the module (G) (Fig 1). (Use 6mm
hex key)
4. Note position of all mounting locations if the seat depth is
not changing. If the seat depth is changing, see pages 3-8.
B. ASSEMBLE SEAT/ADAPTER PLATES/ MODULE
1. Assemble module (G) to the interface (H) using the
interface screws (E). See page 2 for mounting
location. Torque to 13.6-14.9Nm [120-132 in-lbs].
2. Assemble adapter plates (C, D) to module (G). If adapter
plates (C, D) are not used, skip this step and move on to
step 3. See pages 3-8 for mounting location.
Torque to 13.6-14.9Nm [120-132 in-lbs].
3. Assemble seat (F) to the adapter plates (C, D) or the
module (G) using the seat screws (B). See pages 3-8 for
mounting location, and page 9 for seat depth detail.
Torque to 13.6-14.9Nm [120-132 in-lbs].
C. INSPECT:
1. All torque values with a torque wrench.
2. Ensure that all the wire harnesses are out of the way and
are not being pinched.
3. Verify that the harnesses are not put under tension in any
position.
4. Ensure the screws are mounted in the same location as they
were before removal or are mounted to new seat depth
locations as speci ed in Mounting Matrices below.
Required tools:
1. 5mm hex key
2. 6mm hex key
3. Torque wrench
DEALER/TECHNICIAN WARNING
Attention dealers and quali ed technicians, do not operate or service
this device without  rst reading the owners manual. If you do not
understand the instructions and warnings in the owners manual please
contact the Quickie Technical Service Department before operating
and/or servicing the Quickie device. Failure to do so may result in
damage and/or injury.
Find more information and important warnings see the wheelchair
owner’s manual or at: www.SunriseMedical.com
Interface
screws (E)
SEDEO Lite Seat(F)
1
Seat screws (B)
Adapter Plate
screws (A)
Adapter Plate
Right Hand (C)
Adapter Plate
Left Hand (D)
Note
mounting
locations
Module (G)
Interface (H)
Question and Answer IconNeed help?

Do you have a question about the Quickie Sedeo Lite Q700M and is the answer not in the manual?

Summary

A. REMOVE SEAT;ADAPTER PLATES;MODULE

Remove Seat (F)

Procedure to detach the SEDEO Lite Seat (F) from the adapter plates.

Remove Adapter Plates (C and D)

Procedure to detach adapter plates (C, D) from the module.

Remove Module (G)

Procedure to detach the module (G) from the interface (H).

B. ASSEMBLE SEAT;ADAPTER PLATES; MODULE

Assemble Module (G) to Interface (H)

Procedure to attach the module (G) to the interface (H) using screws (E).

Assemble Adapter Plates (C, D) to Module (G)

Procedure to attach adapter plates (C, D) to the module (G).

Assemble Seat (F) to Adapter Plates (C, D) or Module (G)

Procedure to attach the seat (F) to adapter plates or module using screws (B).

C. INSPECT

Verify Torque Values

Ensure all torque values are applied using a torque wrench during assembly.

Check Wire Harnesses

Ensure wire harnesses are routed correctly and not pinched.

Verify Harness Tension

Confirm that wire harnesses are not under tension in any position.

Confirm Screw Locations

Ensure screws are mounted in original or specified new locations.

DEALER;TECHNICIAN WARNING

Overview

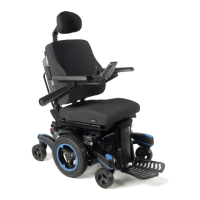
The document describes the QUICKIE Q700M/Q500M SEDEO LITE SEAT MOUNTING MATRIX, a system for assembling and configuring the seat on a Quickie Q700M or Q500M power wheelchair. This matrix provides detailed instructions for technicians and dealers on how to remove and assemble various components, including the seat, adapter plates, and different power modules (Tilt, Lift, Tilt Lift Combo, and Filler), as well as how to adjust the seat depth.

Function Description:

The Quickie Q700M/Q500M SEDEO LITE SEAT MOUNTING MATRIX serves as a comprehensive guide for the proper installation and adjustment of the SEDEO Lite seat system on compatible Quickie power wheelchairs. Its primary function is to ensure that the seat components are correctly assembled and configured according to specific seat depth requirements and module types, thereby optimizing user comfort, safety, and the overall functionality of the wheelchair. The manual covers configurations with and without adapter plates, and for various power modules, allowing for a wide range of customization options to meet individual user needs.

Important Technical Specifications:

  • Required Tools:
    • 5mm hex key
    • 6mm hex key
    • Torque wrench
  • Torque Values:
    • Module to Interface (using interface screws E): 13.6-14.9 Nm [120-132 in-lbs]
    • Adapter plates to Module (using adapter screws A): 13.6-14.9 Nm [120-132 in-lbs]
    • Seat to Adapter plates/Module (using seat screws B): 13.6-14.9 Nm [120-132 in-lbs]
  • Components:
    • Adapter plate screws (A)
    • Seat screws (B)
    • Adapter plate RH (C) (Right Hand)
    • Adapter plate LH (D) (Left Hand)
    • Interface screws (E)
    • SEDEO Lite Seat (F)
    • Module (G) - can be Tilt, Lift, Tilt Lift Combo, or Filler
    • Interface (H)
  • Module Types and Configurations:
    • Module to Interface:
      • Tilt, TLC, Lift (with Adapter Plates): Uses specific mounting locations (e.g., 1-C, 1-E, 4-F, 2-G, 5-H, 3-H).
      • Tilt, TLC, Lift (no Adapter Plates): Uses specific mounting locations (e.g., 1-C, 1-D, 4-F, 2-F, 5-H, 4-H).
    • Tilt Power Module:
      • No Adapter Plates: Seat depth settings (16, 17, 18) correspond to specific backrest positions (1, 3, 5) and Seat Pan to Module locations (e.g., 4-B, 2-D).
      • With Adapter Plates: Seat depth settings (19, 20, 21, 22) correspond to backrest positions (7, 9, 11, 13), Adapter Plate to Module locations (e.g., 5-B, 10-D), and Seat Pan to Adapter Plate locations (e.g., 3-E, 1-L).
    • Tilt Lift Combo (TLC) Power Module:
      • No Adapter Plates: Seat depth settings (16, 17, 18) correspond to backrest positions (1, 3, 5) and Seat Pan to Module locations (e.g., SP6-D, SP3-H).
      • With Adapter Plates: Seat depth settings (19, 20, 21, 22) correspond to backrest positions (7, 9, 11, 13), Adapter Plate to Module locations (e.g., 7-A, 2-E), and Seat Pan to Adapter Plate locations (e.g., 3-H, 1-A).
    • Lift Power Module:
      • No Adapter Plates: Seat depth settings (16, 17, 18) correspond to backrest positions (1, 3, 5) and Seat Pan to Module locations (e.g., SP6-D, SP3-H).
      • With Adapter Plates: Seat depth settings (19, 20, 21, 22) correspond to backrest positions (7, 9, 11, 13), Adapter Plate to Module locations (e.g., 9-A, 4-E), and Seat Pan to Adapter Plate locations (e.g., 3-J, 1-C).
    • Q500M SEDEO Lite Seat Mounting Matrix (Tilt Power Module):
      • No Adapter Plates: Seat depth settings (16, 17, 18) correspond to backrest positions (1, 3, 5), Module to Interface locations (e.g., 1-B, 5-G, 6-H), and Seat Pan to Module locations (e.g., 4-B, 2-D).
      • With Adapter Plates: Seat depth settings (19, 20, 21, 22) correspond to backrest positions (7, 9, 11, 13), Module to Interface locations (e.g., 1-B, 5-G, 6-H), Adapter Plate to Module locations (e.g., 5-B, 10-D), and Seat Pan to Adapter Plate locations (e.g., 3-G, 1-N).
    • Q500M SEDEO Lite Seat Mounting Matrix (Tilt Lift Combo (TLC) and Lift Only Power Module):
      • No Adapter Plates: Seat depth settings (16, 17, 18) correspond to backrest positions (1, 3, 5), Module to Interface locations (e.g., 1-E, 2-G, 3-H), and Seat Pan to Module locations (e.g., SP6-D, SP3-H).
      • With Adapter Plates: Seat depth settings (19, 20, 21, 22) correspond to backrest positions (7, 9, 11, 13), Module to Interface locations (e.g., 1-E, 2-G, 3-H), Adapter Plate to Module locations (e.g., 7-A, 2-E), and Seat Pan to Adapter Plate locations (e.g., 3-I, 1-B).
    • Q700M/Q500M SEDEO Lite Seat Mounting Matrix (Filler Module - No Adapter Plates):
      • Seat depth settings (16-22) correspond to backrest positions (1, 3, 5, 7, 9, 11, 13), Filler Module to Interface locations (e.g., E-1, H-2), and Seat Pan to Filler Module locations (e.g., SP3-B, SP6-A).

Usage Features:

  • Step-by-step Assembly/Disassembly: The manual provides clear, numbered steps for removing and assembling the seat, adapter plates, and various modules.
  • Visual Aids: Diagrams and illustrations accompany each step, showing component locations and mounting points, which are crucial for accurate assembly.
  • Torque Specifications: Specific torque values are provided for all fasteners, ensuring secure and safe connections. This is critical for preventing loosening and potential injury.
  • Seat Depth Adjustment: Detailed mounting matrices are included for various module types and configurations, allowing technicians to precisely set the seat depth. The "Seat Depth Detail" section provides a visual guide for backrest seat depth adjustment hardware.
  • Module Versatility: The system supports multiple power modules (Tilt, Lift, Tilt Lift Combo, Filler), offering flexibility in configuring the wheelchair to meet diverse user needs.
  • Adapter Plate Options: Instructions cover configurations both with and without adapter plates, accommodating different frame designs or customization requirements.
  • Front of Chair Orientation: Clear indicators for the "FRONT OF CHAIR" help ensure components are oriented correctly during assembly.

Maintenance Features:

  • Inspection Checklist: After assembly, technicians are instructed to:
    1. Verify all torque values with a torque wrench.
    2. Ensure wire harnesses are clear and not pinched.
    3. Verify harnesses are not under tension.
    4. Confirm screws are mounted in the correct locations (either original or new seat depth locations as specified in the Mounting Matrices).
  • Troubleshooting Guidance: While not explicitly a troubleshooting guide, the detailed assembly instructions and inspection checklist serve as a preventative measure against common assembly errors that could lead to maintenance issues.
  • Dealer/Technician Warning: A prominent warning emphasizes the importance of reading the owner's manual before operating or servicing the device to prevent injury or damage. It also directs users to contact Quickie Technical Service Department for assistance if instructions are unclear.
  • Customer Service Information: Contact details for Sunrise Medical Technical Support (+1 (800) 333-4000) and their website (www.SunriseMedical.com) are provided for ongoing support and access to additional information, including the wheelchair owner's manual.

Quickie Sedeo Lite Q700M Specifications

General IconGeneral
BrandQuickie
ModelSedeo Lite Q700M
CategoryMedical Equipment
LanguageEnglish