EasyManua.ls Logo

Quincy QMB Series - User Manual

Quincy QMB Series
12 pages
Print Icon
To Next Page IconTo Next Page
Loading...
Quincy
Compressor
®
True Blue Reliability
TM
Manual No. 65004-FA February 1998 Edition
Quincy QMB/T
Series
Electronic Control
Instruction Manual
This manual contains important safety information and should be made available
to all personnel who operate and/or maintain this product. Carefully read this
manual before attempting to operate or perform maintenance on this compressor.
Question and Answer IconNeed help?

Do you have a question about the Quincy QMB Series and is the answer not in the manual?

Summary

Quincy QMB;T Control Operations

Control Panel Layout

Describes the layout of the electronic control panel and its primary controls.

LED Indicators and Status

Explains the meaning of LED lamps, blinking patterns, and alarm conditions.

Basic Controls and Operation

MENU Button Functionality

Details how the MENU button cycles through set parameters indicated by LED lamps.

START, STOP, UP, DOWN, RESET Buttons

Explains the function of the primary operational buttons for starting, stopping, and navigating.

System Indicators and Program Menus

System Status Indicators

Covers RUN STATUS and LOAD/UNLOAD indicators on the numeric display.

Accessing and Navigating Program Menus

Describes the procedure for accessing and selecting program setup menus.

Menu 01: Basic Operating Adjustments

Details adjustments for unload/load pressure, Wye/Delta time, and timers.

Menu 02: Filter Service Hours Setup

Separator Service Hours Setup

Configures the service interval counter for the separator.

Air Filter Service Hours Setup

Configures the service interval counter for the air filter.

Fluid Filter and Sample Service Hours

Configures service intervals for fluid filter and fluid sample/service.

Menu 03: Display Units and Model Type

Pressure and Temperature Unit Selection

Sets display units for pressure (PSIG/BAR) and temperature ('F/'C).

Compressor Model and ID Settings

Configures compressor model type and sets the compressor ID.

Faults and Error Indicators

Emergency Stop and Fault Conditions

Describes emergency stop function, contactor faults, and overload conditions.

Fault and Message Indicator Summary

Lists specific LED and message indicators for various fault conditions.

Service Replacements and Procedures

Safety Precautions for Service

Emphasizes power disconnection, lockout, and grounding before repairs.

Replacing Sensors and Controls

Details procedures for replacing temperature sensors, pressure transducers, and electronic controls.

Operational Testing After Service

Outlines steps for testing unit operation and programming after component replacement.

Wiring Diagrams

Across the Line Starting Wiring Diagram

Presents the electrical schematic for ACROSS THE LINE STARTING configuration.

Wiring Diagrams

Wye-Delta Starting Wiring Diagram

Presents the electrical schematic for WYE-DELTA STARTING configuration.

Quincy Service and Support

Authorized Distributors and Service

Information on authorized distributors stocking Quincy parts and accessories.

Contact and Website Information

Provides contact details for Quincy Compressor service and website.

Overview

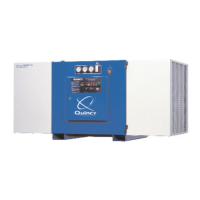
The Quincy QMB/T™ Series Electronic Control is a microprocessor-based system designed for use with Quincy QMB/T series air compressors. This instruction manual (Manual No. 65004-FA, February 1998 Edition) provides comprehensive details on its operation, setup, and maintenance.

Function Description

The electronic control manages and monitors various aspects of the air compressor's operation, ensuring efficient and safe performance. It provides real-time feedback on system status, allows for adjustment of operating parameters, and alerts users to potential issues or required maintenance.

Usage Features

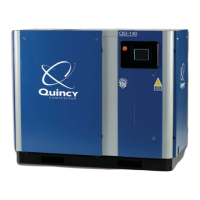
The control panel features a clear layout with primary controls on the right-hand side and LED lamps on the left to indicate selected display parameters or alarm conditions. A numeric display at the top shows the selected item's value.

  • Basic Controls:

    • MENU: Scrolls through various parameters for display and adjustment. These include System Pressure (default), Discharge Temperature, Running (Total) Hours, Loaded Hours, Separator Hours, Air Filter Hours, Fluid Filter Hours, and Fluid Service/Sample Hours.
    • START: Initiates compressor operation, provided no major faults (open pressure sensor, temperature sensor, high temperature, or overload) are present. The compressor will only start if the line pressure is below the load point.
    • STOP: Initiates a controlled shutdown of the compressor, which takes approximately 5 seconds to allow for system unloading and blowdown.
    • UP/DOWN: Used to select parameters within the setup menus.
    • RESET: Clears fault or service conditions from the display panel.
    • Default Display: After a few minutes of inactivity, the control automatically returns to the default display (System Pressure).
  • System Indicators:

    • RUN STATUS LED: A steady light indicates the compressor is running. A flashing light, when the compressor is stopped, indicates it will re-start automatically (if auto-restart is enabled) or is about to start.
    • LOAD/UNLOAD: The left-most digit of the numeric display shows 'L' when loaded and 'U' when unloaded.
    • LED Status Lights:
      • A flashing '----' on the digit display, accompanied by an LED on the left, signifies a faulty sensor (pressure transducer or temperature probe).
      • A FAST blinking LED indicates a tripped function (over-pressure, motor overload, or High Air Temperature (HAT) trip).
      • A SLOW blinking LED indicates the Separator Differential Pressure (D.P.) switch has tripped.
      • A STEADY LED, with a blinking message on the display, indicates a service time-out for filters.
  • Program Setup Menus: Accessed by holding both UP and DOWN keys until the left-side LEDs flash.

    • MENU 01: Basic Operating Adjustments:
      • LED 1: Adjusts UNLOAD and LOAD pressures. 'U' or 'L' on the left-most digit indicates the selected parameter.
      • LED 2: Adjusts Wye/Delta (Y/D) time (factory set for optimum performance).
      • LED 3 (AUTO-DUAL timer): Sets the duration (in minutes) the compressor runs unloaded before shutting down. A 'd' on the left-most digit indicates this timer.
      • LED 4 (Auto-restart delay): Sets the delay (in seconds) before the compressor automatically starts on power-up. An 'r' on the left-most digit indicates this setting. Set to 0 if auto-restart is not required.
    • MENU 02: Filter Service Hours:
      • LED 1 (Separator Service Hours): Displays remaining hours, alternating with 'SEPA'. Resets after servicing.
      • LED 2 (Air Filter Service Hours): Displays remaining hours, alternating with 'Alr.F'. Resets after servicing. An 'A' blinks on time-out.
      • LED 3 (Fluid Filter Service Hours): Displays remaining hours, alternating with 'FLu.F'. Resets after servicing. An 'F' blinks on time-out.
      • LED 4 (Fluid Sample/Service Hours): Displays remaining hours, alternating with 'FLu'. Resets after servicing or sampling.
      • These LEDs blink when service intervals reach '00'.
    • MENU 03: Display Units and Model Type:
      • LED 1: Selects Pressure display units (PSIG or BAR).
      • LED 2: Selects Temperature display units (°F or °C).
      • LED 3: Selects Compressor Model (QSF or QSB/QMB - factory set).
      • LED 4: Sets Running (Total) Hours (only adjusted during controller replacement to match previous records).
      • LED 5: Sets Compressor I.D. (for future network control).

Maintenance Features

The electronic control provides fault and service indicators to guide maintenance activities.

  • Faults:

    • EMERGENCY STOP: Pressing this button immediately halts compressor operation, removing power from all control relays. The panel LEDs flash, and 'STOP' flashes on the display. To reset, twist the button and press RESET.
    • CONTACTOR FAULT: Side LEDs flash if the main contactor fails to close or open properly.
    • OVERLOAD: The dedicated LED lights if the motor overload trips.
  • LED & Message Indicators (Specific Faults):

    • Excessive Pressure Error: Top LED flashes fast.
    • Separator Element Clogged: Second LED flashes slowly.
    • Air Filter Timer Expired: 'AIRF' flashes on the display.
    • Excessive Temperature: Third LED flashes slowly.
    • Temperature Error (broken wire, etc.): Third LED flashes fast.
    • Fluid Timer Expired: 'F0' flashes on the display.
    • Motor Overload: Fourth LED flashes fast.
    • Power Line Glitches: The left 3 bars on the display flash, indicating potential issues with the 3-phase power supply (loss of cycles > 40 milliseconds).
  • Service Replacements:

    • Safety First: Always disconnect and lock out all power supplies before any repairs. Verify no AC voltage is present.
    • Replacing Sensors/Transducers:
      • Temperature Sensor (HAT probe): Disconnect conduit, cut wires, remove from reservoir side, install new probe into discharge tube, splice wires, and reconnect conduit. Perform HAT tests.
      • Pressure Transducer: Open enclosure door, remove wire channel cover. Ground yourself with a wrist strap before touching the circuit board. Disconnect transducer wires at the microprocessor. Remove transducer from Teflon bushing (replacement recommended). Install new bushing and transducer, reconnect wires, and reinstall cover.
    • Replacing Electronic Control:
      • Ground yourself before touching the circuit board.
      • Record total running hours, separator hours, air filter hours, fluid filter hours, and fluid service/sample hours from the old control. This data must be transferred to the new control.
      • Remove screws, wire tie-wraps. Identify and label all wire locations before disconnecting.
      • Install the new control panel, wire according to the diagram, attach to the door, and secure wiring with new tie-wraps.
    • Operational Test: After replacement, restore power. If the electronic control was replaced, program it using the Program Setup Menu, then perform an operational test.

Technical Specifications (Implied/Derived)

  • Microprocessor-based: Indicates advanced control logic and programmability.
  • Sensor Inputs: Accommodates pressure transducers (4-20mA loop) and RTD temperature sensors.
  • Output Relays: Controls main, star, delta contactors, and load/unload functions.
  • Power Supply: Operates on 20VDC and 24VAC control power, derived from a 120VAC source via CPTs (Control Power Transformers).
  • Safety Features: Includes emergency stop, motor overload protection, phase protection relay, and various fault detection mechanisms (e.g., high temperature, excessive pressure, sensor errors).
  • Service Interval Tracking: Monitors and alerts for separator, air filter, fluid filter, and fluid sample/service hours.
  • Start-up Modes: Supports across-the-line and wye-delta starting configurations.
  • Connectivity: Future network control option indicated by the compressor I.D. setting.

This comprehensive control system ensures the Quincy QMB/T series compressors operate reliably, providing necessary information and control for both daily use and scheduled maintenance.

Quincy QMB Series Specifications

General IconGeneral
BrandQuincy
ModelQMB Series
CategoryAir Compressor
LanguageEnglish

Related product manuals