ISO|
PREPARATION
Before beginning assembly of product, make sure all parts are
present. Compare parts with package contents list and hardware
contents lists. If any part is missing or damaged, do not attempt
to assemble the product.
Estimated assembly time: one hour.
Tools required for assembly (not included): drywall saw, ”
Phillips head drill bit, electric drill, stud finder, drive Phillips
head screwdriver, standard face plate for light switch.
WARNING: Turn off electricity at breaker box before
beginning installation.
•
Carefullyremoveunitfromcarton
• Checkareaaboveinstallationlocationtobesurethatwiring
canruntotheplannedlocationductworkcanberunand
theareaissufficientforproperventilationIfductcannot
berunawayfromceilingorthereisnoductconsultwitha
professionalbeforeinstalling
• Inspectductworkandwiringbeforeproceedingwithinstallation
• Beforeinstallationmakesurethereisanaccessibleareafor
futuremaintenanceaccess
• Youmayneedthehelpofasecondpersontoinstallthisfan
onepersonontheatticsideandtheoneonthebathroomside
Note: Installation may vary depending on how the previous bath
fan was installed. Supplies necessary for the installation of your
bath fan are not all included; however, most should be available
at your local home improvement or hardware store.
The hole for installation is not sized to the fan unit – use the
following dimensions so that the Iso ceiling panel will rest flush
against the ceiling.
DIMENSIONREQUIREMENTS
Ceiling Opening
(L)
Ceiling Opening
(W)
Ceiling Opening
(H)
incm incm incm
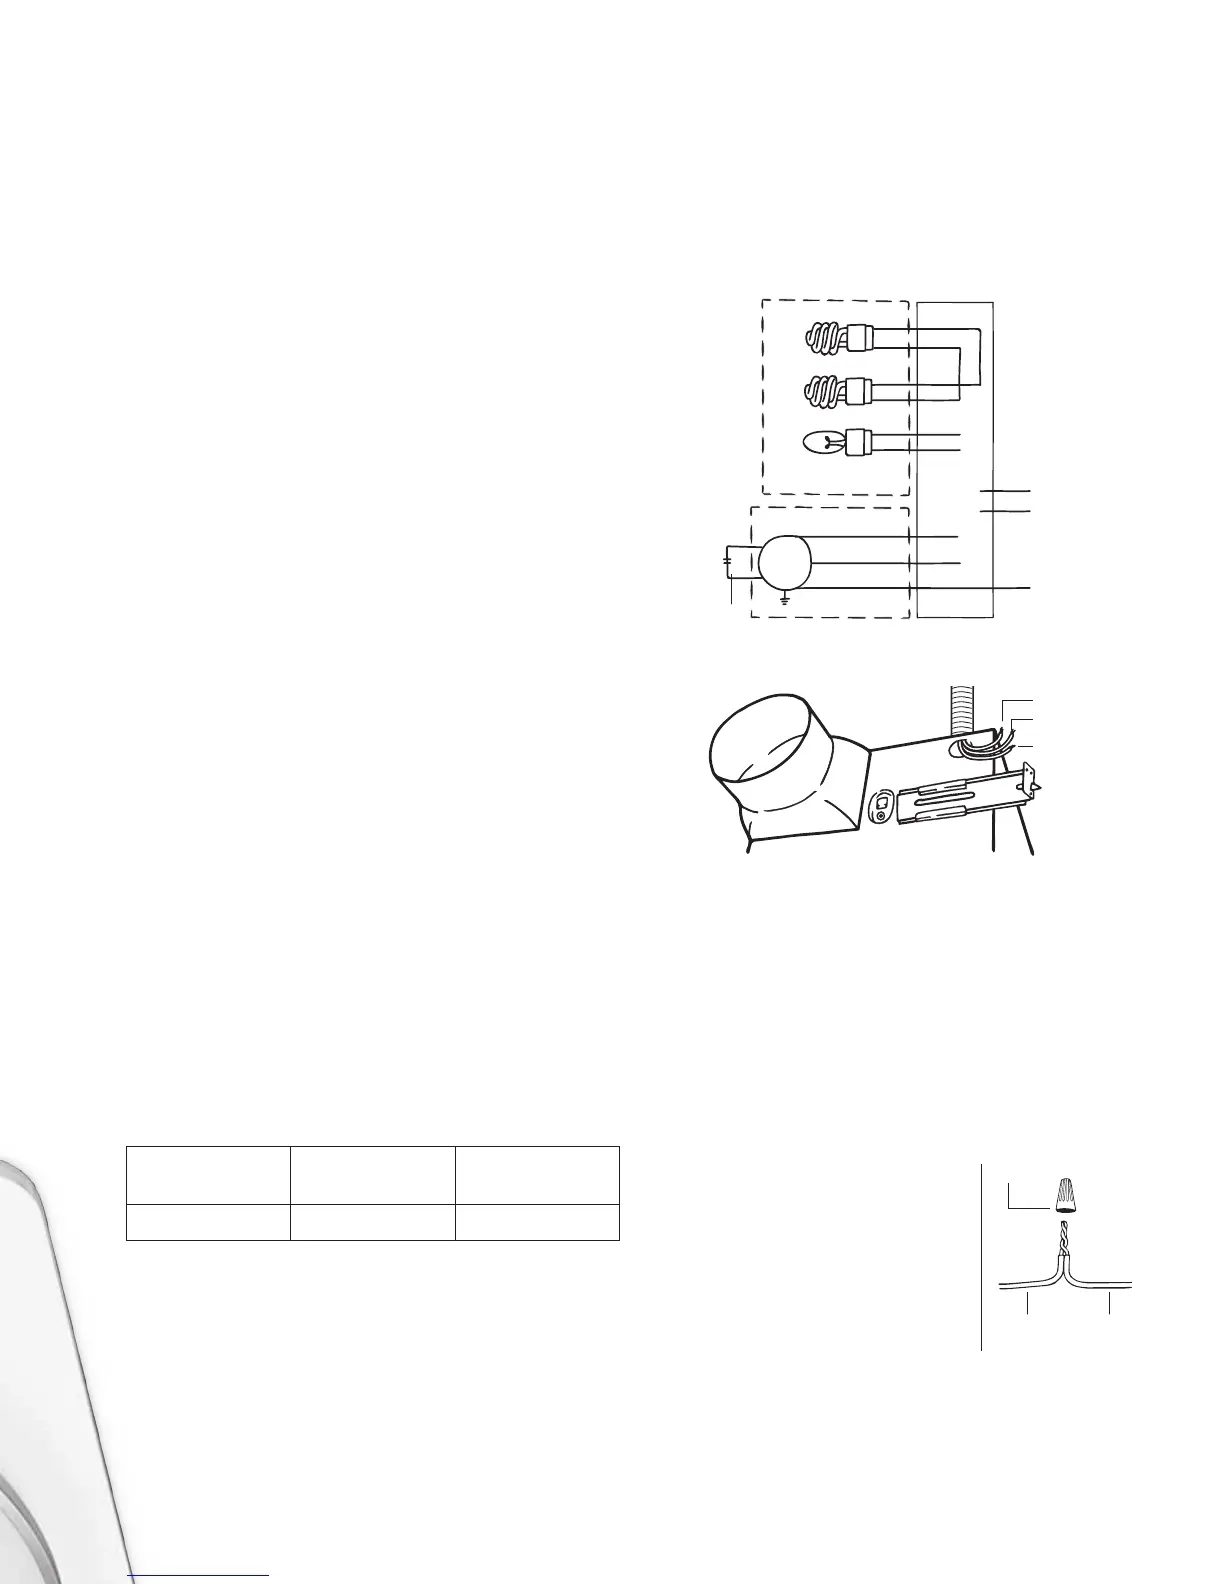
FANWIRINGDIAGRAM
WIRINGINSTRUCTIONS
LIGHT HOUSING
FAN HOUSING
CONTROLLER
PCBA
UPTOWATTS
UPTOWATTS
AUTOMATICTERMINALSWITCH
MOTOR
GREENWIRETOGROUND
CAPACITOR
FORLONG
LIFEOFFAN
WHITEWIRETONEUTRAL
BLACKWIRETOLIVE
WARNING: Wiring must comply with applicable electrical codes.
Turn OFF power before removing or installing wire nuts.
WARNING: Copper to copper only. Do not use aluminium wire.
CAUTION: Accessory part (wires nuts) should meet installation
instructions below.
NOTE: The wire nut is reusable on solid wire of the same wire
gage or smaller, do not reuse the wire nut on stranded wires.
•
Stripwires/˝–/˝cmcm
• Takebothwires
fromwallandfromnewswitch
andtwisttogethersecurely
Insertsecuredwiresintowirenut
• Verifywiresarefullyinserted
intothewirenut
Further wiring instructions are included
in the Installation Instructions section
NOTE – Important wire information: Maximum temperature
rating FCvolts maximum for building wire and
volts maximum for building wire and volts maximum
in signs and lighting fixtures.
The acceptable wire range includes: Solid: AWG
WIRE NUT
PRODUCT
WIRES
HOUSE
WIRES
BLACK WIRE
TO LIVE
WHITE WIRE
TO NEUTRAL
GREEN WIRE
TO GROUND


 To Next Page
 Loading...
