Do you have a question about the Qwest Actiontec M1000 and is the answer not in the manual?
Guide to restoring the DSL Modem to its factory default settings.
Steps to configure the WAN IP Address settings on the modem.
Guide to setting up PPPoE connection using ISP username and password.
Instructions for modifying the wireless network name (SSID) and security key.
Process to change the wireless channel for modem transmission.
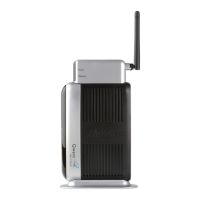
This document describes the troubleshooting process for wireless access (Wi-Fi) on the Qwest Standard Modem, specifically the Actiontec M1000 with the Actiontec W1000 Wireless Module. It serves as a guide for users experiencing wireless issues and outlines steps to modify various modem settings to resolve them. The instructions are applicable to all Internet Service Providers (ISPs) and assume the user has their PPP username and password, and that their computer is directly connected to the modem via an Ethernet cable, with the modem powered on.
The primary function of this guide is to assist users in diagnosing and resolving common wireless connectivity problems by guiding them through a series of configuration changes. These changes include resetting the modem to factory defaults, reprogramming the modem, altering the Wireless Network Name (SSID), changing the Security Key (WEP key), and adjusting the wireless channel. By systematically addressing these settings, users can often restore or improve their wireless internet connection.
The guide begins by ensuring the Qwest Wireless Module (Actiontec W1000) is properly installed into the Qwest Standard Modem (Actiontec M1000). If not, it provides a link to installation instructions. This foundational step is crucial for the wireless functionality to work correctly.
To access the modem's configuration interface, users are instructed to open a web browser and enter the IP address 192.168.0.1. The document then presents two possible interface screens: a blue and white screen or a solid blue screen. It directs users to different sets of instructions based on which screen they encounter, ensuring a tailored troubleshooting path.
The first major troubleshooting step involves resetting the modem to factory defaults. This is initiated by navigating to the "Utilities" tab within the modem's interface and selecting "Restore Default Settings." This action removes all current custom settings and reverts the modem to its original configuration, which can often resolve issues caused by incorrect or conflicting settings. The process requires a confirmation step, where users select "Restore Default Settings" again, followed by a "Thank You" screen indicating that the changes are being applied.
Following the factory reset, the guide moves into reprogramming the modem. This involves selecting the "Advanced Setup" tab and then "WAN IP Address." Users are presented with a warning about resetting other settings and are prompted to confirm their decision. This step is critical for re-establishing the internet connection with the ISP's specific parameters.
Within the WAN IP Address configuration, users are guided to select their ISP's connection type, typically "PPPoE." They are also instructed to enable "PPP Auto Connect" if it's not already checked. A crucial part of this step is entering the PPP username and password provided by the ISP. This ensures the modem can authenticate with the ISP and establish an internet connection. The guide also mentions common IP, DNS, and ATM encapsulation types, advising users to follow their ISP's instructions for these settings and to click "Apply" to save changes.
The next set of usage features focuses on changing the Wireless Network Name (SSID) and the Security Key (WEP key). Users are directed to the "Wireless Setup" tab. They must first ensure that wireless functionality is "On." The ESSID, which is how other wireless devices identify the network, can be changed or left as is. For security, users are guided to select "64-BIT WEP." They then have the option to use the factory default WEP Security Key or create a customized one by typing 10 characters (using A-F or 0-9). After reviewing the summary of selected settings, users click "Apply," and a "Thank You" screen confirms the changes.
Finally, the guide addresses changing the wireless channel. This is also done under the "Wireless Setup" tab, by selecting "Channel." Users are informed that primary channels are 1, 6, and 11, and they can select one of these. Changing the channel can help mitigate interference from other 2.4GHz devices like cordless phones, security cameras, and baby monitors, which can impact wireless internet performance. After selecting a channel, users click "Apply," and another "Thank You" screen appears, signaling the completion of the configuration. The document concludes by stating that users can now attempt to connect to the wireless signal transmitted by their Actiontec modem.
While the document primarily focuses on troubleshooting and configuration, the "Restore Default Settings" function can be considered a key maintenance feature. By allowing users to revert the modem to its original state, it provides a clean slate for resolving persistent issues that might stem from accumulated or incorrect configurations. This is a fundamental step in maintaining the modem's optimal performance, especially after multiple configuration attempts or if the device has been in use for an extended period and is experiencing unexplained issues.
The ability to change the Wireless Channel also serves as a proactive maintenance step. In environments with many wireless devices or neighboring networks, interference can degrade wireless performance. By providing instructions to change the channel, the guide empowers users to optimize their wireless signal and maintain a stable connection, preventing potential slowdowns or disconnections. This feature allows users to adapt their network to their specific environment, ensuring better long-term wireless reliability.
The instructions for updating the ESSID and Security Key, while primarily for security and personalization, also contribute to network maintenance. Regularly updating security keys is a good practice to prevent unauthorized access, and changing the ESSID can help in identifying and managing the network, especially in multi-network environments.
Overall, the document provides a comprehensive set of steps for users to manage and troubleshoot their Qwest Standard Modem with the Actiontec Wireless Module, ensuring they can maintain a functional and secure wireless internet connection.
| Type | DSL Modem |
|---|---|
| DSL Technology | ADSL2+ |
| Maximum Download Speed | 24 Mbps |
| Wi-Fi Frequency Bands | 2.4 GHz |
| WAN Port | DSL (RJ-11) |
| Wi-Fi Standards | 802.11n |
| Security Features | Firewall |
| Weight | 0.75 lbs |