Attach 2x Inner Runner to each side of the
Drawer, and you’re done.
H
I
THIS END TO BACK THIS END TO FRONT
G
J
N
Front Edge
Front Edge
MADE IN CHINA | DISTRIBUTED BY:
Zenexus (AUS) Ph. 1300 734 714 Zenexus (NZ) Ph. 0800 443 058
AUSTRALIA: RACK-IT.COM.AU NEW ZEALAND: RACK-IT.CO.NZ
DEEP SINGLE DRAWER
ASSEMBLY INSTRUCTIONS
ITEM CODE: 01906
RACK IT
STEP 1
STEP 1
STEP 2
STAGE 2: DRAWER IT
STAGE 3: RACK IT
Followed your Small Front Panel (N).
Hot tips:
1. Look at the Parts List on Page 1 to easily differentiate between your Right and Left Side Panels.
2. When you’re attaching the Inner Runners, be sure they’re the right way around (see diagram) and the front attachment hook is facing upwards.
Hot tips:
This can be fiddly, it’s way easier with 2x people. Be patient, and kind to one another. We’re almost done.
NOTE CORRECT POSITIONING OF RUNNER
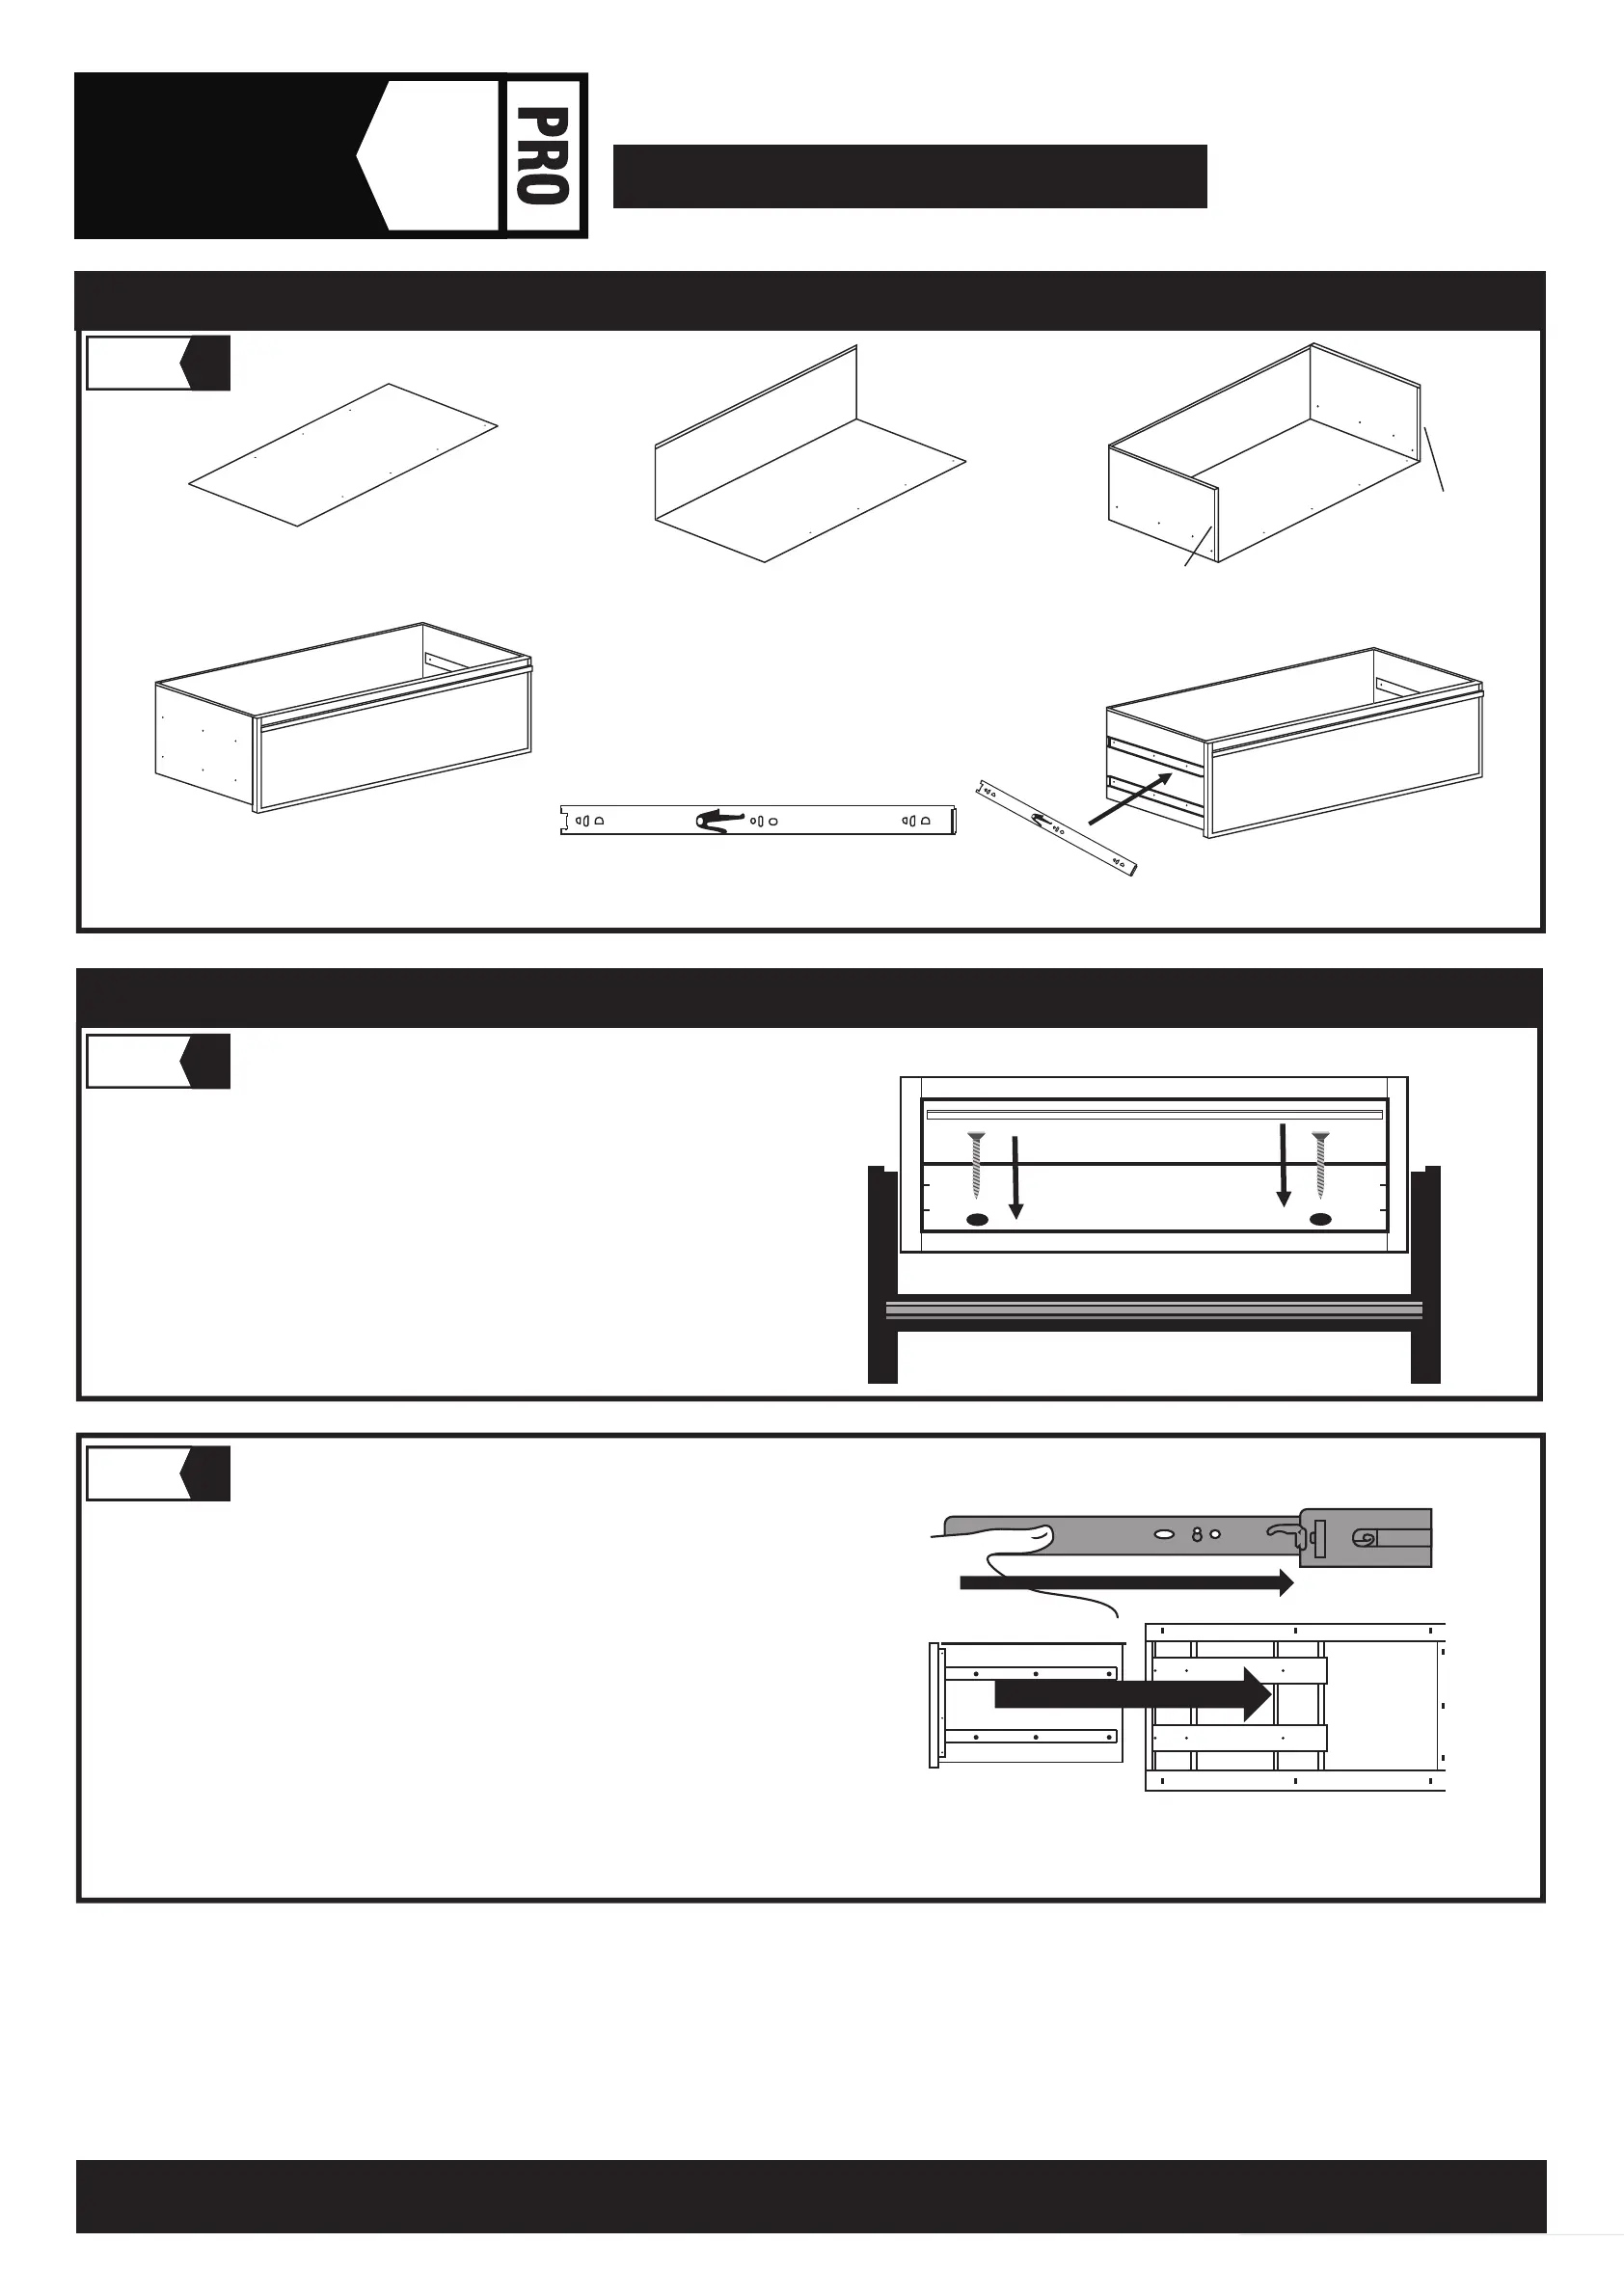
Place your Drawer Bottom (G) on your familiar flat
surface. Flat side up! And with the 3x
threaded holes to the back.
Screw fix on your Back Panel (J)
first (this is important).
Then fix your Side Panels (H & I).
You’ve done it! Cue warm inner feeling of satisfaction.
Stand back and marvel at your Rack It PRO Deep Single Drawer. Now all that’s left to do is select your precious stu to store inside.
Now is also the time to enjoy tossing these instructions in the recycling.
We knew you had it in you!
The final assembly is made easier (and more enjoyable) with a friend. Celebrate together
as you slide this baby home…
Carefully line up the Inner and Outer Runners on the Drawer. Once all 4x Runners are touching,
gently push the Drawer closed. Easy does it: you might need to slightly open and close the Drawer
a few times before it all falls into place.
If you’re screw fitting your Drawer to a Rack It MDF Shelf, now is the time to do so.
Pick 2x self-tapping screws no longer than 15mm, and fix the Unit down through
the 2x Screw Holes in the Bottom Panel.
Fix screws through the holes
RACK IT 15mm MDF SHELF
 Loading...