27
1300905-W2-A
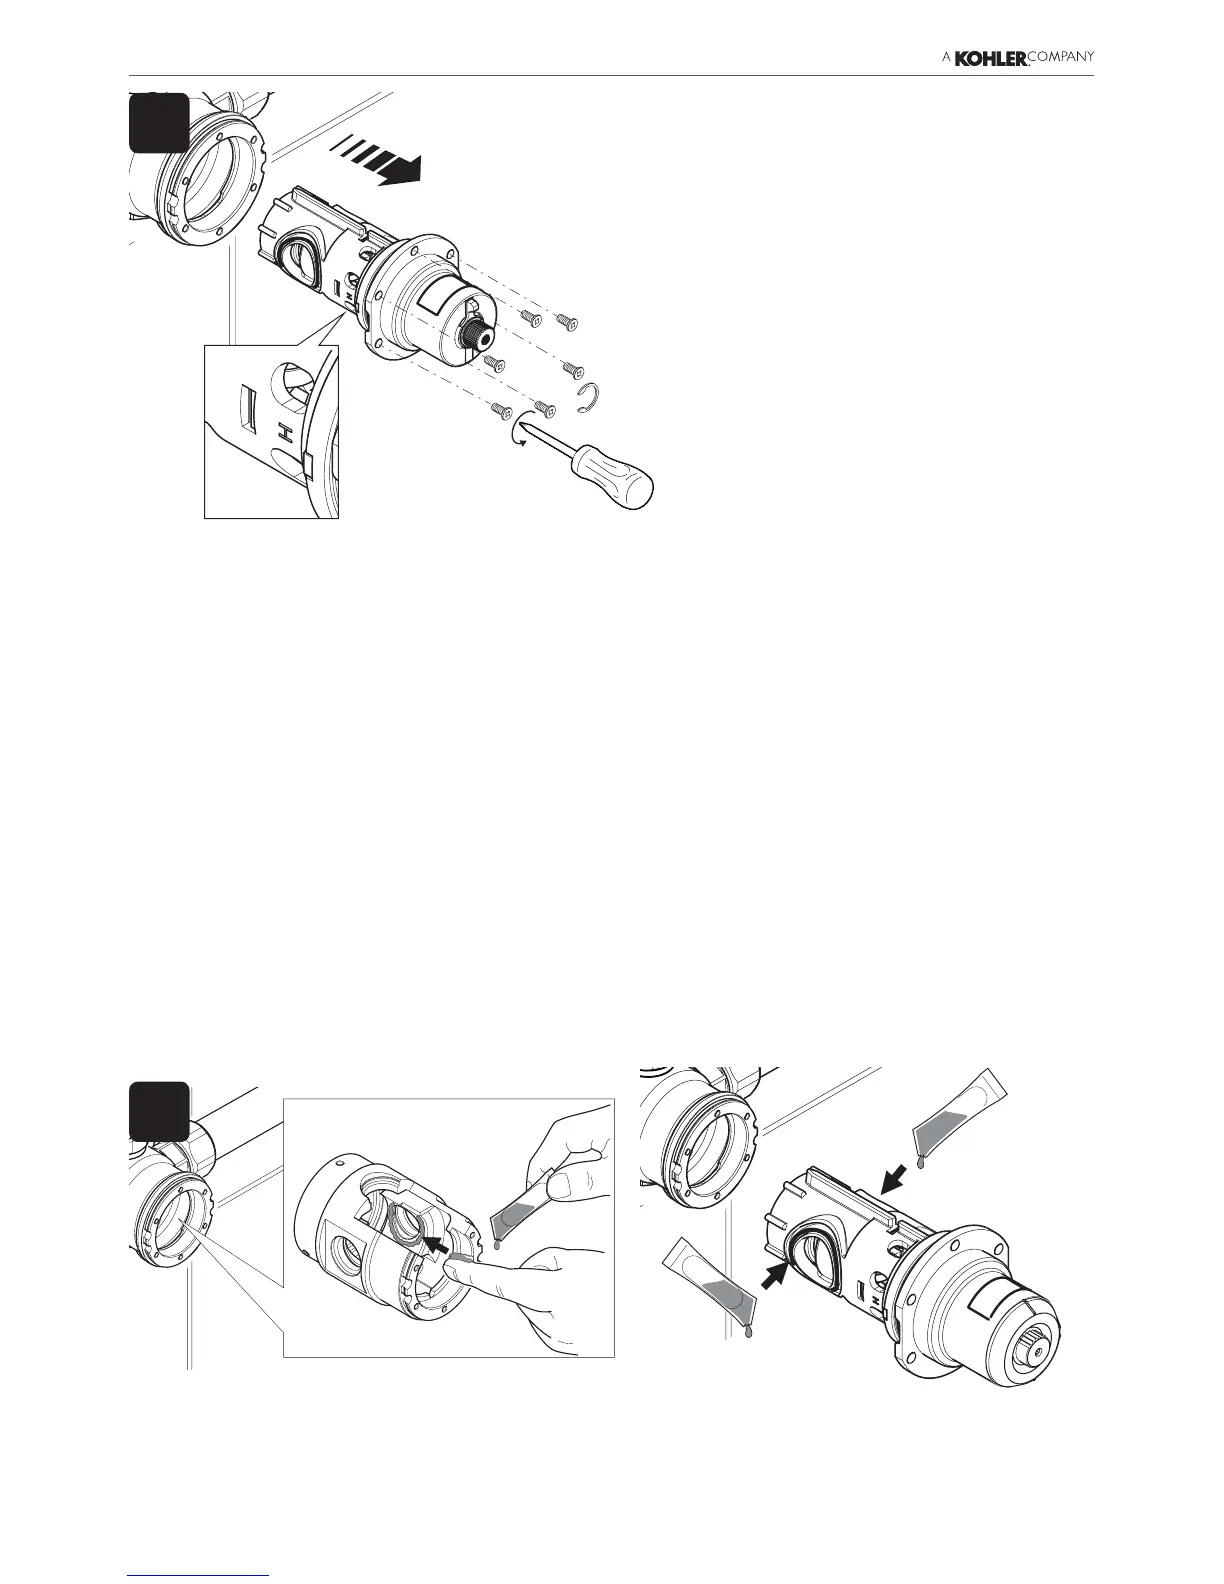
Remove the temperature knob concealing
cap and then the screw using the 3 mm
hexagonal wrench (supplied). Remove
the temperature knob, the temperature
indicating ring and the hub.
Remove the six screws holding the
cartridge assembly into the body.
Use a suitable tool inserted into the cut-
outs to lever the cartridge assembly from
the body.
Remove the cartridge assembly from
the body.
4
Cleaning/Renewal of Parts
1. The interior surface of the mixing valve body must be clean before re-tting the cartridge.
Rinse the valve interior thoroughly in clean water to remove any debris before retting
the cartridge.
Note! The body interior must be cleaned carefully and not damaged in any way. Do not
use any abrasive material.
2. Cartridges may only be cleaned by ushing through under a jet of clean water to remove
debris.
Do not descale. Descaling solution MUST not be used on any parts of the 320
valve. Cartridges are not serviceable, and must not be dismantled.
Cartridges cannot be tested individually, service condition should be assessed as part
of the performance check; refer Commissioning Checks.
3. Examine all accessible seals for signs of deformation or damage, and renew as necessary,
taking care not to damage the seal grooves.
Re-assembly
Note! Apply a small amount of silicone based grease to the top and bottom groove that the
inlet seals t to retain them whilst the cartridge is tted. Fit the inlet seals to the cartridge and
apply further grease to the seal faces and to the inside of the body as shown to aid insertion
of the cartridge into the body.
1
 Loading...