Page2
Setting the Program Schedules
This timer switch has the ability to program each individual day of the week separately, or program 7 days of the week at once. You can also program weekdays(5 days)to
one schedule and then weekends (2 days) to a different schedule. See the Menu information for details on how to set this up.(refer to Menu 02)
Above are default program schedules, to make changes, follow easy steps as below.
Use to adjust the day of the week you want to start programming or to the day you wish to edit an existing event / program.
2
(Press to select all 7 days of the week, and to cancel press again.)
ALL DAYS
Use and to adjust the time you wish the Program 1 event to commence for the selected day/days .
4
Use and to choose the ON or OFF status to be maintained during Program 1.6
Press and the LCD screen will show the time flashing for Program 2 , this signifies that the second daily event is now ready to be programmed.
7
NEXT
Repeat steps 4,5,6 to set the remaining programs/events, then press to store and exit.
Hint: During setting programs, press will clear a program entry and your timer switch will maintain the setpoint of the last executed program
until the beginning of the next program.
Lock the Keypad
To lock the keypad, press and hold the top left corner of display for 5 seconds, you will see
a lock symbol . To unlock, repeat the steps above and the lock symbol will disappear.
Reset to Factory Setting
With the timer switch turned off, press and hold OFF for 5 seconds until you can see -- : -- on LCD.
Temporary Override (5+2/ 7 day program mode only)
Touch the ON or OFF status display, and it will start to flash. Use up or down buttons to adjust.
Press to accept, and you will see “Override” on display. The timer switch will maintain the new
status until the next programmed event(comfort level).
To cancel the override setting, press
RUN
SCHEDULE
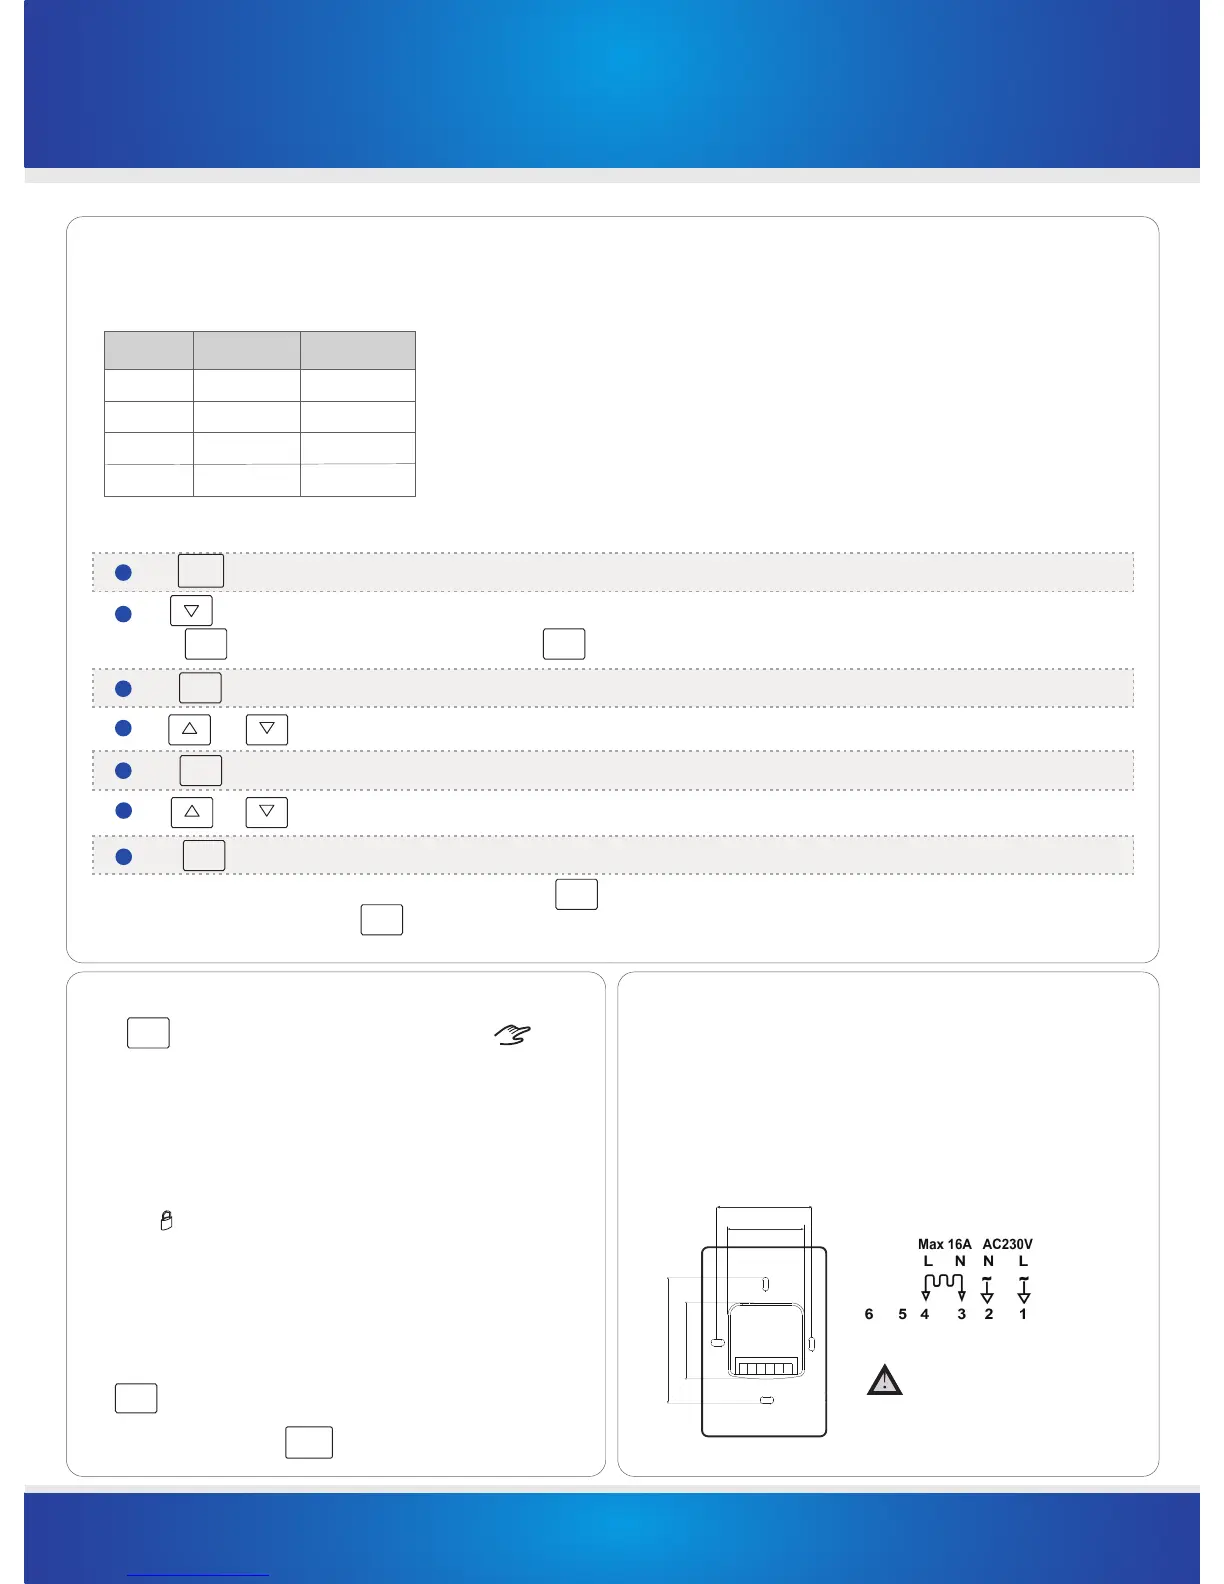
Installation and Wiring
Carefully separate the front half of the timer switch from the back plate by placing a small
flat head terminal driver into the slots on the bottom face of the the timer switch.
Carefully unplug the ribbon connector which is plugged into the front half of the timer switch.
Place the time switch front half somewhere safe. Terminate the timer switch as shown in the
diagrams below.
Screw the timer switch back plate on to the flush box
Re-connect the timer switch ribbon cable and clip the two halves together.
This product should be installed by
a qualified electrician.
TR8100VTM Timer Switch Instructions
ver 2.0
DONE
DELETE
DONE
R e a r V iew
Press and the temperature will start flashing.
5
NEXT
Press the LCD screen will show the time flashing for Program 1.
3
NEXT
Press and the day display will start flashing. (If your timer switch is set to 5+2 day programmable mode, the programming will skip to step3)1
SCHEDULE
82mm
62mm
60mm
45mm
ALL DAYS
not in use
Program Start Time Setpoint
1
07:00 ON
2
09:30 OFF
3
16:30 ON
4
22:30
OFF
Auto / Manual Mode
MODE
Press to select Auto/Manual mode. In Manual mode( ), the
timer
manually turns the output on or off. First touch the ON or OFF display,
In Auto mode, the timer executes the preprogrammed schedules.
use the up or down
button to select ON or OFF status.
 Loading...