© 2004 RadioShack Corporation.
All Rights Reserved.
RadioShack and RadioShack.com are trademarks used by RadioShack Corporation.
OWNER’S MANUAL — Please read before using this equipment.
Radio-Controlled Travel Alarm Clock
Your RadioShack Radio-Controlled Travel Alarm Clock combines a
simple design with advanced technology. The clock automatically
updates the time setting when its built-in antenna receives the
60 kHz longwave radio signal from station WWVB which broadcasts
the time according to the U.S. government’s atomic clock in Boulder,
Colorado. The clock checks this continuous signal several times
each day, giving you the most accurate time possible. The clock
comes with a carrying case, which makes it perfect for travel.
The clock’s other features include:
Four Time Zones — let you see the time for Pacific, Mountain, Cen-
tral, or Eastern time zones.
Five Languages — let you view the day of the week in English,
French, German, Italian or Spanish.
Backlight — lets you light the display for about 8 seconds so you
can see the time in the dark.
Dual Display — displays the current time and date or the current
time and alarm time.
Low Battery Indicator — appears when the battery is weak.
Snooze Control — temporarily silences the alarm for about 8
minutes.
Built-In Antenna — receives periodic time updates from WWVB.
Built-In Stand — lets you place the clock on a flat surface for easy
viewing.
Crescendo Alarm — gradually increases in volume to gently
awaken you.
Easy-to-Use Controls — let you manually set the clock and the
alarm time if you are in an area that prevents good reception of
WWVB.
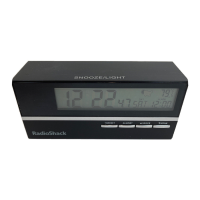
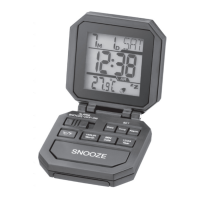
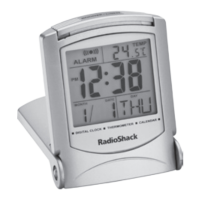
A QUICK LOOK AT THE CLOCK
INSTALLING BATTERIES
Your clock requires 2 AAA batteries (not supplied) for power. For the
best performance and longest life, we recommend RadioShack
alkaline batteries.
Cautions:
• Use only fresh batteries of the required size and recommended
type.
• Do not mix old and new batteries, different types of batteries
(standard, alkaline, or rechargeable), or rechargeable batteries
of different capacities.
Follow these steps to install batteries.
1. Lift the antenna stand up and slide the battery compartment
cover down to remove the cover.
2. Place the batteries in the compartment as indicated by the
polarity symbols (+ and –) marked inside.
3. Replace the cover.
When flashes, the display dims, or the clock stops operating
properly, replace the batteries.
Warning: Dispose of old batteries promptly and properly. Do not
burn or bury them.
Caution: If you do not plan to use the clock for a week or longer,
remove the batteries. Batteries can leak chemicals that can destroy
electronic parts.
Notes:
• If the clock does not operate after you install the batteries,
remove them and wait about five seconds until the display
clears. Then reinstall the batteries.
• The clock is set to automatically search for a radio signal to set
the time and date when you install the batteries. To set the clock
manually, see “Manually Setting the Time, Date, and Language”
on Page 2.
As soon as you install the batteries, all display segments briefly
appear. Then
PM 12:00, 1M, and 1D appear.
For about 2 minutes after you install the batteries, the clock scans
for the radio signal while the radio indicator and the United States
time zone map flash.
The clock also automatically shows a time zone. While the clock is
scanning for a signal, you can set it to show your time zone. To
change the time zone, repeatedly press
ZONE until your time zone is
highlighted (
P = Pacific, C = Central, M = Mountain, or E = Eastern).