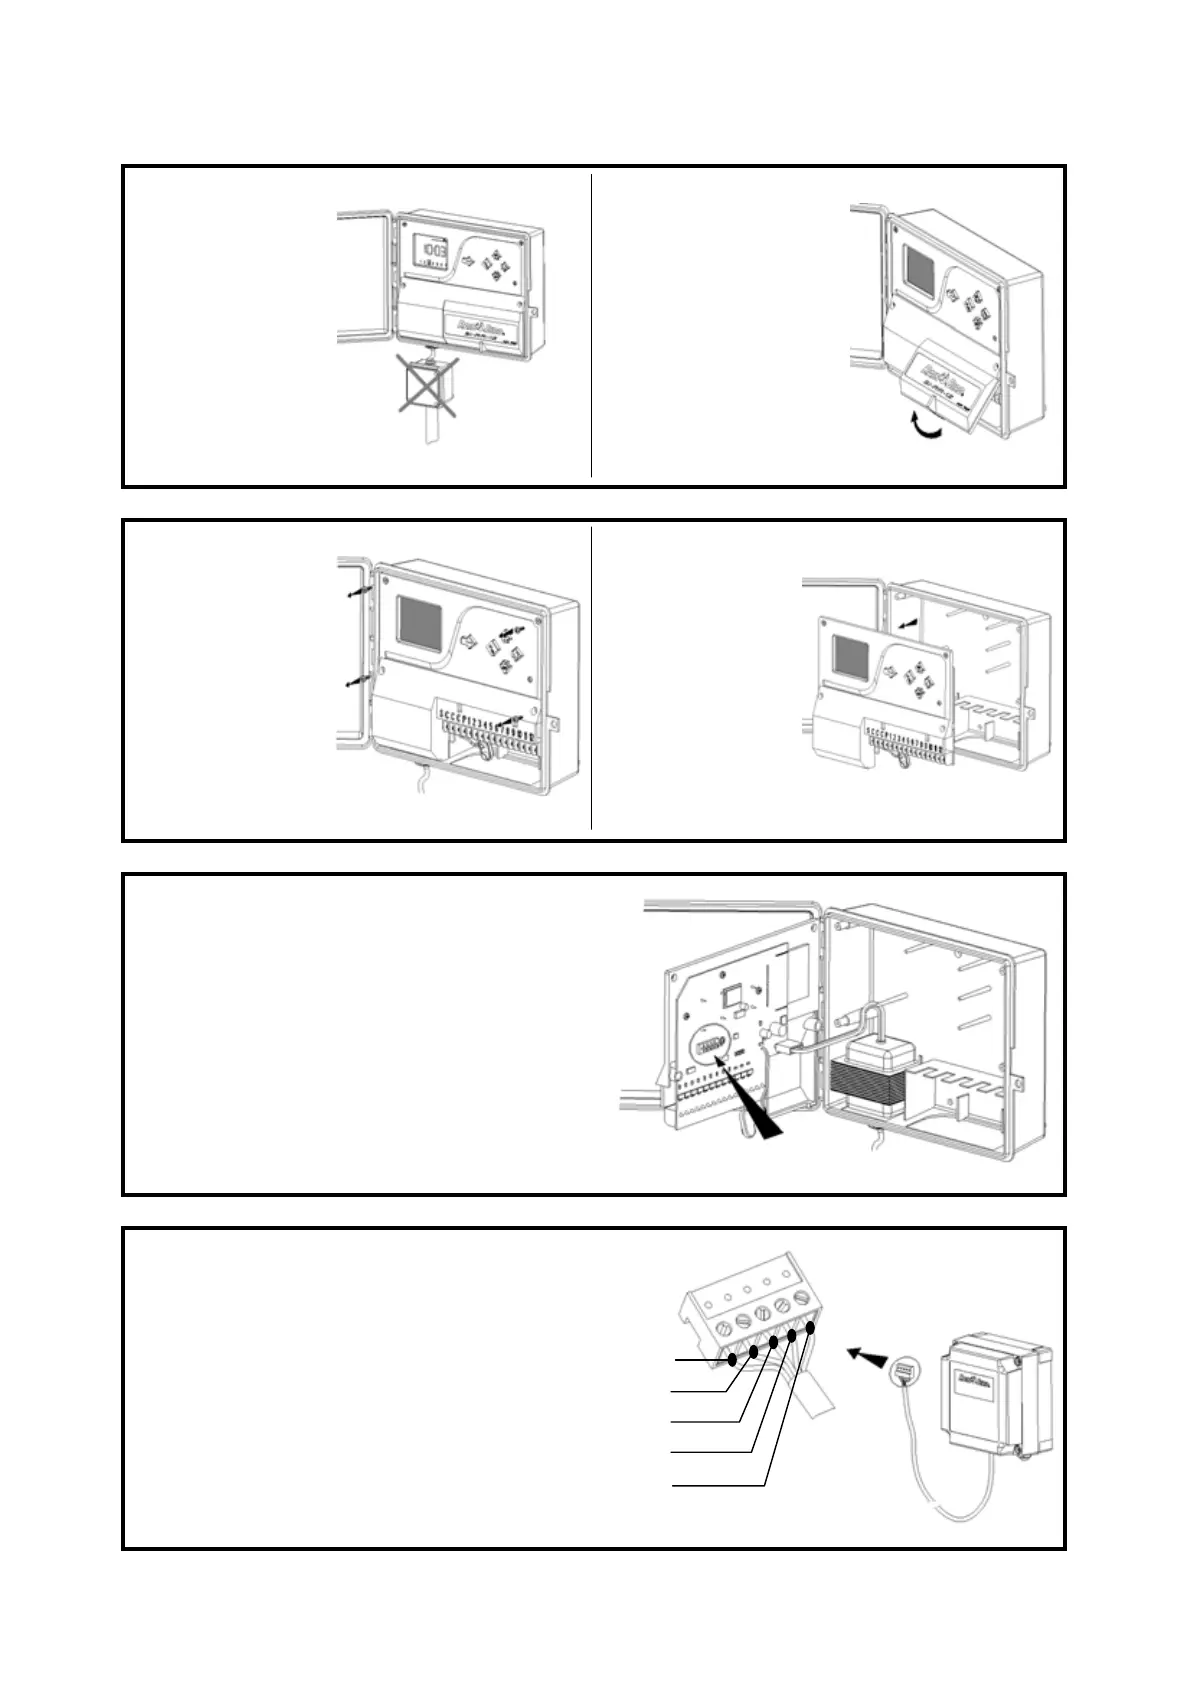
Make sure the
230V power
supply is off
before installing
the controller.
Remove the
terminal strip
access door.
Unscrew the 4
screws that
secure the front
panel.
Remove the
front panel.
The pin connector for the radio interface is
located on the back of the electronic circuit
board.
Install the radio interface unit in the
desired location (2m of connection cable
included). Insert the cable inside the
controller cabinet. Adjust the cable
length as required. Wire the pin plug by
following the color codes indicated in
the drawing.
5: BLUE
4: WHITE
3: YELLOW
1: BROWN
2: GREEN
2