17
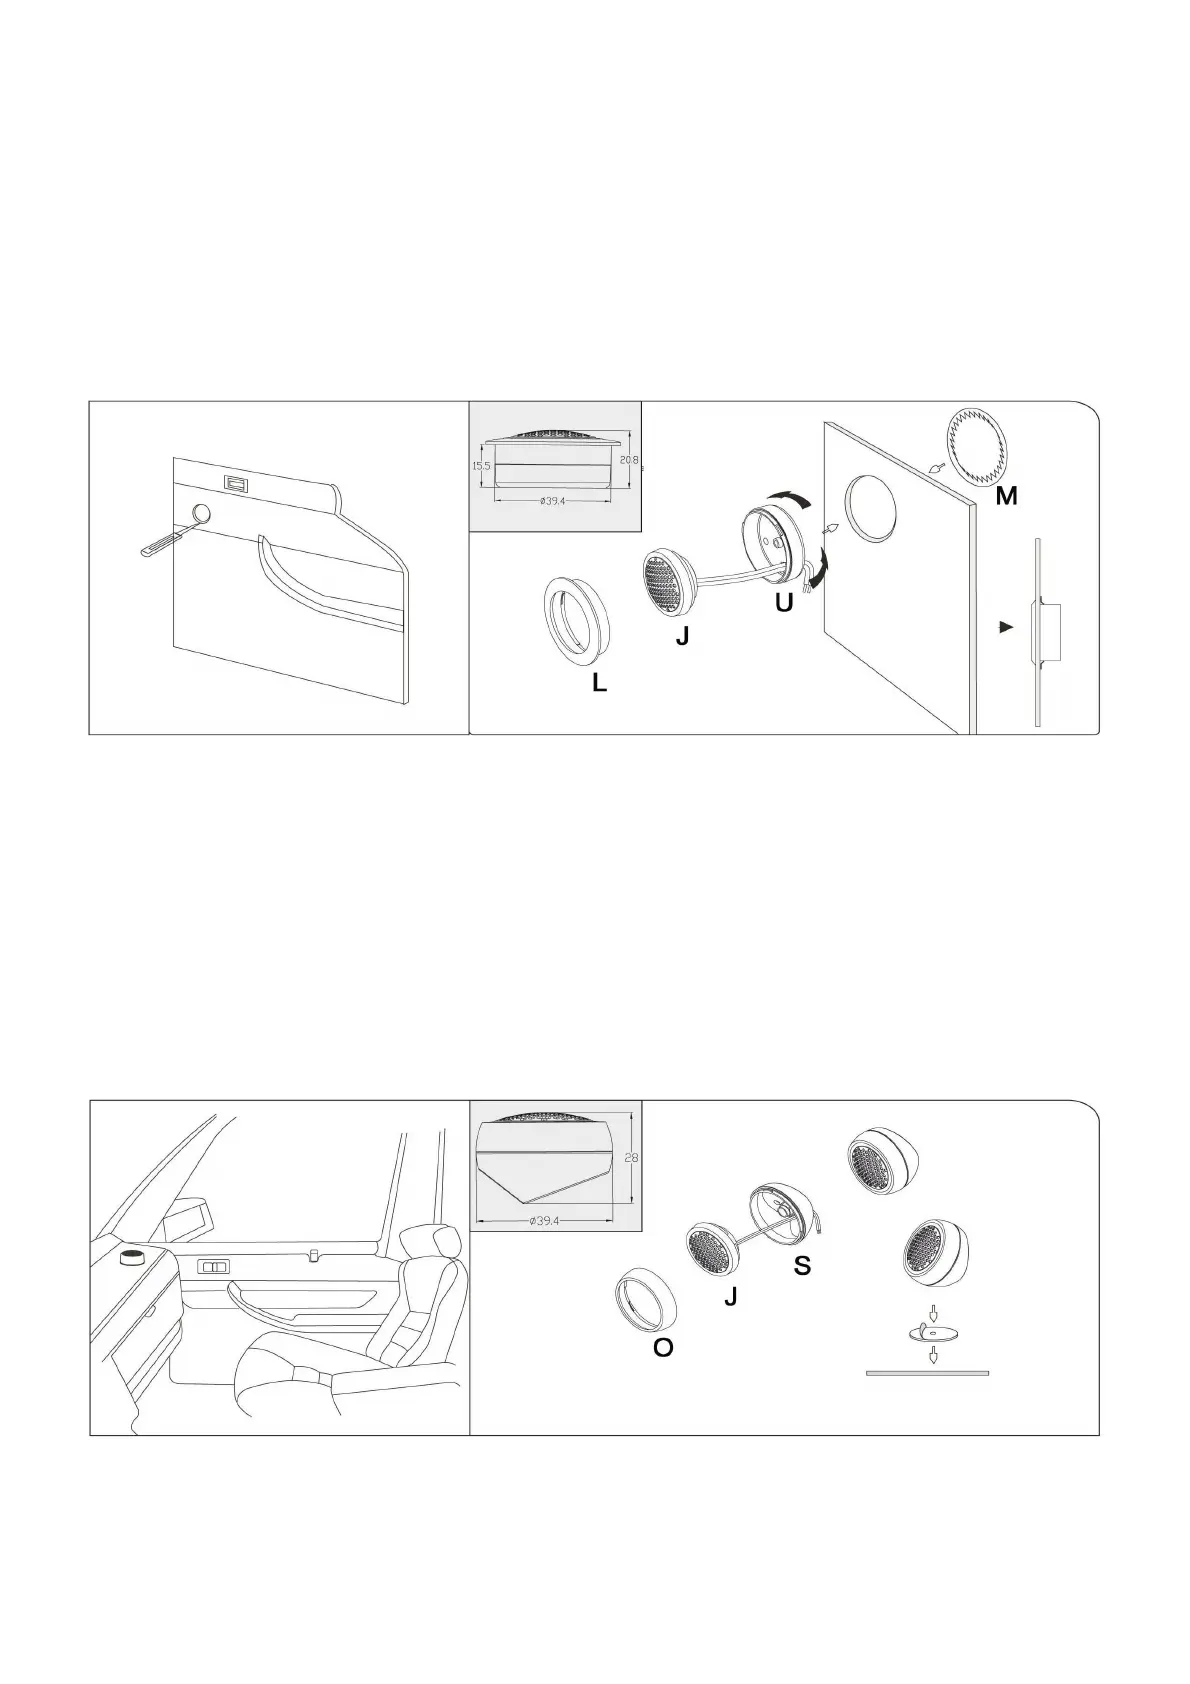
Flush mount installation: Fig. 3
• Place the flush mount cup (L) on the installation place. Scribe and cut-out mounting hole.
• Place tweeter (J) on ground plate (U), pull cables through the appropriate holes and put flush
mount ring (L) over the tweeter and fix it by twisting.
• Place complete tweeter in cut-out and fix it with ring (M) from the backside.
• The tweeter can be moved in all directions now.
• Connect the tweeter-cable with the crossover. The cable with the red marking is “+”
Fig. 3: Flush mount installation
Angle mount installation: Fig. 4
• Put angle mount cup (S) on desired installation place. Scribe the mounting holes and cable
feedthrough and drill them.
• Fix angle mount (S) with the provided screws.
• Twist the intermediate ring on the tweeter and pull it down to remove it.
• Insert tweeter (J) into the angle mount cup (S) and push the cables through the cable
feedthrough
• Fix the tweeter (J) into the angle mount by twisting until it snap in.
Fig. 4: Angle mount installation
Attention: Use the provided assembly-kit for tweeter installation only!