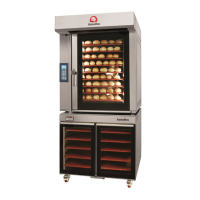
This document describes the Ramalhos TURBORAM oven, a professional baking appliance designed for both manual and automatic operation, featuring a sophisticated control panel and a separate prover unit (optional).
Function Description
The TURBORAM oven is designed for baking various products, offering precise control over temperature, baking time, steam injection, and fan speed. It supports both manual operation for direct control and an automatic mode with up to 20 programmable baking cycles, each with up to four stages. The optional prover unit provides a controlled environment for dough proofing, managing both temperature and humidity.
Important Technical Specifications
Oven Manufacturer:
Ramalhos, S.A.
Rua Arrota de Baixo, 823
Covão ZI EN1 Norte
3750-802 Águeda · Portugal
Tel. +351 234 630 200
Fax +351 234 630 209
ramalhos@ramalhos.com
www.ramalhos.com
Electrical Connections:
- Electric Current Connection: Requires a connection respecting the color code for wiring.
- Current Source:
- Ground Source (⏚)
- Blue Source (N)
- Beige Sources 3~ (400 V)
- Prover Electrical Connection (Monophasic): 230V + ground (brown for 230V, blue for neutral, yellow/green for ground). Ramalhos is not responsible for incorrect wiring.
Water Connections:
- Water Entry: 1/2" connection with a pressure of 300 to 350 kPa. A filter should be placed to remove residue.
- Water Regulation: For steam production.
- Drainage: Water residues from the prover container should be removed monthly.
Safety Features:
- Security Thermostat: Set at 320°C.
- Thermal Cutoff Device/Circuit Breaker: For motor protection.
- Overheating Warning Circuit Breaker.
- Prover Safety Thermostat Sensor: For temperature control within the prover.
Control Panel Components (Oven):
- LCD Display
- Function Keys (F1, F2, F3)
- Temperature Selection Key
- Button to Select Baking Time
- Steam Injection Key
- Button to Select Fan Speed
- Steam Output Valve
- Light Key
- Exhaust Key
- START/STOP Key (Multifunctional)
- ON/OFF Key (Panel)
A. Programme Keys
B. START/STOP Programme Key
C. Auxiliary Keys (Light/Exhaust)
Control Panel Components (Prover - Optional):
- Temperature Display
- Humidity Display
- Prover Heating Pilot Light
- Humidity Pilot Light
- Temperature Button (for editing temperature and turning heating ON/OFF)
- Humidity Button (for editing humidity and turning humidity ON/OFF)
- Increase Value Button
- Decrease Value Button
- Light Button (for turning light ON/OFF)
- TECLA ON/OFF (for turning the control panel ON/OFF)
Usage Features
First-Time Heating:
- Upon initial power-on, the oven enters "Ramalhos mode" and displays "Function Test" and "First Heating".
- Function Test: Checks proper oven functioning after installation (temperature limited to 50°C).
- First Heating: Crucial for future proper functioning and avoiding structural problems. This program must be completed in full. It can take up to 3 hours and will restart from the last recorded temperature (with a 25°C margin) in case of a power cut.
- The control panel automatically manages the process, displaying alternating information like oven temperature, remaining baking time, baking temperature (SET), cycle, and present phase.
Manual Operation:
- Select Programme 0 (NPROG).
- Confirm with F1 (OK).
- Program baking parameters (temperature, baking time, number of steam injections, steam valve status, turbine speed) using F1, F2, and F3.
- Exit programming mode by pressing START/STOP.
- Start baking cycle by pressing START/STOP. The oven pre-heats to the selected temperature.
- Once the temperature is reached, an acoustic signal sounds, and "OPEN and LOAD" is displayed. Load the product and close the door.
- "BAKING IN COURSE" is displayed. Steam injection and remaining baking time are automatic.
- After baking, "OPEN TO STOP" is displayed. Unload the product.
- Note: If baking time needs extension, close the oven door within 10 seconds to automatically add minutes. If the door is open for more than 10 seconds, the oven becomes inactive until a new cycle. Turbines continue functioning until temperature drops below 150°C for motor cooling.
- Slow Speed (SPx1): Recommended only for very light products or temperatures below 150°C.
Automatic Operation (Programming):
- Press F1 (PROG).
- Select desired program number (01-04) using F2/F3, confirm with F1 (PROG).
- Select program stage (01-04), confirm with F1 (OK).
- Name the program (up to 16 alphanumeric characters) using F2/F3 for character selection and F1 to confirm each character.
- Set parameters for each stage: temperature, baking time, steam injection time, steam valve status (ON/OFF), and turbine speed (normal speed SPx2 recommended).
- To create additional stages, press F2 and then F1 (OK).
- Exit the menu by pressing START/STOP.
- Note: The total baking time is the sum of each stage. Steam injection is generally recommended only during the first stage.
Editing Programmes During Baking Cycle:
- While "BAKING IN COURSE" is displayed:
- Temperature: Press temperature button, use F2/F3 to alter, F1 to set.
- Baking Time: Press time button, use F2/F3 to alter, F1 to set.
- Changes made in "Programme 0---Manual" are stored. Changes in other programs are only effective for the current cycle.
Manual Steam Output Valve Control:
- Press the steam output valve button to open or close it. LED on means open, LED off means closed.
Manual Steam Injection:
- Press the steam injection button once to inject more steam.
Prover Unit Operation (Optional):
- ON/OFF: Press the TECLA ON/OFF button for 2 seconds to turn the control panel ON/OFF.
- Temperature/Humidity Adjustment: Briefly press the corresponding button, use increase/decrease buttons to alter value, then briefly press the button again to validate.
- Heating ON/OFF: Press the temperature button for 2 seconds. LED on means heating is on.
- Humidity ON/OFF: Press the humidity button for 2 seconds. LED on means humidity is on.
- Light: Press the light button to turn it ON/OFF. It will turn off automatically after a preset duration.
Maintenance Features
Warning Messages and Frequency of Oven Maintenance:
- The oven has a system that warns the operator of the need for periodic maintenance ("SAT MAINTENANCE"). This is a general preventative warning, and shorter-term tasks should be performed regardless.
- To cancel the warning: F3 (user menu) -> F1 (maintenance) -> F2 and F3 simultaneously (MAINTENANCE STATUS = YES) -> F1 (HRST = 0) -> F2 and F3 (reload hours until next warning) -> F1 (validate and exit).
Cleaning:
- Weekly: Oven front, glass doors, baking chamber, racks, trays.
- Weekly (Outside): Use warm water (30-40°C), avoid abrasive products and water jets on electronic panels.
- Monthly (Glass and Doors): Remove glass from door, clean with warm water or cleaning products. Avoid iron filings or sandpaper.
- Do not clean with jets of water.
- Do not clean hot glass with cold water.
- Avoid corrosive products.
Preventative Maintenance Schedule:
- Lubricate the door lock: Every 250 hours (Use HHS 5.000 WURTH lubricant).
- Check the motor: Every 1500 hours (Consumption should be 1.15A each).
- Check the turbine: Every 2000 hours (Check for abnormalities).
- Check the resistance: Every 2000 hours (Consumption should be 5T=12A; 9T=17A).
- Check the opening system of the steam valve: Every 100 hours (Check proper opening and closing).
Light Bulb Substitution:
- Push the rubber up or down.
- Pull the glass out.
- Remove the light bulb and replace it with one of the same reference.
Breakdown Messages (Oven):
- E1: Main probe ruptured/reversed. Solution: Call technical assistance.
- E20: Thermal cutoff device/circuit breaker off. Solution: Reset thermometer.
- E30: Safety thermostat sensed excessive temperature. Solution: Call technical assistance.
- E31: Motor thermostat sensed excessive temperature. Solution: Call technical assistance.
Breakdown Messages (Prover Control Panel):
- E1: Rupture or reversal of the main probe. Solution: Substitute probe or contact Ramalhos technical assistance.
- E4: Humidity sensor. Solution: Contact Ramalhos technical assistance.
- E5: Rupture or reversal of the safety thermostat sensor. Solution: Substitute probe or contact Ramalhos technical assistance.
- E10: Internal temperature of the panel above 70°C. Solution: Oven resumes operation if temperature drops below 65°C.
- E11: Oven temperature too high. Solution: Oven resumes operation once temperature drops below safety limit.
- E14: Safety thermostat went off. Solution: Reset thermal cutoff or contact Ramalhos technical assistance.
- E20: Motor thermal cutoff. Solution: Allow motor to cool down. If message persists, contact Ramalhos technical assistance.
- E52: No water. Solution: Open water inlet or turn controller off and on again.
General Recommendations:
- The device is not intended for use by children or individuals with reduced physical, sensory, or mental capacities without supervision or prior instruction.
- Children should be supervised to ensure they do not play with the device.
- Avoid looking directly at the light bulbs when they are on.
- When positioned near dividing walls, furniture, or decorative accessories, ensure they are non-combustible and thermally insulated, adhering to fire prevention regulations.
- Baking products with high alcohol content is strongly advised against due to explosion and fire risk. If reduced alcohol content products are used, the steam valve must remain open throughout baking to evaporate alcohol.