Do you have a question about the Raptor Series MAGNUM RT Series and is the answer not in the manual?
| Series | MAGNUM RT Series |
|---|---|
| Category | Automobile Accessories |
| Brand | Raptor Series |
| Model | MAGNUM RT |
| Installation | Bolt-On |
| Compatibility | Specific vehicle models (check manufacturer's website for exact compatibility) |
| Finish | Black |
Support representatives are available to assist with installation questions and concerns.
Contact via phone (1-877-769-3765) or Live Chat at www.raptorseries.com.
Contact the seller immediately if parts are damaged or missing.
Caution: Do not install damaged parts to ensure safety and product integrity.
Returns accepted within 30 days for items in new, original packaging.
Installed, damaged, or non-original packaged items are not eligible for return.
Contact seller immediately if order arrives damaged; do not install.
Contact seller promptly if the wrong part is received.
Ship returns to CYC Returns Warehouse, Jasper, IN.
Covers manufacturer defects in materials, workmanship, and finish for powder coated steel.
Excludes damage from road hazards, misuse, improper installation, accidents, modifications, neglect, or scratches.
Covers manufacturer defects in materials, workmanship, and finish for stainless steel.
Excludes damage from road hazards, misuse, improper installation, accidents, modifications, neglect, or scratches.
Defective merchandise must be returned with the purchase receipt to the original place of purchase.
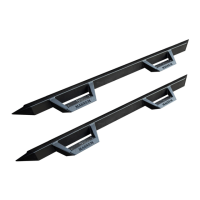
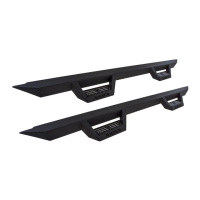
Lists all parts included in the kit, such as step bars and brackets.
Details the specific bolts, nuts, washers, and plates required for installation.
Lists the tools needed for installation, including a torque wrench.
Provides torque settings for M8-M12 bolts used in rocker panel mounts.
Verify all parts are present and undamaged before starting installation.
Diagrams show interior and underside rocker panel holes for bracket mounting.
Remove protective tape and rubber grommets from the rocker panel holes.
Guide for correctly installing U-Nut clips into the vehicle's rocker panel.
Aligning the mounting brackets on the vehicle's rocker panel.
Attaching front and rear mounting brackets with specified hardware.
Attaching center mounting brackets using M8 hardware.
Line up step bar holes with brackets and fasten using provided hardware.
Adjust the step bar for desired front/back and up/down placement before final tightening.
Ensure all hardware is tightened to specified torque after positioning.
Instructions for cleaning and adhering Front Armor Plates to the step bars.