EasyManua.ls Logo

Rasonic RC-N1221V - User Manual

Rasonic RC-N1221V
2 pages
Print Icon
To Next Page IconTo Next Page
Loading...
When installing air conditioner at glass window
or thin partition, fix the vertical and side supporting
bar to the concrete wall in order to support the weight
of the air-conditioner and reduce the vibration that is
being transferred to the glass window or thin partition.
This can minimize the noise problem caused by
improper installation.
ACXF55-32500
Do not use the unit for other purposes, than its intended use.
Do not remove the power plug by pulling the cord.
Do not block the air intake and outlet vanes.
Do not splash or direct water at the unit.
Do not expose the unit to direct sunlight during operation.
Do not operate the unit without the air filter installed
or when the front intake grille has been removed.
Do not place any objects on the unit.
Do not operate any combustion equipment near the unit’s
air flow area.
Do not sit or step on the unit, you may fall down accidentally.
Do not touch the sharp aluminium fin, sharp parts may
cause injury.
Do not use means to accelerate the defrosting process or to
clean, other than those recommended by manufacturer.
Plug in properly before operating and use a specified power cord.
If abnormal conditions (burnt smell, etc.) occur, switch off and
remove the power plug.
Confirm to authorized dealer or specialist on usage of specified
refrigerant type. Using of refrigerant other than the specified
may cause product damage, burst and injury etc.
This appliance is not Intended for use by persons (including children)
with reduced physical, sensory or mental capabilities, or lack of
experience and knowledge, unless they have been given super-
vision or instruction concerning use of the appliance by a person
responsible for their safety. Children should be supervised to
ensure that they do not play with the appliance.
Switch off the breaker and unplug the unit from the socket
if the unit will not be operated for a long period.
Pay attention to any damages on the unit caused by
extensive usage.
Ventilate the room occasionally where the unit is installed.
Unplug the power cord when cleaning the unit.
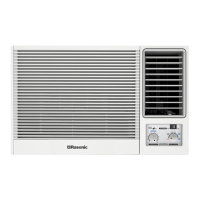
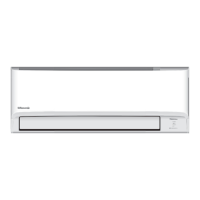
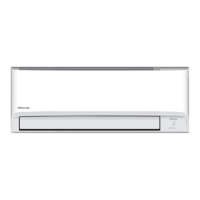
Main Control Panel
OPERATION PRECAUTION
MAIN UNIT
This sign warns of risk of
death or serious injury.
This sign warns of risk of injury
or damage to property.
Do not modify the length of power cord or use an extension cord.
Do not touch or operate with wet hands.
Do not modify or damage the cord.
Do not turn on the unit by inserting the power plug.
Do not switch off the unit by pulling out the power plug.
Avoid an extended period of direct airflow.
Do not Insert your fingers or other objects into the unit, rotating
parts may cause injury.
Do not try to repair the unit yourself.
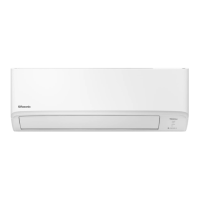
PARTS IDENTIFICATION2
CHOOSING THE INSTALLATION LOCATION
PREPARATIONS BEFORE INSTALLATION
CAUTION POINT DURING INSTALLATION
REMOVAL OF FRONT GRILLE
AIR CONDITIONER OPERATION3
AIR CONDITIONER INSTALLATION4
Air Swing Switch
(Airflow direction adjustment Side-to-Side)
To obtain a fix airflow direction, set the air swing switch to “ON” for the
vanes to swing from side to side until the desired flow direction is reached,
then switch it to “OFF”.
For continuous side-to-side air cirulation set the air swing switch to “ON”.
OPERATING INSTRUCTIONS
ROOM AIR CONDITIONER
ENGLISH
RC-N1221V
Main Control Knob
Air Swing Switch
OFF Stops the operation of Air Swing.
ON Air Swing is in operation.
(Only for LOW COOL and
HIGH COOL operation.)
Low fan speed operation
(without cooling)
Low fan speed with
cooling operation
High fan speed with
cooling operation
High fan speed operation
(without cooling)
“OFF”
Stops all operation
Main Control Knob
Turn the thermostat control knob as shown:
Main Control Knob
Set to LOW COOL or HIGH COOL as desired.
(FAN setting operates the fan only.)
Caution: If the main control knob is turned off or changed to a fan setting
from a cooling operation setting, WAIT at least 3 minutes before
resetting to cooling operation.
1
Thermostat Control Knob
Set the thermostat control knob to your desired setting. (Usually 6 - 7 is
recommended). If the room temperature is not as desired after a reasonable
period of time, turn the thermostat control knob clockwise to cool the room
more or counter clockwise to cool the room less.
When the thermostat control knob is set to 10, moisture may freeze on
the evaporator fins and prevent effective cooling. If this happens, turn
the Main Control Knob to HIGH FAN and the Thermostat Control Knob
counter-clockwise. This will quickly defrost the evaporator fins to resume
normal cooling operation.
2
3
When installing, use the nearest power outlet. Make sure the power outlet is easy
to reach so you can quickly disconnect your air conditioner in case of emergency.
Ensure that the air conditioner is well supported, securely fastened, easily reachable
and not obstructed.
Aviod location with: salty or sulphurous air, draughts, dampness and flammable gas.
If you install the drainage system, be sure to channel the concensed water to a
suitable location.
Covers, obstructions and unsteady support may cause excessive operating noise and vibration.
The rear end of the air conditioner is splash proof. You don’t need to shield or cover it.
R32 refrigerant air conditioner installation and maintenance should be done by competent person.
There should not be any obstacles surrounding
the unit.
Prepare and installation hole slightly bigger than the
cabinet size.
Left and right side of the unit should be at least
15 cm away from the wall.
The minimum installation height is 75cm.
Dimension
Proposed to use 1/8” x 1-1/4” angle-
aluminium for installation frame and
side supporting bar.
1
Remove the front grille.
3
a
b
c
d
Remove the air filter.
Tilt up and pull out the air filter by the holder.
2
Air Inlet Louver
Cabinet
Front Grille
Air Filter
(behind the front intake grille)
Front Intake Grille
Vertical airflow direction vane
(Airflow direction adjustment up-down)
The vertical airflow direction vane is
controlled by positioning the vent to
discharge the air upwards, downwards,
or straight out.
65.5cm
indoor
outdoor
35
The appliance shall be stored in a room without continuously operating ignition sources
(for example: open flames, an operating gas appliance or an operating electric heater)
Do not install, remove and reinstall the unit yourself.
Improper installation may cause Leakage, electric shock or fire. Please engage an authorized dealer
or specialist for the installation work.
Do not add or replace refrigerant other than the specified type.
It may cause product damage, burst and injury. If the supply cord is damaged, it must be replaced by
the manufacturer, its service agent or similar qualified persons in order to avoid hazard.
The room air conditioner must be earthed.
Improper grounding could cause electric shock.
Do not install the unit in a place where there are explosive gas leaks.
Gas leaks near the unit could cause fire.
Ensure that the drainage piping is connected properly.
R32
Otherwise water will leak out.
In cases that require mechanical ventilation, ventilation openings shall be kept clear of obstruction.
Ventilate any enclosed areas when installing or testing the refrigeration system.
Escaped refrigerant gas, on contact with fire or heat, can produce dangerously toxic gas.
Confirm after installation that no refrigerant gas is leaking. If the gas comes in contact with a burning
stove, gas water heater, electric room heater or other heat source, it can cause the generation of toxic gas.
INSTALLATION PRECAUTION
SAFETY PRECAUTIONS1
Please observe these following safety precautions when using your air conditioner.
Failure or negligence in observing these safety precautions could cause fire, electrical shock or personal injury.
This sign warns of risk of
death or serious injury.
This symbol (with a white background) denotes an action that is
PROHIBITED.
These symbols (with a green background) denote actions
that are COMPULSORY.
Risk of fire /
Flammable
materials
This sign warns of risk of
injury or damage to property.
This symbol shows that this equipment uses a flammable refrigerant.
If the refrigerant is leaked, together with an external ignition source,there is a possibility of ignition.
This symbol shows that the Operating Instructions should be read carefully.
This symbol shows that service personnel should be handling this equipment with reference to the
Technical Manual.
This symbol shows that there is information included in the Operating Instructions and/or
Installation Instructions.
Before operating the unit, read these operating instructions thoroughly and keep them for future reference.
Open the Intake Griille until over 90°
front grille fulcrum can remove from Grille force arm.
Remove the screw on the front grille.
At the bottom right side of the front grille,
press inward on the cabinet near the power
cord, and pull the grille outward to the right
until right tab releases.
At the bottom left side, push inward on the
cabinet and pull the grille outward to the left
to release the left tab. Do not pull the bottom
edge towards to you for more than 3 inches to
prevent the two top tabs from damage.
Slide the front grille upwards to loosen the two
top tabs from slots at the top of the cabinet.
Front Grille Fulcrum
Body Support
Grille Force arm
air filter
OPERATION CONDITIONS
Use the air conditioner
under the following
conditions:
Operating temperature range.
Continuous operation at over 90% high humidity
may create condensation and result in
waterdrops on the intake and outlet vanes.
Max. Temperature
Min. Temperature
NOTE:
Humi dity ma y exceed 90%
32
Indoor side
23
21 15
D.B.T.: Dr y Bulb Tempe ratur e
(unit in °C)
D. B.T. W.B .T.
W.B.T.: Wet Bulb Temper ature
43
Outdoo r side
26
21 15
D. B.T. W. B.T.
Avoid installation in the following locations.
Mechanical processing plants and other places with a lot of mechanical oil.
High humidity areas such as laundry room and bathroom.
Air conditioner normal operating temperature.
In side maximum temperature 30
Out side maximum temperature 43
NOTICE:
When the air conditioner is used at room temperature of 21 degrees or less,
the temperature may be too low, and the air conditioner may be easily
frosted. After frosting, it may be difficult to drain and may flow into the room.
(Based on IEC 60335-2-40, there is no restriction for the
minimum installation floor area since the refrigerant charges
is less than 1.224kg.
Ventilation Lever
The ventilation lever must be in CLOSE
position in order to maintain the best
cooling conditions.
When fresh air is necessary in the room, set
the ventilation lever to the Open position.
The damper is opened and room air is
drawn out.(If the ventilation lever is OPEN, there
is a chance that noisy noise can be introduced
into the room)
outdoor
Question and Answer IconNeed help?

Do you have a question about the Rasonic RC-N1221V and is the answer not in the manual?

Summary

Air Conditioner Operation and Safety

Operation Conditions and Controls

Specifies operating conditions, main control knob, thermostat, and air swing switch functions.

General Safety Precautions

Highlights safety symbols and general precautions for handling the unit.

Installation Safety Guidelines

Details safety measures during installation, including refrigerant handling and grounding.

Operation Safety Guidelines

Covers safety precautions to be followed during the operation of the air conditioner.

Main Unit Components Identification

Identifies key parts of the main indoor unit, including controls and airflow components.

Vertical Airflow Direction Adjustment

Explains how to adjust the vertical airflow direction vane for desired air discharge.

Ventilation Lever Functionality

Describes the function of the ventilation lever for fresh air intake and its impact.

Installation Caution Points

Advises on supporting the unit during installation on glass or thin partitions to reduce vibration.

Front Grille Removal Procedure

Provides instructions for safely removing the front grille for cleaning or maintenance.

Air Conditioner Installation Procedures

Chassis and Cabinet Installation Steps

Details the process of removing the chassis, placing the cabinet, and securing the chassis.

AC Power Cord Routing

Instructions on routing the AC power cord based on outlet location before final assembly.

Final Assembly and Filter Installation

Covers attaching the front grille and installing the air filter as final installation steps.

Installation and Operation Considerations

Condensed Water Drainage System

Explains the 'Slinger-Up System' for condensed water and options for external drainage.

Noise and Installation Location

Guidance on selecting an installation location to minimize noise and vibration.

Energy Saving Hints

Provides tips for efficient operation and reducing power consumption.

Care and Maintenance Procedures

Outlines cleaning instructions for the unit, filter, and recommendations for professional checks.

Pre-Season Inspection Checklist

Lists checks to perform before the operating season, including airflow and battery status.

Troubleshooting Common Issues

Guides users on checking common problems before calling for service or repairs.

Electrical Installation Requirements

Specifies electrical requirements, including circuit protection, wiring, and earthing.

Overview

Rasonic Room Air Conditioner RC-N1221V (ACXF55-32500)

This document describes the Rasonic Room Air Conditioner, model RC-N1221V, which utilizes a flammable R32 refrigerant. Users are advised to read the operating instructions thoroughly before use, paying close attention to safety precautions, installation, operation, and maintenance.

Function Description

The Rasonic RC-N1221V is a room air conditioner designed for cooling indoor spaces. It features a main control knob for setting cooling and fan operations, a thermostat control knob for temperature regulation, and an air swing switch for adjusting airflow direction. The unit incorporates a "Slinger-Up System" to enhance cooling efficiency by splashing condensed water on the condenser coil. It also includes a ventilation lever for fresh air intake when needed.

Important Technical Specifications

  • Model: RC-N1221V
  • Refrigerant: R32 (flammable)
  • Cooling Capacity: The unit's cooling capacity should match the room size for efficient operation.
  • Operating Temperature Range:
    • Indoor Maximum: 30°C
    • Outdoor Maximum: 43°C
    • Continuous operation at over 90% high humidity may cause condensation and waterdrops.
    • Operation at 21°C or less may lead to frosting.
  • Minimum Installation Height: 75cm (Based on IEC 60335-2-40, no restriction for minimum installation floor area as refrigerant charge is less than 1.224kg).
  • Clearance:
    • Left and right sides: At least 15cm from the wall.
    • Rear end: Over 100cm.
    • Top: Over 15cm.
    • Bottom: Over 15cm.
  • Electrical Specifications:
    • Rated Voltage: Use at the rated voltage with a specific air conditioning circuit.
    • Earthing: Must be earthed and strongly recommended to be installed with an Earth Leakage Circuit Breaker (ELCB) or Residual Current Device (RCD).
    • Fuse/Circuit Breaker Rating: 16 Ampere.
    • Power Supply Wire: 3 core x 1.5 mm² or above.
    • Circuit: Independent circuit.
    • Switch: Double pole switch with a minimum of 3.5 mm contact gap in the fixed installation circuit.
  • Splash Proof: The enclosure opposing the room side is splash proof (IPX4).

Usage Features

  • Main Control Knob: Allows selection of OFF, LOW FAN, HIGH FAN, LOW COOL, and HIGH COOL settings. When switching from cooling to a fan setting or OFF, a 3-minute wait is required before resetting to cooling.
  • Thermostat Control Knob: Adjusts the desired room temperature. A setting of 6-7 is generally recommended. Turning clockwise cools more, counter-clockwise cools less. Setting to 10 may cause moisture to freeze on evaporator fins; if this occurs, switch to HIGH FAN and turn the thermostat counter-clockwise to defrost.
  • Air Swing Switch: Controls the side-to-side airflow direction. Set to "ON" for continuous swing or to achieve a fixed direction, then switch to "OFF" once the desired direction is reached.
  • Vertical Airflow Direction Vane: Manually adjusts the up-down airflow direction to discharge air upwards, downwards, or straight out.
  • Ventilation Lever: Set to "CLOSE" for optimal cooling. Set to "OPEN" for fresh air intake, which opens a damper to draw out room air. Note that the "OPEN" position may introduce noise.
  • Safety Precautions:
    • Do not install, remove, or reinstall the unit yourself; engage authorized personnel.
    • Use only the specified refrigerant type.
    • Ensure proper grounding to prevent electric shock.
    • Do not modify the power cord or use an extension cord.
    • Do not operate with wet hands.
    • Avoid blocking air intake and outlet vanes.
    • Do not insert fingers or objects into the unit.
    • Do not operate without the air filter installed or front intake grille removed.
    • Do not place objects on the unit or operate combustion equipment near its airflow.
    • Do not sit or step on the unit.
    • Avoid touching sharp aluminum fins.
    • Unplug the unit if not in use for long periods or during cleaning.
    • Ventilate the room occasionally.
  • Installation Considerations:
    • Choose a location with a nearby, easily accessible power outlet.
    • Ensure the unit is well-supported, securely fastened, and unobstructed.
    • Avoid locations with salty/sulphurous air, draughts, dampness, or flammable gas.
    • If installing in a glass window or thin partition, use vertical and side supporting bars fixed to a concrete wall to support weight and reduce vibration.
    • The rear end of the air conditioner is splash-proof.
    • R32 refrigerant air conditioner installation and maintenance must be performed by competent personnel.
  • Noise Consideration: Select an installation location that supports the unit's weight and minimizes operating noise and vibration. Ensure that outdoor airflow and noise do not disturb neighbors. Obstacles in front of the outdoor air outlet can cause excessive noise.
  • Energy Saving Hints:
    • Avoid overcooling.
    • Match the unit's cooling capacity to the room size.
    • Keep doors and windows closed.
    • Close curtains and drapes to block direct sunlight.
    • Clean the air filter every 2 weeks.

Maintenance Features

  • Cleaning:
    • Clean the cabinet and front grille with mild soap or detergent and lukewarm water.
    • The front intake grille can be easily removed for cleaning. Wash it gently with water and a sponge.
    • The air filter can be cleaned with a vacuum cleaner (vacuum the front, then wash the rear with water). For heavily soiled filters, use a mild household detergent.
    • Do not use benzene, thinner, scouring powder, or caustic chemicals for cleaning.
    • Do not dry the front panel or air filter in direct sunlight, as it may cause discoloration or deformation.
  • Pre-Season Inspection:
    • Check if the discharged air is cold (after 15 minutes, the temperature difference between intake and outlet air should be more than 8°C for cooling).
    • Check for obstructions at indoor and outdoor air intake/outlet vanes.
    • Check remote control battery strength.
  • Recommended Inspection: Seasonal inspection is recommended to maintain performance and prevent foul odors or clogged drainage. Contact Shun Hing Electric Service Centre Ltd. for annual checks.
  • Troubleshooting Guide (Before Calling for Service):
    • Noisy Operation: Normal sounds include low humming, soft clicking (compressor on/off), flowing refrigerant, and splashing condensation. Consult service if other noises occur.
    • Unit Does Not Operate: Check if the power cord is plugged in and if the main circuit breaker has tripped.
    • Unit Does Not Cool Properly: Check if the room is too large, ventilation lever is OPEN, or air circulation is impeded. Ensure the temperature difference between intake and outlet air is more than 8°C after 15 minutes.
    • Water Drips Off Rear: This indicates high humidity or overflowing condensed water. Mount an optional drain pan.
    • Water Drips Inside Room: Tilt the unit slightly outward. Mount an optional drain pan if preferred. Check for blocked drain pan.
    • Squeaking Noise: Normal during operation and after shutting down due to expansion/contraction from temperature changes.
  • Condensed Water Drainage: The unit uses a "Slinger-Up System" for cooling efficiency. If splashing sounds are bothersome, an optional outside drainage system can be installed. This involves removing the rubber plug and chassis locking brackets, sliding out the chassis, installing a drain pan, connecting a drain hose, and then reassembling. Drainage is recommended in coastal areas to prevent condenser corrosion.
  • Disposal: For disposal in the European Union, follow local authority guidelines. For other countries, contact local authorities or dealers for proper disposal methods.
  • Emergency Situations (Call Shun Hing Electric Service Centre Ltd. IMMEDIATELY):
    • Circuit breaker frequently trips or fuse blows.
    • Water or foreign objects enter the air conditioner.
    • Abnormal sound during operation.
  • Power Cord Replacement: If the supply cord is damaged, it must be replaced by the manufacturer, its service agent, or a similarly qualified person.

Rasonic RC-N1221V Specifications

General IconGeneral
BrandRasonic
ModelRC-N1221V
CategoryAir Conditioner
LanguageEnglish

Related product manuals