ASSEMBLY / SET UP
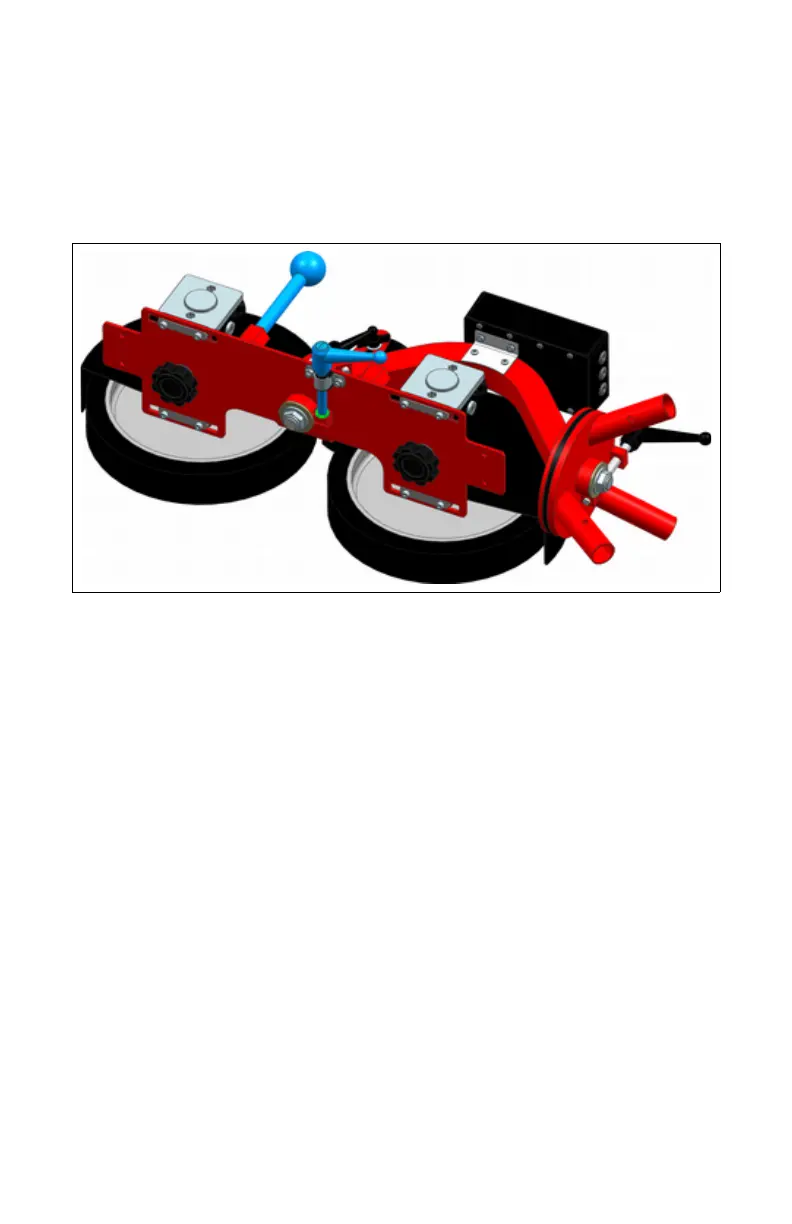
INSTALL HANDLES Thread the clamp handle into the shaft clamp
on the back of the machine and tighten it so the machine doesn't pivot
freely on the shaft. Thread the ball ended aiming handle into the top
hexagonal base. See Figure 1.
Fig. 1: Handles shown in blue. Note location of bronze washer shown in
green.
LEGS Slide the legs into the sockets on the tripod base until the spring
loaded buttons pop up and set the machine upright. See Figures 2a &
2b.
BALL FEEDER TUBES Use the 3" tube for baseballs, tennis balls,
or cricket balls, and the 4" tube for softballs. Attach the tube to the
machine using the two included thumb screws. Position the feeder tube
to clear the wheels by 1/4 - 1/2". Placing the tube in contact with the
wheels will damage the tube and wheels, and may cause the tube to be
grabbed and thrown. Placing the tube too far away from the wheels will
diminish the machine's accuracy. See Figure 3.
TRANSPORT WHEELS The two transport wheels are installed
with two screws each. These screws (and matching nuts and washers)
are shipped pre-installed in the bracket holes. See Figure 3.
MOTOR / WHEEL POSITION The gap between wheels is a
critical adjustment to maximize pitch speed and accuracy. The optimal
distance between wheels depends on the size and compressibility of the
ball being used. Softer, more compressible balls require a smaller gap
Rawlings Pitching Machines
Rawlings Pitching Machines
 Loading...