5. INSTALLATION/REGISTRATION/TECHNICAL SUPPORT
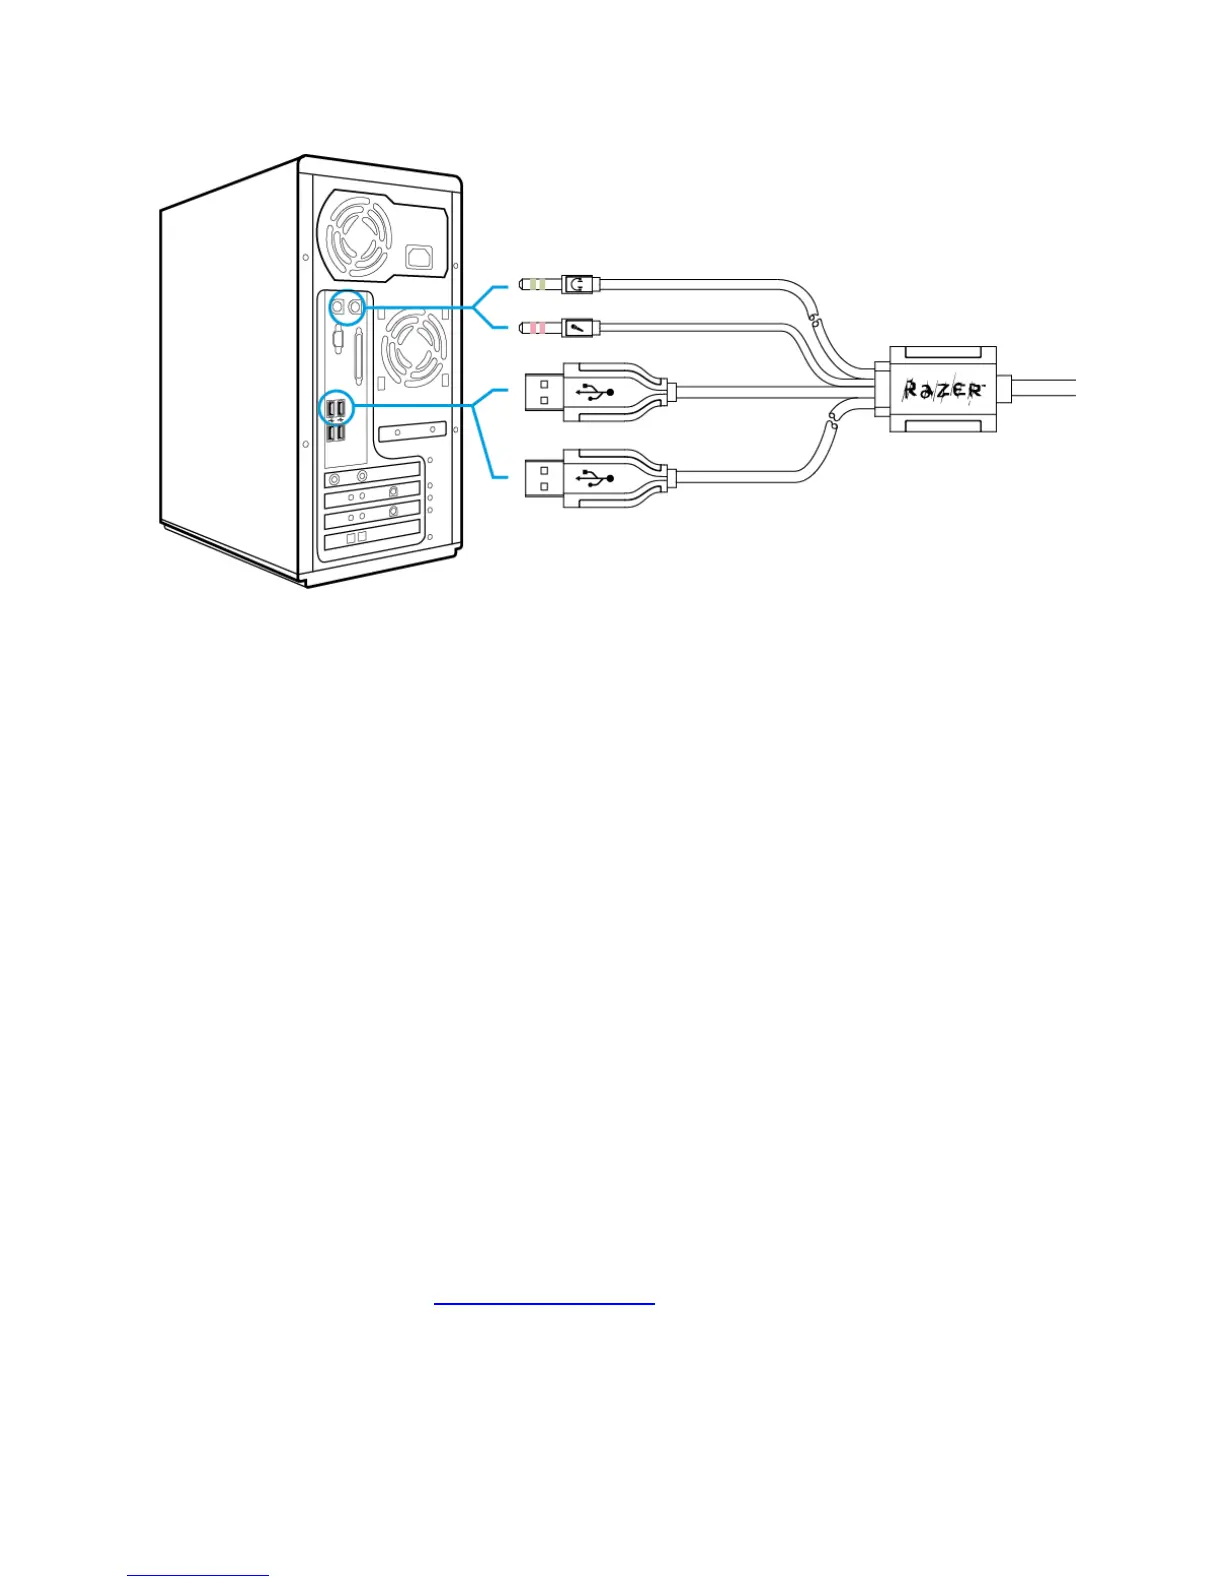
CONNECTING YOUR TRON GAMING KEYBOARD
Windows® 7 / Windows Vista® / Windows® XP installation instructions
Step 1 : Plug your TRON Gaming Keyboard into the USB ports of your computer.
Step 2 : Download the Driver Installer from www.razersupport.com/.
Step 3 : Run the installer.
Step 4 : Choose setup language. Click OK to proceed.
Step 5 : The Razer TRON setup screen appears. Click NEXT to proceed.
Step 6 : Read the license agreement. If you agree to all the terms, select “I accept the terms in the
license agreement”. Click NEXT to proceed.
Step 7 : Enter your User Name and Organization. Click NEXT to proceed.
Step 8 : Choose your installation setup. Click NEXT to proceed.
Step 9 : If everything is correct. Click INSTALL to begin installation.
Step 10 : At the end of the installation, click FINISH to complete the installation.
Step 11 : Follow the instructions onscreen to restart your computer. Click YES.
* If you have already installed the Razer TRON Configurator previously, you just need to plug in your device.
You will not need to reinstall the drivers a second time.
REGISTERING YOUR TRON GAMING KEYBOARD
Please visit www.razerzone.com/registration/ for online product registration.
What you’ll get:
• 1 year limited manufacturer’s warranty.
• Free online technical support at www.razersupport.com.