5
ASSEMBLY AND SET-UP
Attaching the Handlebars
Tool Required: 5 mm Allen Wrench
1. Using the 5 mm Allen wrench
loosen the handlebar clamp.
5 The tension of the quick-release lever can be adjusted by
manually tightening or loosening the Allen bolt. Be careful not
to overtighten. You should always be able to open and close
the quick-release lever by hand and the T-bar should slide
freely when the quick-release is open.
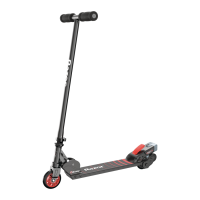
2 Insert the handlebar with the
throttle facing the rider.
3 Using the 5 mm Allen wrench
tighten the handlebar clamp.
4 To adjust the height of the handlebars, open the quick-
release lever and slide the T-bar to the desired position
and resecure the quick-release lever to lock into place.
WARNING: Failure to
properly secure the quick-release
lever may cause the T-bar to
telescope up or down while riding
and may cause you to lose control
and fall.
Collar Clamp
WARNING: Failure to
properly tighten the collar clamp may
allow the handlebars to dislodge
while riding and may cause you to
lose control and fall. When correctly
tightened, the handlebars will not
rotate out of alignment with the front
wheel under normal circumstances.