EasyManua.ls Logo

RC Factory F-22 Raptor User Manual

RC Factory F-22 Raptor
13 pages
To Next Page IconTo Next Page
Page #1 background imageLoading...
Page #1 background image
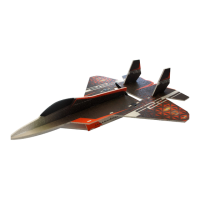
F-22 Raptor
Kit Contents:
*Wings
*Elevator
*Fuselage parts
*Rudders
Acessory Pack Contents:
1x Control horns set
1x Motor mount
Control/Servo horns set:
1. Aileron horn
2. Elevator horn
3 Pushrod guides
You Will Also Need:
* CA medium+thin, CA kicker
* Sharp hobby knife
* Screwdriver
*Canopy
*Acessory Pack
*Wood 1,5x7x600 ... Wing spar
*Carbon parts:
- 2x 1,2x330 ... Aileron Elevator Pushrodo &
* Ruler
* Sandpaper 100-500
1
1
2
2
3
4x Adjustable link+Quicklock washer
4x Plastic Clevises
4cm Heatsink tube
730 mm
990 mm
250g
Li-pol 3s
850mAh
Question and Answer IconNeed help?

Do you have a question about the RC Factory F-22 Raptor and is the answer not in the manual?

RC Factory F-22 Raptor Specifications

General IconGeneral
BrandRC Factory
ModelF-22 Raptor
CategoryToy
LanguageEnglish

Summary

Kit Contents and Specifications

Main Kit Components

Lists the primary parts included in the F-22 Raptor kit.

Accessory Pack Contents

Details the items found within the accessory pack.

Control and Servo Horns Set

Describes the components of the control and servo horns set.

Required Tools and Materials

Lists essential tools and materials needed for assembly.

Assembly Instructions: Fuselage and Wings

Initial Parts Preparation

Steps 1-4: Preparing and joining main fuselage and wing sections.

Wing Spar Installation

Steps 5-8: Attaching the wing spar and other reinforcements to the wing.

Fuselage Construction

Steps 13-16: Assembling main fuselage parts and adding internal supports.

Wing and Fuselage Joining

Steps 9-12: Joining wing sections and initial attachment to the fuselage.

Assembly Instructions: Control Systems and Tail

Control Rod Guide Installation

Steps 21-24: Inserting control rod guides and pushrods into the airframe.

Tail Surface Attachment

Steps 25-28: Affixing the vertical and horizontal stabilizers.

Nose Cone Assembly

Steps 29-32: Constructing and attaching the nose section.

Assembly Instructions: Electronics and Final Touches

Servo Installation

Steps 33-36: Mounting the servos for control surface actuation.

Control Linkage Connection

Steps 37-40: Connecting pushrods to servos and control horns.

Electronics Installation and Final Assembly

Steps 41-44: Installing receiver, ESC, motor, and completing the airframe.

Related product manuals