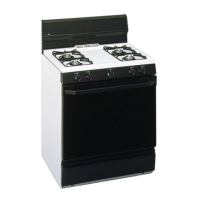
GENERAL
. See
Dimensions and Clearances in this section
for all rough-in and spacing dimensions. These
dimensionsmust be met forsafeuse ofyour range.
The locationofthe electricaloutlet andpipeopening
(see Gas Pipe and Electric Outlet Locations) may
be adjusted to meet specific requirements.
. The range maybe placed with O“clearance
(flush)at the back walland sidewalls ofthe range.
LOCATIOU
Do not locate the range where it may be subject
to strong drafts. Any openings in the floor or wall
behind the range should be sealed. Make sure
the openings around the base of the range that
supply fresh air for combustion and ventilation
are not obstructed by carpeting or woodwork
PROTECT YOUR FLOOR
Your range, like many other household items, is
heavy and can settle into softfloorcoverings such
as cushioned vinyl or carpeting. Use care when
moving the range on this type of flooring. It is
recommended that the following simple and
inexpensive instructions be followed to protect
your floor.The
%&r
e shouldbe installedon a sheet
ofp
&wood(or s“
material). Whenthejloor
covm”tg endsat
thej%ontofthe range, the area
that the range willrest
on should be built up with
plywoodto the same level or higher than the
floor covering. ‘I%@willallowthe range to be
movedfor cleaning or servicing.
De riding on ow ~ge, youll find the model
r
{
~ serial num em on a label on the front frame
ofthe
range, be~d the storage drawer, kick
panel or broiler drawer.
TOOLS YOU WILL HEED
● Phillips and flat-blade screwdrivers
● Pencil and ruler
● Two pipe wrenches (one for backup)
● 1%’open-end or adjustable wrench
● Nut drivers or wrenches 3/16” and 1/4”
ADD9TIOUAL M4TERIALS YOUMAYNEED
● Gas line shutdf valve
● Pipe joint sealant or Unapproved pipe thread
tape with Teflon* that resists action of natural
and LP gases
c Flexible metid appliance connector (1/2” I.D.)
A 5-footlen
P
is recommended for ease of
installation ut other lengths are acceptable.
Never use an old connector when installing a
new range.
QFlare union adapter for comection to gas
supply line (3/4” or 1/2” NPT x 1/2” I.D.)
● Flare union adapter for connection to pressure
regulator on range (1/2” NPT x 1/2” I.D.)
Teflon: Registered trademark ofDuPont
PREPARATION
● Remove all tape and packaging. Liftup the
cooktop (onmodelswithstandard twinburners)
and remove any packing material under it Make
sure the standard twin burners are properly
seated and level.
● Remove plastic tilm that covers some chrome
parts (around oven door, side trim).
● Take the accessory pack out of the oven.
● Check to be sure that no range parts have
come loose during shipping.
(continued next page)
29
 Loading...